Make your own night vision device. Assembling a zero generation night vision device
In this article I will tell you how to make simple night vision goggles. Of course, they will not be super powerful like real ones, but getting to the right place in the room in the dark will not be so difficult. All the necessary parts can be found at your home, you can order them from the Chinese, or you can just read this article for general development.
The design of the glasses contains an action camera; in fact, this is one of the main parts, so in the daytime they can be used as a first-person camera and shoot interesting videos.
You will also need an infrared flashlight with a light wave of 850 nm, since this is the light that the camera perceives best, but you can try replacing it with infrared LEDs with similar characteristics, if such suddenly become available. It’s convenient to use the flashlight because you don’t need to make a separate box for power supply and attaching it is much easier.

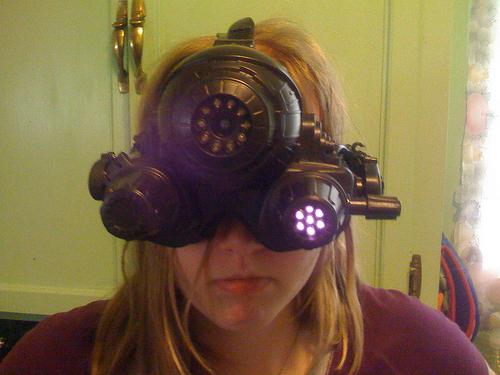
If you turn on the flashlight and look at the diode through the camera, you can see a lilac glow, this is infrared light. It is not visible to the human eye, but through a camera please!

But not all cameras alone perceive such radiation well, so the author used an action camera, since it coped with the task better than others, and besides, such a camera has many settings that will help improve the perception of radiation.


We will also need lenses for glasses virtual reality, which were purchased by the author on Aliexpress, they are needed to focus the eye on the camera screen, since the human eye is not able to focus on objects located directly in front of it at a minimum distance.


To fix the lens, you need to assemble a frame. Auto used a dark plastic drink bottle for this purpose.

The lens fits exactly the diameter of the neck, all that remains is to fix it there.

To do this, you don’t need to glue anything, you just need to cut out the middle part of the cork from the same bottle using a blade or knife.

Then we place the lens in it and screw it onto the bottle. It seems that the lens was specially made according to the diameter of the neck, since the stopper easily twists and fixes it.

Now you need to cut off the top part of the bottle, while choosing a comfortable length at which the focus will be set correctly.


Next, you need to come up with a holder for the camera, to which the assembled optics will subsequently be attached. The author used foamed PVC plastic, which is used when assembling models. It needs to be cut into pieces according to the size of the chamber to make boxes and glue them together with super glue.


Then you need to attach the optics from a section of the bottle to this viewing window. To do this, mark the edges of the window with masking tape and cut off all excess without touching the tape. You will get two protrusions that should easily be inserted into the edges of the window, after which we glue everything with super glue to fix it.


After assembly, the camera fits very tightly into the resulting box and there is a possibility that it will not be possible to pull the camera back out, so the author decided to make slots for fingers and a record button. After a little modification, the camera can be removed from the box without any problems.


To protect glasses from chips, we glue the glasses with masking tape. Take a crown and drill a hole in the center evenly on both sides. The author recommends not drilling all the way, leaving thin plastic, then finishing the hole with a stationery knife, this will help avoid possible chips and cracks when drilling.


After the hole is made, the optic should be freely inserted there, but as you can see in the photo, the camera is pointed to the side and needs to be aligned.


Then I sanded all the edges and used super glue to glue everything in place.


To attach the lantern, plumbing clips of the required diameter were used, which were selected based on the size of the lantern.

The clips are attached to the side of the glasses using bolts and a nut. After which the lantern is easily fixed and securely held in place. The infrared flashlight can be replaced with a regular one and, as mentioned above, you can shoot good first-person videos.


For a more reliable fixation, the author recommends securing the 32nd tube with nylon ties, since the camera is heavy and the super glue mount may not be able to withstand it. To do this, using a drill and a screwdriver, we make three holes in the pipe and three in the glasses opposite each other, insert the ties into them and tighten them, now it’s definitely secure!
Human vision is an amazing thing. The eyes are called the mirror of the soul and a powerful weapon that nature has endowed us with. What we really are not given is to see in the dark, unlike technical devices called NVGs or night vision devices.
Until recently, we heard about them as special equipment for the military, who use them for covert surveillance and combat operations in the dark. The capabilities of such devices are also used in modern conventional cameras. Moreover, some of them are able to distinguish objects in the infrared spectrum, while others are not. Today we will show you how to make a night vision device from a regular digital camera. So let's get started!

How it works and resources for homemade NVGs
Our NVD is based on a digital camera, popularly nicknamed a “point-and-shoot.” The electronic content is preserved, since it is capable of transmitting images in real time through the LCD screen. By changing the lens filtration and increasing the camera's sensitivity to the infrared range, as well as equipping the camera body with infrared illumination, we open up new possibilities for a digital camera capable of capturing objects in the near-infrared range. Also, such a device can be used as a thermal imager, distinguishing heated objects, for example, an unattended iron, electric stove or kettle.Materials:
- Digital camera;
- Button – switch;
- AA AA battery 1.5 V – 2 pcs;
- Wiring, electrical tape.
- Soldering iron;
- Screwdriver with replaceable bits;
- Painting knife;
- Hot glue gun;
- Tweezers.


We manufacture a night vision device (NVD)
For this experiment, the author purchased a working digital Samsung camera S1030. This is a regular point-and-shoot camera with a sensitivity of 50 - 1600 ISO, a maximum resolution of 3648 x 2736, equipped with a 2.70-inch LCD screen on the rear panel.Removing the infrared filter
Unscrew all visible screws from the back cover of the camera. This is easy to do with a screwdriver, making sure that nothing interferes with its dismantling. This must be done as carefully as possible, without damaging the plastic closures and clips, and without pulling out the cables of the electronic filling.


We unlock the LCD screen by carefully removing it from the holder frame, which we then also dismantle. We release the cables from the LCD screen and camera control from the connectors. The output control board should release the front cover, which can now be unfastened from the device.


The wiring leading to the microphone must be removed, or this element must be disconnected completely. Having gained access to the high-voltage capacitor for the flash, it must be de-energized with a resistor, voltmeter, tester or light bulb by short-circuiting its contacts.


Having unsoldered the power contacts, remove the camera control board, leaving only the lens and matrix. It is to her that we need to get close.


We unscrew the matrix board with the light-sensitive sensor that captures the image. In this model, the infrared filter is a small removable glass covered with a polymer frame. Remove it carefully with tweezers, without damaging the surface of the sensor.


To maintain the camera's ability to autofocus, it is necessary to compensate for the lack of a filter with a transparent material of similar size. The author adapted it from a protective film for his smartphone.


We mount in reverse order control board, front cover and LCD screen with a frame for it. Don't forget to connect the disconnected cables to the connectors. By connecting the control panel to back cover, check the functionality of the camera.


Installing LED lighting
We place LEDs and output contacts on the cooling radiator boards. We connect the voltage reduction module to the batteries and configure it to the required parameters.


We coat the LEDs with thermal conductive paste to transfer heat to the radiator panel, and then solder them to the contacts.


Our homemade NVD can be considered ready. The range of such a device will directly depend on the photosensitivity of the camera sensor, as well as the power of the IR LEDs. Of course, it will be far from what real NVGs offer, but for short distances exactly what is needed.
Quality regular photos after removing the IR filter, it will not be correct, and the colors in the photo will be mixed and do not correspond to the actual ones. However, for true IR photography this option is the most suitable!


Every physical body is capable of reflecting or emitting infrared rays (IR). It is this feature that is taken into account by the designers of night vision devices. Their action is based on the so-called internal photoeffect. When an infrared image is projected somewhere, then the electrical conductivity of the irradiated areas of the photosemiconductor (2) becomes different on the adjacent electroluminescent layer (4), and in this case there is a potential distribution, which, in turn, corresponds to the distribution of the brightness of the image on the photographic conductor. In order for this process to take place, it is necessary to provide the transparent electrodes located at the edges with an alternating voltage of electric current of 250-300 Volts at a frequency of 400-3000 hertz, and the current strength should not exceed 10 mA.
How to make a night vision device yourself.
Let's start! In order to construct a night vision device yourself, you need to take chemical elements from the chemistry classroom at school or in the chemical laboratory of a separate plant or factory. They will be needed to make it.
First of all, we take two small glass plates, as well as the chemical compound Sn Cl2 (tin chloride), silver (Ag), ZnS (crystalline zinc sulfide) and Cu (copper). The glass pieces need to be heated for about 4 hours in a solution of strong acid H2SO4 and potassium dichromate K2Cr2O7, and then dried thoroughly. Then you need to take a cup - preferably made of porcelain - and pour it into it. Then take a porcelain cup, put tin chloride SnCl2 in it and put it in an electric stove. Above this stove you need to attach pieces of glass somewhere at a distance of no more than 7-10 centimeters. Next, you will have to cover the porcelain cup with a metal plate. Turn on the electric stove.
As soon as the stove heats up to about 400-480˚, you will have to take a metal plate from there. Make sure that there is an extremely thin conductive coating on it. Then you need to turn on the oven again and put the glasses on the table and let them cool completely. You will need to check this very coating with a tester. Next, you will need to apply a photosemiconductor to one of these plates. To do this, it is necessary to prepare the same amount of a three percent solution of thiocarbamide Na4 C(S)NH2 and a 6% solution of lead acetate. These solutions must be poured into a glass vessel. Using tweezers, insert a glass plate into the solution, holding it upright. Before this, you need to apply varnish to the side that is not covered with a conductive coating. Wear rubber gloves and carefully pour the concentrated alkaline solution into the vessel with the plates to the very top. Carefully and carefully stir the resulting mixture with a glass rod, being careful not to touch the plates. After 10 minutes, the plate will need to be carefully removed and washed with a stream of distilled water. Next you need to dry it all. Turn on the stove and pour silver (Ag) into a clean porcelain cup. Repeat the process we described at 900˚. Coat the photo semiconductor wafer. In this case, it will be necessary to ensure that there is a mirror film there. To make a phosphor, you need to prepare pure crystals of zinc acetate ZnS. It should be noted that in the presence of impurities, the brightness of the glow will drop significantly or disappear altogether. Prepare the stove. Place Cu in a porcelain cup. Its copper crystals and ZnS zinc acetate crystals should be as small in size as possible. The proportion must be observed as follows: ZnS - 100%, copper - 10%. Copper vapor must circulate in the stove and pass through the gaps between the crystals. Do not grind the resulting crystals under any pretext! You will then have a colorless powder. Mix the varnish with the crystals. Use as little varnish as possible. Pour the mixture onto the silver plate and wait until it spreads completely and forms a smooth surface. Place a second strip of conductive coating on top of the varnish and lightly clamp it. When everything dries, the resulting night vision device must be sealed. After all these manipulations, having applied a conductive coating, solder the wires as leads along the edges of the plates.
Assembling a night vision device
All that remains is to assemble the high voltage generator and put it all in the same housing. Its shape is arbitrary, but we recommend the one proposed by most developers of night vision devices (in the figure). The lens in it can be taken from any photographic camera, but best of all is a short-focus one (say, from a Smena-8M or FED camera. Any biconvex lens can act as an eyepiece. When you put it all together, you need to check everything connections for strength and correctness of connection. When you turn on your new night vision device, you will definitely hear a thin squeak. This is the squeaking of the transformer. If you don’t see any image, don’t be upset - you can change the level of the supplied voltage or the frequency of the generator. Set the maximum sensitivity.
Enjoy your observation!

- glass plates;
- photographic guide;
- silver (Ag) layer;
- electroluminophore;
- photographic lens or lens.

Resistor R2 changes the frequency of the generator.
The transformer is wound on any core and contains:
- Winding I contains 2000 - 2500 turns, wires - 0.05 - 0.1 mm;
- Winding II contains 60 turns;
- Winding III - 26 turns, wires - 0.3 mm.
In this article you will learn how to make a real night vision device with a monitor with your own hands. This homemade device has quite good characteristics and will definitely come in handy in the household, well, almost anyone can assemble it!
To make the device you will need:
- 3D glasses with lenses
- Car monitor good quality with a small diagonal.
- Rechargeable batteries from a video camera, Samsung type 4 pcs. 3.5 V each.
- Two video cameras, one of which has very good sensitivity for night work
- Two IR illumination
You can watch the homemade video at the end of the article!
This is what the monitor we need for homemade looks like:
Two cameras, one for close-up viewing and the other for far-viewing.

The IR illuminator, purchased on Aliexpress, consists of a round board with a hole in the center and two rows of IR diodes. I left a link to them at the beginning of the article. By the way, you can purchase a backlight in a frame, and then disassemble it if you can’t find a suitable one. These boards will be attached to the glasses as shown in the photo below.

The monitor will be mounted into the glasses as follows:

Manufacturing of night vision devices NVD
We first check how the equipment works. I connect a small video camera to the monitor, supply 12 V - everything is fine. The monitor shows the image transmitted by the camera

I install the monitor from which the stand leg is removed into 3D glasses. I remove the partition, excess filling and lenses. I used a 3D printer to print an extension for the frame of the glasses to make it comfortable for my eyes to look at the monitor. The surface of the extension was not entirely smooth due to the printing speed of the printer, but this does not really matter.

I burned holes in the body of the glasses and secured the entire structure with plastic ties. For reliability, I fixed it with “Second” glue.


I carefully cut off the fastenings that were on the body of the glasses and transferred them to the lid so that it could open and not fall down. I also secured the hinges on the lid with zip ties. I also screwed in a small screw to give additional strength to the structure and the ability to unscrew it and get inside the device for repair or replacement of parts.

On the front side of the device I attach a small video camera between two LED lights. I fix the larger camera on top using mounts printed on a 3D printer, into which I screw small screws. Everything is held securely.
For the LED backlight, I also 3D printed mounts in such a shape that the side partitions would cover the camera and prevent it from being blinded by the LEDs.


The front camera and LED backlight are mounted on glue. The wires from the LEDs are secured with ties and routed into the housing through a drilled hole. I installed control buttons on the body (on/off and switching to the far or near camera), and connected the wires to them. On the body I also placed a joystick, which is responsible for the settings of the distant camera.

As a power source, I used 4 batteries from Samsung video cameras, each 3.5 V.

The batteries are fixed with tape into a single block, the wires from them converge in the connector. The connector indicates which wire is which, as well as the plus and minus. The battery is connected to the device using a homemade plug, in which the wires soldered in series are fixed with glue and tape. The plug is connected to the battery connector, the plug is connected to the night vision device.
There are still some problems with recharging batteries. First, the first battery in the block is charged for an hour, then it is rearranged Charger and the next one is charged. We still need to think about this problem.
First short-range camera:
I tested the device at night. If the near camera does not produce a good quality image, then the far one does its job perfectly. Houses, passing vehicles, and people are clearly visible. And in the forest it will be perfectly possible to see a hare, a wolf, and our owl. Actually, I'm going to watch the owls.


Long range camera:

 Similar
Do you dream of seeing in the dark like a cat and remaining invisible to others? Night vision goggles will help you fulfill this desire. This device is used in various fields, for example:
- for all kinds of search operations;
- for the professional activities of security guards, police officers, military personnel and drivers, who often have to repair equipment on the roads in complete darkness;
- for those who like to photograph or videotape wildlife at night.
Night vision goggles can be bought at the store, however, they are very expensive. An alternative solution is to make them yourself at home. Try to recall your knowledge of chemistry and physics, and then it will be easier for you to understand how to make night vision goggles yourself. Find literature, read information, prepare.
Step-by-step instruction
Take 2 glass plates and immerse them in a solution of sulfuric acid (for about 4 hours). Then dry the glasses and fix them above a porcelain cup at a height of at least 10 cm (you should put tin chloride in the container). Now place all this in the cup. First place a metal plate on the cup.
Preheat oven to at least 470 degrees Celsius. Remove the plate quickly. Now carefully monitor the changes occurring in the glass. They will gradually begin to become covered with a thin film that conducts current.
Turn off the stove and let the glass cool. Apply varnish to the side of the glass where there is no conductive film and dip the glass in a solution of thiacarbamide and lead acetate. Then pour the alkali concentrate here, gently stirring the resulting liquid. After 15 minutes, carefully remove the glasses from the cup.
Place the same cup in the oven, but now pour the silver solution into it. Place glass above it.

Preheat the oven to 900 degrees. A mirror film should gradually appear on the plate.
To obtain a colorless crystalline powder, mix copper and ZnS (10:100) in a cup and heat the mixture in an oven.
Take Tsapon varnish (for the binder) and mix with the powder. Now drop this mixture onto the plate and let the drop spread. Make sure the coating is even. Connect the two plates by slightly squeezing them, dry them, and at the end of the process, check the sealing of the resulting device. Night vision goggles are ready.
Don't forget to assemble the high voltage generator circuit!
Now all that remains is to connect everything. Take the lens for the device from the camera, and for the eyepiece - a biconvex lens.
After checking all connections, you can start connecting. You will understand that everything is working normally by the characteristic squeak of the transformer.
For a clearer image, it is necessary to change both the generator frequency and voltage levels several times.
If you succeed, then you won’t have to spend a lot of money on night vision goggles buying them in a store.


