Let's understand the AIMP media player. Setting up functionality
Launched Aimp for the first time and don’t know which buttons to press to play a song or adjust the sound? This is normal, there is nothing to be ashamed of. Despite the fact that the player has a user-friendly interface, it takes time to get acquainted with it and study the functionality of the program. Thanks to these instructions, you can quickly figure out how to use Aimp - its desktop version for operating systems of the Windows family (10, 8, 7 and XP).
The main player window by default consists of 4 parts, see the screenshot below (Aimp version 4.50 is shown here).
- The top panel is the playback control panel. Here are the play, stop, rewind, audio slider, equalizer, visualization, repeat and sort buttons.
- Below in the left window the files (music tracks) are displayed that are in the folder opened through Aimp for playback.
- The right window displays a playlist that can be made up of songs located in different folders. Playlists are convenient to use to create your own collections based on your mood. For example, for training, relaxation, romantic evenings.
- At the very bottom panel there are playlist and playlist control buttons (plus/minus - add/delete file, search window, view switch button, etc.)
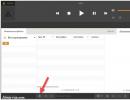
The best way to listen to music through Aimp is to add a folder with your songs to the program and set it to update automatically. Click the plus sign on the bottom panel.

In the window that opens, click the “Add” button and select the folder with music on your computer’s hard drive.

In the adjacent “Settings” tab, you can enable the search for changes every time you start the program, so that Aimp automatically rescans the open folder and adds new files to its library. In this case, you won’t have to manually add a folder every time if new tracks appear in it, but the player startup time will increase due to the enabled scanning function.

P.S. alternative ways to add music files to the program:
- Just double-click on the file with the left mouse button, if the format was associated with Aimp during installation, it will open in this player;
- Drag a music file into the player window;
- Open files individually or an entire folder with them in the playlist section by clicking on the plus sign below - then a playlist will be created from the selected tracks.
So, the music has been added to Aimp, double-click on any track with the left mouse button, or select it and press the play button on the top panel, or the Spacebar on the keyboard to start playing.

Adjust the volume to taste using the slider at the top. Aimp automatically outputs audio to the sound card selected as the default audio device in Windows. You can change it by going through the menu to the player settings and clicking on the selection window next to the “Device” inscription in the first “Playback” tab.

To switch between tracks, use the keys on your keyboard - F1 and F2, or the arrows on the top panel of Aimp. If you don't like the sound being played, open the equalizer and adjust the frequencies manually, or select one of the saved presets. We recommend trying Rock, Soft and Soft Rock.


To play the same track continuously, press the R button, or click on the repeat icon on the top panel. To the left of it is an icon in the form of the letters A-B - it also turns on repeat, but not the entire track, but only the selected segment.

With this segment repeat option you can quickly teach your parrot to talk :)
Aimp has a minimalistic interface display option. Press the “-” button on the top panel - the player will collapse into a small panel that can be moved to any place on the desktop.

If you want to minimize the program completely so that even the panel is not visible, press the Win+D key combination on your keyboard.
You can change the appearance of Aimp using covers, and the available functionality is possible using plugins that are installed separately and included in the kit.

We hope that after reading these instructions, you now understand how to use the Aimp player on the Windows operating system. If you still have questions, visit the instructions section, or write them in the comment form below.
2013-08-06T14:34
2013-0408-06T14:34
Audiophile's Software
Attention: With the release of the new version of AIMP3, most of the results in this review have become irrelevant. You can read the review of the new version of AIMP.
Prologue
Following the principle “not foobar alone,” I decided to start looking at alternative players. I’ll start, of course, with AIMP, since it is the second most popular among visitors to this site (60% foobar2000, 20% AIMP).
I will examine the most important part of the player for us, namely the audio path - decoder, processors and output. At the same time, I will compare these components with the corresponding components of foobar2000, and then summarize the advantages of this or that player.
Equipment and software used
200?"200px":""+(this.scrollHeight+5)+"px");"> Microsoft Windows 7 Ultimate SP1 x64
AIMP v3.50 build 1277
foobar2000 core 1.2.9 + SoX Resampler 0.8.3
RightMark Audio Analyzer 6.3.0
Adobe Audition CS6
Sony Sound Forge 10.0c
Creative X-Fi XtremeGamer
During the study, the audio stream will be output either to a file or recorded from the “What U Hear” source of the Creative X-Fi XtremeGamer card. In Bit-Matched playback mode (Audio Creation mode), the card is capable of passing a 24-bit stream through itself without making changes.
Decoder
The player uses BASS decoders. Actually, here we are interested in the decoding results for lossy formats, because for lossless, the results at the output of decoders are always identical (otherwise this would be a blunder). We will compare the AIMP3 decoder with the foobar2000 decoder. We will encode the RightMark Audio Analyzer test signal 16 bit/44.1 kHz using LAME 3.99.5 with the switches -b 320 -q 0 .
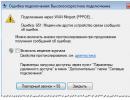
In order not to suffer with recording, we will decode using AIMP and foobar2000 converters (since the decoders there are the same as in the players). But here one interesting fact emerges. If foobar2000 knows for certain that decoding and all processing occurs in the 32-bit float format, then AIMP seems to have problems with this. Let's say, if we play an encoded MP3 file, in the playback status window we see:
It says here that the decoder receives a stream in 16-bit format. This is not very good, because... An MP3 file can also be obtained from a 24-bit source (this cannot be known for sure; lossy files have no bit depth as such, and data on the bit depth of the source is not saved), i.e. a recording can have a dynamic range greater than 97 dB (maximum for 16 bits), and then, when decoding at 16 bits, the quietest sounds (below -97 dBFS) will be cut off. Well, we'll check that later. For now, let's deal with the 16-bit source.
For clarity, I added an analysis of the source WAV file - to have an idea of the real characteristics of 24-bit audio. So what do we see? Firstly, it is interesting that in this case, in the absence of a signal (when noise is tested), the AIMP decoder gives us a complete zero (-400 dBFS for a 32-bit format). This can be explained by the fact that in MP3 data at this moment the signal level is described by values much lower - 97 dBFS, and during conversion to 16-bit we, of course, get that same round zero. And then this zero is converted into the format we specified in the converter - i.e. to a 32-bit zero, which corresponds to -400 dBFS. Yes, that's right - AIMP continues to use the 16-bit format when decoding. And this is very unfortunate. If foobar2000 completely matches the original audio in terms of noise level and dynamic range, then AIMP clearly has problems with dynamic range.
To finally confirm the defeat of AIMP at the decoding stage, we will conduct an experiment: we encode a pure tone with a frequency of 1 kHz and a level of -110 dB into MP3, and then decode it.
Source signal spectrum (24 bit 48 kHz):


And now the spectrum at the output of the AIMP decoder...

Complete calm! Absolute digital silence. That is, the signal is lost. And thus, a dynamic range of 102 dB (based on AIMP results) says that all sounds quieter than -102 dBFS will be irretrievably lost.
What's even sadder is that 16-bit decoding is used for all lossy formats - AAC, OGG, MPC...
1-0 in favor of foobar2000.
Handlers
At this stage, we are primarily interested in converting the frequency and quantization bit depth. Let's see what opportunities AIMP offers us. In order to be able to manually select the bit depth and number of channels, you must specify the DirectSound or WASAPI Exclusive output. In other cases, these parameters are selected automatically, but more on that later.

In general, the fixed sampling frequency parameter immediately catches your eye. Those. When playing sources with different sampling rates, we will have to either constantly change the output settings, or use the built-in resampler. By the way, if ASIO supports a reference frequency automaton, the “as source” sample rate value would be very useful... Well, maybe it’s still worth using a resampler? Let's check its quality.
So, if we play, say, an Audio CD, then a DVD Audio (with a sampling rate of, say, 96 kHz), then the best option would be to set the maximum frequency in the settings - so that everything is converted to 96 kHz if necessary. And then the reference frequency of the sound card should also be set to 96 kHz.
The AIMP documentation does not explicitly state which resampling algorithm is used, but it does indicate the use of the BASS Audio Library, so it is likely that the library includes a resampler. Anyway, let's finally get to testing.
We will also use the RightMark test signal and the AIMP3 converter. We will take the signal in 24 bit/44 kHz format to examine the quality of oversampling in detail. We will compare with the SoX resampler (Best, Aliasing: off) from foobar2000.
AIMPPLAYERRUS
License type:
Quacked
Languages:
Windows 8, 8 64-bit, 7, 7 64-bit, Vista, Vista 64-bit, XP, XP 64-bit
Downloaded:
Setting up Aimp player
Hello everyone who is currently a user of this site. Today we will look at the process of setting up a famous program, its name is AIMP. Although the program is quite simple to set up, and it may seem that the description of this procedure is useless, but in fact it is not.

The experience of using programs of this type is different for all users, because for some, setting up AIMP is a “trivial” matter, but for others it is a “dense forest”. In addition to all this, even if you have already installed and configured this program, it would not be superfluous to go through the settings again, perhaps you will find something interesting for yourself.
In order not to beat around the bush for too long, let's look at the process of setting up AIMP.
An example setup will use AIMP version v2.61, build 583, and the default skin “Euphoria” will also be used.
All program settings can be divided into six categories, these are:
1. Playback
4. Templates
1. Playback

“Sound output device” - in this menu item. You need to choose which device will play the sound (by sound, of course: tracks, songs, any sound recordings). All devices that are available for audio output can be viewed by clicking on the “pop-up” list. In our case, these are: default sound scheme (windows default), SPDIF sound interface, VIA sound card. But you need to understand that this is only an example; each user’s device may be different. Devices can be switched between each other; perhaps a particular device seems better to you than others. For the review we will use a VIA sound card.
Next, you need to select the type of software mixing; it is located to the right of the playback device selection list. This option must be enabled and the 32-bit mixing type must be selected. Enabling this option makes the output sound fuller sounding and similar to real sound.
Under increased load on the computer, we sometimes hear “slowdown” in the sound. To avoid this, you need to move the “buffer size” option slider almost to the end. If you have never observed this defect, then it is better to leave everything as is.
“Logarithmic volume control” to set it up, you need to add volume on the speakers, and then adjust the volume directly in the player. The main purpose of this option is to increase/decrease the sound volume level by a “logarithmic” level.
The volume level changes at a qualitative level when using this option.
“Sound effects” - I think this option is clear to many, since the setting is personal. "DSP-Manager" is where you can focus your attention. To get into the DSP-Manager settings, you need to click on the button with the name of the option.
“Echo” - playback with shades of echo, is achieved by turning on this option.
“Reverb” - adding an additional echo display. Simply put, this option adds echo in the specified amount, and is reminiscent of the sound in large indoor spaces. This is actually a very interesting option and worth considering.
“Chorus” - Although the option means “singing in chorus”, in fact the effect is not very noticeable when turned on
“Flanger” - this option plays sound with a reverse signal. To be honest, it’s not clear what it could be useful for, except for some kind of jokes.
“Stereo Enhancer” - stereo amplifier. From the name itself it is clear that when this option is enabled, the sound will be saturated with a stereo effect. But if you turn the settings to maximum, expect a headache.
For example, “auto-sound equalization” and channel reverse, these settings can really improve the sound quality.
“Replay Gain” many people simply do not feel it; some hear the sound being played back in some “disorder”. We considered this option useless and did not spend much time considering it.
Removing voices using a filter. I haven’t personally used it, but I think it’s suitable for people who record tracks on their own and need a backing track. Another interesting option is adjusting the playback speed, sometimes even funny. Also, do not be afraid that you will not return everything as it was, since there is a “default settings” button.
Mixing of sound in one direction out of two between speakers/headphones (for example) occurs when the “Balance” option is set
“Winamp DSP Plug” is a plugin that is used for Winamp, we will not use it.
Once setup is complete, most users look for the usual “Save Changes” or “OK” button, but you won’t find them here, so just click the “cross” in the right corner of the program.
Let's look at the following customization categories.
2. Playlist

(to enlarge the image, click on it)
“Interface” - everything here is quite simple and clear. To see the labels of folder names, you need to insert the value “%ParentDir%” into the “Break into categories” line. This can be highlighted as the main advice for this option. But you can also use additional settings items:
When a file is selected, display information about it.
Display time and columns
The remaining items can simply be turned off; you may like this option.
“Playlist” - in this category you can safely check all the boxes, but remove one that is not convenient. This is the second checkbox that opens bookmarks in a new playlist group.
“Saving” - this option is responsible for saving playlists, if you do not want to save them, just leave the settings at “default”. These settings are fairly self-explanatory. And you can figure them out on your own.
“Automation” in masonry is included in this group. In order for the files that are added to the playlist to be played in “random” order, it is imperative to enable the option “When adding files, automatically scan the playlist”. You also need to set the option to automatically skip to the next track. If you don’t put it on, the track being played will be repeated, but if you suddenly need it, it’s convenient to do it from the main menu by pressing one button.
We did not consider the remaining options in this group, since we did not consider them important.
“At the end of playing the playlist,” the standard solution is to repeat the playlist. But users are different, and someone can create dozens of playlists, and at the end of one, switch to another automatically. Also, the option “do not repeat a sheet if it contains one file” is convenient for some and not for others.
“Drag & Drop” - the literal translation of this option speaks for itself. “Take and throw” - a manipulator is used for this action. Again, it all depends on the user, for some it is convenient to simply add tracks to the end of the list, for others in a draggable area. But the main thing is to uncheck the “ask the user” box, otherwise the pop-up window will not give you peace. But the “Sort by name” function is a very convenient functionality, so it is advisable to enable it.
When opening files:
- “Creating a new Playlist” - this means that if you add a folder to play using the “ADD” function buttons, the playlist will change its name to the corresponding folder name.
- “Add to this playlist” - I think it’s not worth describing, everything is clear.
- “Add default” - if you add a new folder for playback, a playlist with a default name is created, and this is “default”.
Opinions vary, but in practice the first option is the most practical.
Another option that can be added to the list of not very useful, at least for most users, is “After opening the audio file, start playing.” If you disable this option when opening a file on your computer, it will not be played immediately, but will only launch the AIMP player. There is also a similar option that immediately plays files when adding them to the playlist or vice versa.
3. Player
The settings when starting the program require special attention. Advice, immediately remove the “bird” - “Minimize program to tray”. Most people simply notice that the program has already started, and then stubbornly “click” on the shortcut, and do not understand why it does not start. Another useful option is "Do nothing on startup", just consider the situation if you turn on your computer late at night or early in the morning and when you open the program at full volume, playback starts through the speakers. It is very convenient to configure the program’s “hot keys,” which significantly increases ease of use, the so-called “usability.” To change the action performed by a hotkey, you need to double-click on it, then press the button that will be responsible for this action.

(to enlarge the image, click on it)
4. Templates
All these obscure words and abbreviations are shorthand variables that format a template that is subsequently used for the string and playlist. If you are interested in this, just repeat the examples, it's quite easy.
5. System

(to enlarge the image, click on it)
If you are tired of the AIMP program logo, you can remove it using this particular settings category. This group is also full of other interesting settings, for example:
- “Show information about the current track on the taskbar”
- “Allow viewing track information using scrolling”
- “Auto-start program”
- “Integration of AIMP to system
But you should understand that these settings affect the CPU load, albeit slightly.
On the “Tray” tab, you can enable or disable pop-up windows, as you wish. You can also change the display of the button in the tray.

(to enlarge the image, click on it)
If you want to. In order for all audio files to be opened in the AIMP player, you need to set the association of the files with this program. This can be done in the File Association tab. But this player only opens audio files; you can use KMP-player to play videos.
6. Interface

(to enlarge the image, click on it)
This category of settings is classified as purely individual; there cannot be correct advice here, and so on. Therefore, a simple description of your own settings will be presented, and whether to install them or not is up to each person. It is also worth saying that some settings affect the performance of the computer. If your personal computer is weak in hardware configuration, these settings should not be used, especially the “transparency” option.
To avoid malfunctions in the program, I do not recommend installing a large number of covers at the same time.
Let only high-quality music and the same high-quality playback accompany you through life.
Listening to music is a completely necessary function of a computer, since not a single user can do without it. However, the standard media player is quite limited in functionality, does not support many formats, and often produces errors. Thanks to Aimp, a free, powerful audio playback app, this problem will be a thing of the past.
Aimp is a mega popular player that combines ease of use and powerful tool functionality. A wide range of settings allows for maximum personalization and suits most users. The program is also quite lightweight and does not take up too much system resources; even old computers can handle background processing of the application.

Usage Aimp
First, you should download the modern version of the application, which will allow you to install the latest plugins and add-ons, for this you need:
- Download the program from the official website https://www.aimp.ru/index.php?do=download;
- Perform the installation by clicking on the exe file in the newly downloaded archive. During the installation process, you can choose the portable version, convenient to save space or if the application will be used from portable storage;

- Launch the installed program.
During the installation process, be careful and uncheck the boxes next to the options for downloading additional elements, such as Yandex browser, etc.
To use the program, you can simply click on any audio format file and it will automatically launch in this player (if you did not clear the boxes with the association enabled during the installation process). To download playlists, you will need to select all the desired songs and drag them into the Aimp window, or by clicking the button with the plus icon in the player window.
In addition to power and functionality, Aimp has many plugins, skins, wallpapers and advanced encoders. All these additions can be found on the official website of the program. In this article, we will look at some of the most necessary and convenient add-ons and functions.
Functional Aimp
A useful feature is the smooth transition aimp, which allows you to fade out the previous song and smoothly increase the volume of the next one, connecting one track to another.
To make these settings you need:
1.Go to the “Menu” tab;
2.Select the “Settings” option;
3.In the “Player” section, select the “Automatic” tab;
4. The playback mode should be set to “Normal” and the “Automatically move to the next file” flag should be checked;
5.From the main application window, near the volume control, click on the “Sound Effects Manager” button;
6.Go to the “Mixing Options” section;

7.In the automatic and manual transitions section, set everywhere the value in ms, which determines the duration of file mixing.
The program also has functions for repeating files, shuffling a playlist, you can turn on the mixer, add effects, and turn on visualization mode.
Quite simple in design, but has a full range of frequencies. In the Sound Effects tab, you can adjust echo, bass, speed, tempo, reverb, and change other characteristics.

Aimp has produced a large number of covers that you can choose according to your taste. This is done very simply. Go to the appropriate section of the official website and download the desired skin. To install, simply drag the file into the program window or paste the file into the Skins folder of the application root directory. To change covers, go to the aimp tab of the same name and apply the one you want.

Listening to VKontakte music via aimp
You can read it by following the link. Today we will talk about how you can conveniently listen to music from the above-mentioned site. So, the application developers have released a plugin that allows you to use VKontakte Aimp. So you can listen to any compositions without opening your browser, simply by downloading them from the social network. The function is very useful for two reasons: firstly, the browser is a much more loading application and when launching games this can significantly affect performance, and secondly, aimp is very convenient to use on multimedia keyboards, where the transition to the next song can be done without opening the program window.
Using aimp to listen to VK recordings is impossible without installing the appropriate plugin.
In order to install it you need:
- At the moment, the current version of the player is 4.10, you can download a plugin for it from the link https://www.aimp.ru/index.php?do=catalog&rec_id=819 ;
- After downloading, unpack the archive into the Plugins folder of the application root directory;
- Now go to the program settings and find the “Plugins” tab;
- Find the file you just downloaded and check the box next to it;

- In the plugins section, the “Vkontakte” option will appear; by going to it, click the “Log in” button and enter your data.

From now on, we have access to VKontakte audio recordings. In order to use them, you need to go to the VKontakte tab from the main program window and select the section you need.
The Aimp program has thoroughly won the favor of users thanks to its professional approach to product quality and, I must say, it is well deserved. Aimp is one of the best players of our time.
If you still have questions on the topic “How to use Aimp?”, you can ask them in the comments
if(function_exists("the_ratings")) ( the_ratings(); ) ?>