Firmware for Samsung Galaxy S (GT-I9000) phone. Firmware for Samsung Galaxy S (GT-I9000) phone Firmware for Samsung galaxy gt i9000
At the request of some readers, I finally decided to write an instructional article on firmware for SAMSUNG I9000 Galaxy S (hereinafter simply SGS). Causes:
- Yesterday's flagship still looks quite an attractive purchase today, especially against the backdrop of the ever-decreasing cost of the gadget. Powerful hardware, excellent screen, good build, attractive appearance (I agree in advance that it’s not for everybody, but I’m satisfied with all the other advantages, so I’ll ask in advance without discussing the appearance in the comments, that’s not what the article is about). As we see, SAMSUNG also does not discount this device, has released several modifications of it and continues to develop the SGS line.
- The manufacturer, as always, is in no hurry with official firmware updates through the standard KIES channel, however, on thematic sites you can always find the latest versions of factory firmware, received there from insiders. In addition, delays in official updates are due to regional aspects. In fact, no one can forbid you to use any new firmware for another region; Russian and Ukrainian languages, from experience, are present everywhere, you will not notice the difference with the “localized” version.
- I can say that SGS is one of the most interesting phones for geeks, because... has a very powerful community on the xda-developers website and on other sites on the Internet, which is constantly developing improvements, fixes, software, hacks, visual themes and, of course, the firmware itself (hereinafter referred to as ROM) for this device. At the moment, you can count about a hundred firmware versions of Android 2.1-2.3 for every taste. More details about developments for SGS on the xda forum here: http://forum.xda-developers.com/forumdisplay.php?f=656 and on the Internet. The topic of custom software is especially relevant against the backdrop of problems with factory firmware (memory management, slow file system, music playback artifacts, etc.). In addition to fixing factory errors, custom ROMs often offer additional functionality and a host of improvements.
In principle, instructions for SGS firmware are found quite often on the Internet, but mostly they are all in English, which creates certain difficulties for users from the former CIS. I hope that this instruction will really help those who do not know English well.
In this article we will look at the main fundamental points that you need to understand when you are flashing a phone. I will not be tied to any specific ROM, because... they all have a different installation sequence, usually described in the xda forum topic header, where you will also find links to the necessary files. If you understand the theory, you can flash any firmware and install any update.
Preparing the phone for firmware.
The first thing you need to check is whether your phone has a three-button boot mode. If you are just getting ready to buy, it is best to do this right in the store. With the device turned off, press the volume down, home (center button) and power buttons in sequence. Hold until the phone turns on. You should see something like this:

If you see it, then everything is OK, if not, it means the boot mode is blocked at the factory (this also happens). If you already own an SGS and it doesn’t work, don’t despair, the three-button mode can somehow be unlocked, how to do this - look at the xda forum in the corresponding topic (I didn’t go into too much detail - I was lucky and everything works for me). If you haven't made a purchase yet, it's best to look for another copy. In the absence of a three-button mode, you will only be able to receive updates through KIES, which is absolutely unacceptable for a geek! To exit download mode, just remove the battery, nothing bad will happen.
Download the ODIN Multidownloader software on your Windows computer. This program has many versions, I use Odin 1.3 and it has never let me down. The program consists of one file, starts from a folder and does not require installation on a PC. This is what it looks like when launched:

Since the program is intended for use in service centers, you can flash up to 8 phones at a time. You see at the top eight slots with indicators for connecting phones to virtual COM ports (that’s why multidownloader). You most likely will not need this, so the main thing is the first slot, which will display all the stages of connecting and downloading the firmware to the phone, then keep an eye on it while working.
Have you looked at the program? Now close it! The next step is to connect your PC to your phone in download mode. Usually, to do this in Windows 7, it is enough to simply connect the SGS with the download mode enabled to the PC. Important note: Use the USB port on the motherboard for this connection. Perhaps everything will work through the front panel and all sorts of splitters/hubs, but I don’t recommend it. From experience there can be problems. Make your first connection without running ODIN. The system will see the hardware and install drivers. If something goes wrong (especially on XP), install the KIES package and the device drivers will be loaded onto the computer. After installing the drivers, check if the ODIN program sees your phone. TURN OFF KIES!!! Launch ODIN, enter SGS into boot state, connect to PC. If the connection is successful, you will see a yellow indicator in the first slot. Congratulations, everything is ready to upload the software to your SGS!
Phone firmware. ODIN program options.
What can you do with the ODIN bootloader? You can upload any ROM, factory or custom, with or without a complete repartition of the file system, root the phone, flash a new kernel into the existing firmware. Often, the firmware update procedure via ODIN is included as one of the stages of a more complex phone software update. Attention here! Further, when working with ODIN, always adhere to the following sequence:
- Turn off KIES if it is running.
- Launch ODIN and configure it for firmware (we consider the options and options below).
- Launch download mode on SGS.
- Connect the SGS to the PC and make sure that the device is initialized by the ODIN bootloader using the indicator in the first slot.
- Last parameter check, countdown, START!
The main files for SGS firmware are supplied as tar or MD5 archives. Actually, you need to indicate them in the appropriate fields of the Files (Download) section.
Let's first consider the simplest example - uploading factory firmware. Often this procedure is necessary, including before flashing a custom ROM, to prepare the file system. Typically, the firmware is supplied in the form of three files, the purpose of which is reflected in the name itself - PDA(or CODE – main firmware file), PHONE(or MODEM - the telephone part of the firmware responsible for working with the network) and C.S.C.– regional settings file. Also, when flashing stock ROM, you must have PIT file. I won’t tell you exactly what it is :-) But it’s needed! Apparently it stores service information necessary for the bootloader to flash ROM into the phone. Currently there are two such files for SGS: s1_odin_20100803.pit And s1_odin_20100512.pit. These files are usually loaded with ODIN or supplied with ROM files. The firmware description always indicates which PIT file should be used in a particular case. Here is an example of factory firmware delivery:
Next, as you can see, everything is simple, we substitute these files into the appropriate fields of the multiloader. This is what you should get after setting up ODIN and connecting your phone in download mode, i.e. just before pressing the START button:

click on the picture to enlarge...
After this, you can press the Start button and the phone’s firmware will begin. All stages will be displayed in the Message window. After successful completion of the firmware, the indicator in the slot at the top will glow green and display the inscription PASS. If an error occurs, it will appear in red.
At this stage, let’s immediately discuss the Option block, namely the first two checkboxes (I won’t say exactly what the third one means, it’s on all the time). First Re-Partition– allows you to repartition the file system from scratch, i.e. will completely erase the phone's memory and re-partition the partitions according to the data in the PIT file. Usually, when flashing a factory ROM, this checkbox is checked to avoid file system errors in the future. You will still lose all user data with the full firmware discussed above, so it should be checked. Next point Auto Reboot– when the firmware is completed, the phone will automatically reboot. Again, it should be checked when flashing the factory ROM.
In addition to loading the full ROM, using ODIN you can upload modified kernels, which are used to get root, replace the standard recovery (Samsung 2e and 3e) with ClockworkMod Recovery or SpeedmodKernel Recovery. We will talk about what recovery is and what its functions are later. Now you should understand that using ODIN, you can also upload not three but only one update file in TAR format, which is inserted into the PDA field of the multi-booter. With this type of firmware, you do not need a PIT file and you do not use it. Also, depending on the sequence described in the installation instructions for a specific ROM, you can/should clear the Re-Partition and Auto Reboot checkboxes. Why is this being done? Usually, before installing any custom firmware, you need to flash the factory firmware first. When you further flash only the update, you naturally do not need to repartition the partitions, because their integrity must be preserved. You may not need Auto Reboot when, after updating via ODIN, you need to not reboot the system but immediately go into recovery mode to complete the subsequent steps of the installation instructions. In this case, you simply remove the battery after finishing the firmware, insert it back and load the recovery mode.
Firmware and phone update via Recovery mode.
Here we come to the description of the recovery mode. What it is? This is the phone's service menu, called up in a way similar to calling the download mode, but in this case the volume button is pressed up. So, with the device turned off, press the volume up button, home, power on, hold until the phone screen activates, release. The splash screen will appear for a short time, after which you should see a text menu, usually on a black background, in green, red or yellow letters (it all depends on the current type of recovery). Moving through the menu occurs using the volume keys (up and down), selecting a specific item using the power button, returning to the previous menu - usually the last text submenu.
Using recovery, you can flash and update your phone with files in zip format. In this case, you do not need a PC. The main thing is to upload the update files to the internal card of the device in advance.
The simplest recovery is native Samsung versions 2e and 3e; these types of recovery come with factory ROMs. There are a minimum of points, one of them is “apply update.zip” i.e. The update file should be located in the root of the internal memory card (not sd) and be called update.zip. The update file must be signed and is intended specifically for flashing firmware through this type of recovery. This version of firmware is mainly used to obtain root rights on a phone with factory ROM and is used very rarely (possibly as an alternative to flashing the kernel with root via ODIN).
A more advanced type of recovery comes with custom firmware - this is ClockworkMod Recovery (called CWM on the forums). There are more items and expanded functionality. Using CWM, you can install any firmware or update file in zip format, which can be called anything you like and can be located anywhere on the internal memory card. Select the “install zip from sdcard” item, then the “choose zip from sdcard” item, in the primitive file manager that appears, find the update file and apply it.

In addition to the update functions, depending on the version and modification of CWM, the following actions are possible using the recovery menu and submenu: completely wiping the phone, clearing the cache, backing up and restoring data, clearing the battery log, managing partitions of system and internal user memory, partitioning the SD card and preparing it for apps2sd, creating a swap partition on sd, applying lagfixes and converting the file system to ext, enabling additional functions, such as backlit key notifications and much more.

One of the most common modifications of CWM for SGS is SpeedModKernel Recovery (SMK), which offers this expanded functionality compared to standard CWM; there are more points specific to SGS.
Example - the easiest way to install a custom ROM for SGS:
Many custom ROMs for SGS require SMK on the phone to carry out the installation procedure. This can be done directly on the factory firmware; you don’t need to get root, etc. first. - it's a delusion. The easiest way to obtain SMK one-time for subsequent update through this type of recovery is to flash the tar file with the SpeedModKernel kernel using ODIN (insert the file in the PDA field) with Re-Partition and Auto reboot unchecked. After flashing the kernel, you remove the battery from the phone, insert it, call the recovery mode and install any update, for example a custom ROM (the zip file, of course, should already be on your phone).
Some custom ROMs, such as CyanogenMod, require a more complex installation procedure that involves several steps of flashing the firmware via ODIN and SMK. Strictly follow the instructions from the developer and you will succeed! You are not the first, you are not the last! If you consider yourself a real geek, then you simply must master these simple procedures.
ATTENTION!!! The author is not responsible for the consequences of your actions with the phone after reading this article. It's not my fault if you turn your SGS into a brick! The official warranty for the phone disappears after flashing the firmware yourself. However, if something happens, with the help of the knowledge gained here, you can always flash the original firmware into your phone before going to the service center. If the phone is completely dead, no one will be able to determine what firmware is in it :-) make a face with a shovel and take it to the service center with the words: it’s broken... In any case, I repeat: only you are responsible for all your actions and their consequences! In fact, not everything is so scary and any incidents with tragic endings happen very rarely.
Happy firmware!
If you find an error, please highlight a piece of text and click Ctrl+Enter.
Android application/vnd.android.package-archive Android application
Samsung Galaxy S I9000 is unlikely to ever receive official updates to , but you can update your smartphone operating system to the latest version using custom firmware CM 11 Nightlies. Below you will find information on how to do this.
CM 11 Nightly based on Android 4.4 KitKat and includes a number of unique features. Note also the fact that this is not yet a stable version of the firmware: it has some shortcomings and bugs, but it is quite suitable for everyday use. More details about CM 11 you can read it.
To install successfully CM 11 Nightlies on Samsung Galaxy S I9000, you need to carry out the preparatory stage:
- Please note that this manual is only suitable for Samsung Galaxy S with model number I9000. The installation files indicated in the post are intended exclusively for this smartphone. They are not suitable for other devices and can cause irreparable damage to them;
- on Samsung Galaxy S I9000 necessary unlock bootloader, get root rights and install the latest version custom recovery image(TWRP/CWM);
- During the installation process you will need to do a factory reset. To avoid losing important data, you need to create a backup for all settings, applications, text messages, call lists and other useful information. The contact list must be synchronized with your Gmail account;
- don't forget about Nandroid backup. This will allow you to return to the current firmware at any time;
- activate the USB debugging option;
- charge your smartphone battery;
- remember that all responsibility for the operation rests solely with you.
1. Download the latest version CyanogenMod 11 Nightly zip .
3. Move both files to the smartphone. To do this, you must use a USB connection; We move the files unpacked.
4. Now that both archives are on your Samsung Galaxy S I9000, disconnect the device from the PC and turn off the smartphone.
5. Load the device into recovery mode. To do this, you need to simultaneously hold down the Volume Up, Home and Power buttons and hold them until the Recovery Mode symbol appears on the screen.
6. Create Nandroidbackup(option backup and restore).
7. Let's do it wipe (wipe data/factory reset).
8. Install CM 11. To do this you need to select the option install zip from sdcard, then choose zip from sdcard and find CM 11 Nightly zip.
9. After installation CM 11, we carry out the same actions for Gapps zip.
10. After both files have been successfully installed, return to the main menu recovery and restart the smartphone.
The first boot can last from 5 to 10 minutes. If Samsung Galaxy S I9000 frozen, then the smartphone battery must be removed for a while, then put it back and repeat the entire guide from the very beginning.
The Samsung Galaxy S may look like an old Android smartphone to you, but there are still plenty of owners who still love it.
Therefore, today we bring you an easy step-by-step guide that will show you how to install a custom ROM based on McKay's Android 4.4 KitKat.
As you probably know, Samsung no longer releases updates for Samsung Galaxy devices, it is believed that the device has a hardware limitation and for this reason the Galaxy S will not receive an official KitKat update.
In this step-by-step guide, we will install a custom ROM that is based on the official Android 4.4.4 KitKat OS on a Samsung Galaxy S I9000 device. The new custom firmware is based on CyanogenMod 11.
The new firmware is packed with new features and comes with great apps that may not be available in the default version of Android KitKat; it is specially designed to improve the presentation of your Android device.
In addition, after installing McKay's Android 4.4.4 KitKat, custom ROM on your Samsung Galaxy S device will gain speed, improve battery life, and give you the ability to customize the appearance of the device.
Once the new firmware runs on your Samsung Galaxy S device, it will run faster and smoother than before and you will have the latest version of KifKat OS, Android 4.4.
CyanogenMod 11 ships as stable firmware and there are no reports of any errors, lags or other problems. The firmware will run without errors or warnings, and you will be able to use the new Android 4.4.4 KitKat OS every day.
All these improvements have already been confirmed by users who have run the new McKay firmware on Galaxy S I9000 devices.
As you probably know, you will need root access on your device to begin installing the firmware. So, before going any further, you need to root it otherwise you will not be able to install the new custom Android 4.4.4.
Moreover, after root access is obtained, you must fulfill one more important condition, this concerns the installation of modified programs to save the recovery image. We recommend using the latest version of ClockworkMod recovery (CWM) or TeamWin (TWRP). So, do not miss this point in your steps because modified firmware can only be installed using modified applications (stock applications have limited capabilities, so you will not be able to install an unofficial update using them).
As you can see, these are unofficial operations and will void your device's warranty. In addition, when installing a modified firmware, you should know that it is distributed free of charge on the secondary market, from where you will receive Android 4.4.4 KitKat updates, and is not an official release from Samsung or Google.
During the process of flashing, using modified programs, there will be a need for an uninstallation process. When you perform the wipe, all data stored in the internal memory of your Samsung Galaxy S device will be destroyed.
For the same reasons, it is recommended that you perform a full backup of your data before doing anything else. Basically, you should start by saving contacts, SMS messages, call logs, EFS partition (one of the important system partitions containing: IMEI, S/N, GPSID, WIFIMAC, BTMAC, etc.), installed applications, all your images, videos, personal data, Internet settings and everything else you see fit.
In addition, for backup purposes, Nandroid is the best option to keep your current firmware.
During the flashing process we will need a computer. On PC, you will have to download some required files and establish a connection between PC and Samsung Galaxy I9000 device.
On your Galaxy S device, you should enable the USB debugging option by following the following path: “Menu - Settings - Applications - Development”.
It is very important that the device's battery has more than 85% capacity so that the phone does not turn off during the flashing process.
Moreover, all the instructions listed below and files can only be applied for Samsung Galaxy S model number I9000. The new СyanogenMod 11 (McKay) based on Android 4.4.4 KitKat modified firmware is compatible only with Samsung Galaxy S!
How to Install Android 4.4.4 KitKat Custom ROM on Galaxy S I9000
1. The first necessary step is to download the KitKat Android 4.4.4 firmware.
2. Now download Google apps package (gapps) and save them on your computer.
3. Save all these files somewhere in a folder on your computer, but do not extract them.
4. Connect your Samsung Galaxy S device to your computer using a USB cable.
5. Copy and paste the downloaded files from your computer to your smartphone's SD card.
6. Now, disconnect the USB cable from the computer.
7. Turn off the device by pressing the power button.
8. Boot the device into recovery mode (pressing the volume up button + Home button + Power button at the same time for a few seconds).
9. In the recovery mode menu, select “wipe data factory reset” - clear all partitions, and then “wipe cache partition” - clear the cache.
10. Go back and select “advanced” - additionally, and then “wipe dalvick cache” - clearing Dalvik Cache (if you don’t know what this is, don’t bother).
12. Now select the firmware file and install it.
13. Repeat the steps above to install Google Apps (gapps).
14. When you are done, return to the main menu and select “Reboot system Now” - reboot the system now.
15. If the device gets stuck in the boot loop, you need to go back to recovery and select “wipe data factory reset” - clearing all partitions, and then “wipe cache partition” - clearing the cache.
Great, that's all you had to do to install Android 4.4.4 KitKat OS on your Samsung Galaxy S. Test CyanogenMod 11, which is based on the modified firmware, and check what's new.
USEFUL
Firmware
Core
.
Setting up the POWER AMP player
Since a person cannot hear more than 15 thousand, we use 16 just as a color of sound. and 8 is already high, as it is. Also, a person cannot hear everything up to 63, respectively, 31 is used as a low sound color. Mid frequencies are 1. Low vocal frequencies are 250 and 500. Everything else is the same. Set up the preamp yourself in the Galaxy tuner at your own peril and risk. Everything has already been done on the screen, so you just need to first adjust the bass with the round knob at the bottom. There is no point in adding highs on stock headphones, because there will be one whistle past the highs. Adjust the preamp when the volume is at full blast. The first two screenshots are made for headphones, the third screen is for listening without them. Designed for good recording quality.
Screenshots
RECALL FROM 2.3.3 AND ANY LATEST FIRMWARE VERSIONS.
If you have a mod or any of the latest firmware:
1. Go to the EFS folder path to the folder: system/efs (if you have not yet made a backup of this folder, then do it)
2. Compare the availability of files from what is below WHAT THE EFS FOLDER LOOKS LIKE
3. We remove everything that is unnecessary, it is one hundred percent garbage.
4. Install firmware 2.2.1 from here, spoiler USEFUL as in the screenshot below, with all the checkboxes.
5. Have you asked? Then we do all the resets and wipes from the native (blue) menu.
6. Have you loaded the device? Then we do a hard reset of the entire device at least 2 times. Since the flash is not always cleaned right away (a Samsung problem)
7. We sew the device again. And only after that we sew the core and so on. Other actions may lead your device to unknown ends.Before doing anything, please read the instructions completely, and then read them again.
Instructions for the correct use of Odin 1.3 and phone firmware:
First, check where your device is from, if it is from Poland or Germany, or so on, and there is no PCT sign, we must do the following, otherwise you will lose your phone forever:
WHAT DOES THE PCT SIGN LOOK LIKE?What does the efs folder look like?
The efs folder is in no way connected specifically with the phone. New firmware configurations are created there.
When flashing the firmware, the phone takes information from this folder. If the firmware contains information for changing the file system, product codes, etc., then during firmware this information gets there. In a word, this is a temp folder, so to speak, like in WINDOWS. If, say, you are sewing a phone, and there is some kind of error, then this error may end up in the system config, so I recommend going there and periodically cleaning this folder. Normally the folder should look like this:Folder.android --> empty. FOR THE FIRST DEVICES FROM RUSSIA IT MAY BE LIKE THIS: testAndroid1.bin, testAndroid2.bin, testAndroid3.bin
imei folder --> --> file: bt.txt and file: mps_code.dat
file: .nv2.bak
file: .nv2.bak.md5
file: .nv_data.bak
file: .nv_data.bak.md5
file: .nv_state
file: nv_data.bin
file: nv_data.bin.md5Null files should also not be present in this folder.
FIRST TRANSITION TO ANOTHER COUNTRY (RUSSIA)
Before switching to another country (firmware), under no circumstances should you make any resets or wipes. Categorically!!!
Just sew on top of the core and do the steps described below. The kernel is needed to easily install root into the system.The kernel is not suitable for firmware on Android 2.1, so we get root in a different way. Kernel only for firmware 2.2 and 2.2.1
A way to switch to Russian firmware so that you can make resets without consequences!
Flash the kernel.tar or the same one, but more recent at the time of reading this instruction. We read how to make a root from it (there is a spoiler below) and save the efs system folder on the computer using the program Root Explorer. Let it lie on the computer as a reserve. Then we copy this reserve (efs) on the computer and copy it again to the desktop for editing. In the efs folder, which is already on the desktop, there is an imei folder, in it we find the mps_code.dat file. Open this file with a text editor and change (PLS, etc.) to SER. Then we change it (efs folder) to the one in the phone. We keep the original folder from the phone like the apple of our eye.
We sew the first firmware on top of the old one without resets or wipes! So that the EFS folder is not updated! That is, skip the item in parentheses "(We make all the resets to the body, first delete all files from the body)", for devices not from Russia.
How to root
We get the root from the kernel (speedmod-kernel-k13... -500hz.tar) and install the busie box into the system.
Turn off the phone.
Press the volume up button + home button + power button (POWER) (ON/OFF)
The volume up and down buttons are used to navigate through the menu up and down
The home button (usually called home) is an OK type confirmation
The POWER button also plays a role as a confirmation button, like OK
Don’t touch the touch buttons at all, they are also involved and can be unpredictable.
We look for the line and press the volume buttons down or up (Do not forget to be nervous)
1 advanced SpeedMod ULK features - got there and press the button in the middle.
2 ROOT / Install superuser - we got there and press the button in the middle.
3 Simple: install busybox*su - got there and press the button in the middle.
4 Yes - apply root to device - we got there and press the button in the middle.
We saw white inscriptions running, that means almost everything!
Are you nervous? Well then, look for the line ****Go Back****
Then we get nervous again and look for ****Go Back**** again
We get nervous until we see the line at the top - - reboot system now - - Click on the already well-known button
Fuhhh Well, the phone reboots itself.
The efs folder will be immediately in the root as soon as you open root explorer. You will need the original of this folder in the future if there are problems.
For devices not from Russia, AFTER THE STEPS DESCRIBED ABOVE, I RECOMMEND INSTALLING THE FIRST FIRMWARE AS DESCRIBED BELOW, BUT WITHOUT RESETS. AND FLASH THE SAME FIRMWARE AGAIN (TIME WILL BE DIFFERENT). THEN YOU CAN CALMLY MAKE WIPES AND RESETS Preferably from native 3e recovery
CORE. HOW TO SEW IT?
Turn off the phone! Remove the SIM card and SD card.
We set it to triangular mode. (volume down button + middle button + power on/off.
Connect to your computer and open Odin.
In Odin, uncheck F.Reset Time.
Press the PDA button and specify the path to the kernel: speedmod-kernel-k13..-500hz.tar
Click START. The time will be 0:7 - 0:8 seconds.
After installing the kernel, be sure to go to the recovery menu (CWM) and clear the Dalwick cache.
1 Turn off the phone..
2 volume up + mechanical button (home-home) + power on/off
3 Look for the line advanced ClockworkMod features and press the volume down key, reach the inscription and press home (mechanical button)
4 We look for the line Wipe Dalvik Cache and, by analogy, confirm with the home key.
Now we sew the firmware in the usual way. This is how all stock firmware is installed on PCT devices, that is, Russia 2.1, 2.2, 2.2.1,2.3.3, 2.3.4
I have JS3 (2.2.1) Look carefully at the punctuation marks!So: The procedure before flashing the firmware is to reboot the computer (We make all resets to the body, first delete all files from the phone’s flash card). We take out the SIM and SD. This is so that after the firmware is loaded, while loading the boot, the computer does not swear that this device can supposedly work faster. Afterwards, we pull out the battery for at least 10 minutes, maybe less, a couple of minutes is enough to reset the phone’s memory from the battery. (this is important, we’ll omit the details) The Internet is turned off, this is so that the computer’s processor is at peace and, accordingly, we unload active programs that are not in the background. Whatever is in the background, let it be (not scary). All these precautions are for those who have a weak computer.
Open Odin 1.3 (not 1.7) they are different and the firmware speed is also different. I personally measured it more than once.
Throw in the pit file --> check the box Re Partition --> Then the firmware in order --> Then check the box - Phone EFS Clear and Phone Bootloader Update. Let's sew!!!
No need to touch the phone when the program writes PASS because this is not the end yet. We do not touch the phone until it turns on and the menu for auto-starting the flash drive from the phone is displayed. Then click on the home button. All! The phone is ready for NORMAL OPERATION.
The flashing time should take 3 minutes 56-57 seconds for JS3.The firmware consists of four files.
pit file, at the end of pit, is assigned to the PIT item in one. Immediately after it, check the box Re Partition.
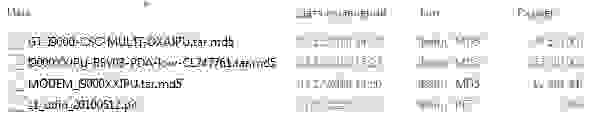
Then comes PDA and opening I9000XWJS3-REV03-ALL-low-CL830616.tar.md5
Then comes PHONE and opening MODEM_I9000XXJPY.tar.md5
Then comes C.S.C. and opening GT-I9000-CSC-SERJS2.tar.md5
Then check the box Phone EFS Clear and a tick Phone Bootloader UpdateLet's sum it up! My steps in order:
1. I am flashing the kernel speedmod-kernel-k13e-500hz.tar or a more recent version from the touristinparadise website (by the way, will it work fine on Android 2.1?) No, at the top it says that the kernel is for 2.2.1
2. I create a Route and save the EFS folder on the computer (is the root explorer program already pre-installed on the phone out of the box?) No, you need to download and install the program.
3. I carry out the necessary manipulations with a copy of the mps_code.dat file and upload back the EFS folder with the modified mps_code.dat file (when backfilling, there will be no difficulties when replacing the original *.dat file? We upload it back using what, kies?) When backfilling sometimes Difficulties arise, in this case, throw the files one by one into the efs folder with substitution. We throw it naturally through the root explorer.
4. I flash up to I9000XWJS3 in the standard way without resets or wipes. Absolutely right.
5. I'M FLASHING AGAIN with the same firmware, having first reset the phone! Exactly!
Do you need to make a reset using one of the methods or all?! If one, then which one? Through Recovery?!1. Hard reset via Settings: Settings > Privacy > Reset data.
2. Hard reset via recovery (wipe / factory reset): Go to the Recovery menu, select the item: wipe data/factory reset, then - Yes
3. Hard reset via service code: *2767*3855# Attention!! With this option, the reset occurs immediately after entering the code + clears the internal flash drive aka \sdcard!!
You can make all the resets, sometimes I do just that, and in the recovery menu I use all three items. Except update of course.
6. After the latest firmware, do you need to flash the kernel again or is that all?! Yes, it is necessary, because it will fly off and the native kernel will become the new firmware
RESULT: (you don’t have to read it)
(This file is not picked up on all models. You can separately get mps_code.dat and edit it, but you need to save the folder. You flash the kernel exactly as written. It is the latest for 2.2.1. When backfilling, sometimes difficulties arise, in this case, throw the files over one in the efs folder with a replacement. And with the help you throw the file directly from the phone. If in the first, then make all the resets just in case, as I wrote. In any case, it won’t hurt. Besides, they are a little different from each other. when you flash the firmware again, you will have to install the kernel again).
BRIEF INSTRUCTIONS
So:
1. Install the kernel according to the instructions.
2. Turn off the phone.
3. Press volume up + button in the middle + power on/off. When Galaxy S appears, release all buttons. We see the green menu.
4. Press the volume down to the item advanced ULK features
5. Press the key in the middle and see the line ROOT / Install Superuser
6. We reach it and press the key in the middle and see Simple: install busybox+su
7. Confirm again with the key in the middle and go down to the Yes line and confirm again.
8. Go back using the line ***GO BACK*** until we see the line reboot system now
9. The phone has booted up.
10. Install the Root Explorer program
11. When opening the program, we answer YES to the super user’s request
12. Immediately in this list of folders and files we find the efs folder
13. Copy this folder to the phone via the path mnt/sdcard/any folder (remember where)
14. Exit the root explorer
15. Go to applications and go to MY FILES.
16. We check the presence of all files by comparing them from the original in the system.
17. Place the efs folder on your computer and save it.
18. Duplicate the efs folder to the desktop for editing.
19. In the efs folder there is an imei folder. It contains the file mps_code.dat
20. Open mps_code.dat using a text editor.
21. Change the inscription to SER.
22. We drop this file on the phone and replace it in the imei folder on the phone.
23. Turn off the phone.
24. Enter the firmware mode. Volume down + button in the middle + power on/off.
25. Connect the cable to the phone and PC.
26. Open Odin and continue according to the instructions.
27. We asked!
28. Enter recovery mode Volume up + button in the middle + power on/off.
29. Click everything we see and confirm in order, except apply sdcard:update.zip
30. Then press reboot.
31. The phone turned on. Dial *2767*3855#
32. The phone rebooted again.
33. Turn off the phone and flash the firmware in the usual way.
34. Then we check our imei. All is good.
35. We are sewing a new kernel, but we are not doing root yet.
36. Let's see how to apply the update. Read it.
37. We throw the update on the phone, to the root of MY FILES and turn off the phone.
38. Enter recovery mode Volume down + button in the middle + power on/off.
39. We see the line apply sdcard:update.zip. We confirm. Yes.
40. Then reboot.
41. The phone has booted up.
42. Reboot it.
43. Loaded. Turn it off.
44. Now you can make a root.
If you want to install all the updates, then install them one by one with a reboot. That is, we repeat from points 37 to 40.
PS: Before starting modifications and installing any programs or other manipulations, I recommend turning your phone off and on, as the processes should be restored. After turning off the phone for the first time, the vibration will work with a slightly longer interval, this is normal. Files should not be deleted from the phone until the first access to the market and Samsung Apps. An update has been released from Samsung Aps, we are not installing it yet. We install it only as a last resort when the phone is loaded with your mods. And by the way, it is advisable to reboot the phone after applications that use root. This also applies to system updates from the market and Samsung Aps.If you have many programs installed, I recommend the Start Up Manager program (if the checkbox is checked, the program will load, if not, the service will not load at all. It’s better not to touch the system ones if you don’t know). You can also try ES Explorer (with it you can back up all apk from the system.
Screenshots
Read carefully how to apply the update!
Before applying the update, I recommend installing the kernel indicated above (k13e) since the 2e recovery mode and all useful functions are already built in there.
Well, I recommend doing root last, since the update listed below cannot be installed on a rooted phone. This is only possible if you had the same update, but without a photo (excellent quality)
The patch itself includes a full screen photo (excellent quality) + a voice recorder on the button during a call, from the line + the increasing ringing has been removed + poor quality pictures have been removed when answering BUSY and a picture when there is no photo when calling. Suitable for all JS firmware 2.2.1 series
Attention! You will need to remove auto-sync from Google in your phone settings, since Google, when auto-syncing, pulls old icons from contacts into the phone.
Screenshots on a blue and purple background belong to number 3 (looks prettier), you can apply both updates for testing. One replaces the other.
Screenshots on a black background belong to number 2
Install as update.zip (must be renamed to update.zip) via recovery 2e
Reflashing your phone can fix many operational errors (for example, if your Samsung Galaxy firmware does not see the network). This can be done in several ways. Installing Android firmware via a PC provides the most flexibility when changing software and allows you to carry out the most complex operations that may arise when reinstalling the phone's operating system. But, in turn, such a procedure requires a more responsible approach and failures during flashing can be very expensive. Naturally, a lot also depends on the program that changes the software on the device - the so-called flasher. There are quite a large number of them, and the choice of a specific program is largely influenced by the actual model of your phone.
For the Samsung Galaxy S GT-i9000 communicator, such a program is a special utility with a rather original name “Odin”, which will always help you reflash the phone when the need arises. For example, if you don’t know how to flash Galaxy S from Android 2.2 to Android 2.2.1. Or, if you bought your phone a long time ago and still have Android 2.1-based firmware installed, which slows down the device a little. After all, the official Android 2.2 firmware for Samsung Galaxy has been released a long time ago. 3 - 4 months ago it was announced that the Russian version of the official firmware based on Android 2.3 would be released. As you can see, progress does not stand still and sooner or later you will have a question about flashing your phone. Therefore, knowing how to work with the Odin program will always be useful to you.
Before you start using it, carefully study the FAQ on firmware using the "Odin Multiloader" program for Samsung i9000.
To successfully complete the phone flashing process, perform only those operations that are described in the instructions for flashing the i9000 firmware. And then you will be able to make only positive adjustments to the operation of your Samsung Galaxy S. "Odin" is a fairly easy-to-learn program, but it will only give the desired result if you strictly fulfill all the requirements for flashing the phone.
Instructions for firmware Samsung Galaxy i9000
1. Check the connection and the presence of all necessary drivers. You will also need support for three-button mode. It should be noted that under no circumstances should you enable USB debugging mode on your Samsung Galaxy S. Firmware via "Odin", the driver of which may not be available on the PC, will take a little longer the first time - you need to install all the drivers necessary for the operation. If you have already used "Odin", then you can skip the first point.
To prepare for installing the firmware, you must complete the following steps:
Download and install the drivers necessary for operation (fresh Kies, flasher "Odin3");
Launch the three-button mode on the device (volume down+home+power), an image of a robot with a shovel should appear against the background of a yellow triangle; if you still don’t get this, then the three-button mode is not supported on your phone (how to restore support for the three-button mode - see the corresponding article on the website);
Connect the phone to the computer via USB (it is advisable to connect it to the connector on the back of the system unit);
Wait until the installation is completed and the drivers are recognized;
Disconnect USB, exit phone firmware mode.
If everything went well, you can proceed directly to the process of flashing the phone.
2. Create a folder in which you will subsequently save all the firmware files unpacked from the archive, the "Odin3" program, and the pit 2.3 settings file for the Samsung Galaxy S GT-i9000.
3. Launch "Odin3" and close all other applications (including Samsung Kies). Depending on the firmware requirements, set the necessary parameters: Re-partition, PHONE=MODEM, CSC=CSC, PIT. If, after completing the firmware, you want to reboot the phone yourself, then uncheck the "Autoreboot" item.
4. Launch three-button mode on your phone as described above.
5. Connect your device to your computer. It is necessary to follow the order - first the firmware mode is turned on, and then the phone can be connected to the PC. Not the other way around! If the ID:COM field turns yellow and the value COM appears, then the connection was normal and you can continue.
6. Click the Start button - the flashing process will start. A yellow bar and messages in the "Message" section will appear in the program window, indicating the status of the process.

The flashing process takes on average three to five minutes. As a result, the first cell in which COM is displayed will turn blue and the phone will automatically reboot.

After this, you can disconnect the device from the computer.
If, at the time of unpacking the files, one of the cells turns red and a message appears about the absence of the multi CSC file, then you do not need to do anything. This error is not terrible and the process should not be stopped.
These instructions for updating firmware via "Odin" will help you understand this program and allow you to update the software without contacting a service center. But, if you are reflashing for the first time, then try to get a more experienced person to help you with this. Moreover, during flashing some problems may arise. They can affect all future work. In any case, you should not panic and immediately pull the USB cable out of your phone. Below are possible troubles that may occur.
1. The flashing process takes longer than five minutes. In this case, most likely the whole process just hung. That happens. Reconnect your phone to your PC and run the flashing process from the beginning.
2. During flashing, the message “USB-!-phone image” appeared, the phone does not boot. Most likely, the USB connection is broken or the phone itself is frozen. In this case, remove and reinsert the battery and disconnect the device from the PC. Then enter the firmware mode again and connect the USB. Start the firmware process again.
4. The program stops flashing, the message E:Can"t mount /dev/block/[error number] appears. A critical error occurred when flashing the phone and the process was stopped. The most ideal option would be to determine by the error number what went wrong. If it worked to fix it, then try to start the download again.
4. The message “Can”t open the serial(COM) port appeared. All threads completed. (succeed 0 / failed 1)". Most likely there are problems with the connection. Reconnect the phone. Try using a different USB port, free up computer memory for third-party applications, disconnect other USB devices. Do not forget to exit the three-button mode before disconnecting from the PC.
5. After flashing the firmware, the phone does not reboot. Repeat the flashing process again from the very beginning by selecting the Re-partition option in the settings. Be careful - all information on the memory card will be lost! Take care to create backup copies of your data.
In other similar cases, you have two options: try to start the firmware again or stop your attempts. You decide.
It is also worth noting that during flashing it is better not to do anything extraneous on the computer. Samsung Kies must not be enabled!
Keep this information for yourself. Even if you are not going to master the flashing process on your own in the near future, the instructions for flashing Samsung Galaxy S firmware can come in handy at any time.