Modeling in 3D blender in Russian. Blender3D from modeling to animation
The Blender three-dimensional editor has a lot of advantages, and we have already told 3DNews readers about this wonderful program (see the material “Blender 2.45: a free 3D editor”). Since writing that review, the program has changed a lot - it has many useful functions, it has become an order of magnitude more powerful, more convenient, but at the same time it still remains free. Today we will talk not so much about its capabilities (to list all the options and settings of the application it would be necessary to write not an article, but a weighty reference volume), but about the difficulties that those who launch this 3D editor for the first time will have to face.
At the moment, Blender does not have a long list of known projects where it is used. Of the more or less worthwhile works done with the help of this 3D editor, the only ones that come to mind are “Spider-Man 2” and the full-length animated film “Brendan and the Secret of the Kells.” Well, the Llama Drama project best reveals the capabilities of the program - these are two short animations about the unlucky Llama, made by a team of Blender professionals.
The lack of a “portfolio” of the program can only be explained by the fact that professionals in large companies are very wary of a free product that is distributed “as is.” For reputable animation studios, it is very important that the product not only has a powerful arsenal of tools, but also develops and has good support. In the case of Blender, everything is built on pure enthusiasm. In addition, famous studios are strongly tied to commercial software, which is impossible to abandon for a number of reasons - from problems associated with compatibility with other software, to the obvious reluctance to give up various components in the usual tools and many years of experience working with a professional expensive application .
However, with each new version, Blender is gaining more and more popularity among professionals. At the moment, it has already been adopted by dozens of animation studios, which successfully use the program’s tools to produce multimedia presentations, commercials and TV screensavers. The potential of the program is so great, we can say with confidence: the emergence of more serious projects is almost certainly a matter of time. For example, relatively recently, the creator of “angry birds” Rovio Stars, together with the English studio Midoki, released the multiplayer online strategy Plunder Pirates. Blender was used to produce this colorful and memorable game.

The growing popularity of the 3D editor is natural, because we can talk about the advantages of Blender for a very long time. This program is very powerful, but at the same time it uses system resources efficiently. Early editor distributions weighed only a few megabytes, and even then Blender could be used as a full-fledged professional 3D modeling tool. Now the size of the installation file has become larger, but, compared to the distributions of other packages for 3D modeling and animation, it still has a much smaller volume, and is not inferior in functionality to famous programs. Do you have any doubts? Then watch the following video - everything was done in Blender.
The 3D editor is an interesting but complex program. If you are really interested in the world of 3D, you need to be patient, especially when it comes to the free Blender editor. It is very difficult to master using the scientific method, and this is an insurmountable problem for many 3D lovers. For example, the program does not have a full-fledged main menu in the form to which everyone is accustomed. Many application tools and commands are hidden somewhere deep in the interface or can generally be called only by keyboard shortcuts. Learning Blender will definitely take time for an animator and designer to get used to and get comfortable in the new environment.
It’s paradoxical, but it’s precisely this kind of application architecture, made “to suit you”, that captivates. The first skills in working with Blender are acquired quickly, and after just a few days of intensive training, the understanding comes that the main strategy of this program is to get the maximum result with a minimum number of actions. This is why Blender's interface is devoid of unnecessary icons, buttons, and other elements.
If you decide to learn Blender, you will be faced with a lot of questions, even if you have already done 3D creation before. Blender does a lot of things differently than users of Maya, 3ds max and other commercial applications are used to. Fortunately, Blender comes with good documentation (there is even a Russian translation, although not entirely correct). Also, as you get acquainted with Blender commands, tooltips with fragments of official documentation will appear on the screen every now and then. But this, of course, will not be enough. Therefore, in this material we will try to help beginners in mastering Blender, focusing on some important features of this 3D editor.
⇡ Interface
The uniqueness of the 3D editor lies in the fact that Blender combines a complete set of tools for animation production. Theoretically, you can create a short animation from start to finish using exclusively the tools of this program. Blender's features are amazing in their variety. There is a module for animation, a video editing tool, 2D drawing, tracking, 3D sculpting tools, and much more. We suspect that it was this “explosive mixture” of a wide variety of tools for creating three-dimensional graphics and visual effects that prompted the developers to give the program the name Blender (translated from English as “mixer”, “stirrer”). And all this variety of tools could not but affect the program interface - the appearance of the three-dimensional editor can change depending on the task at hand.
When working with Blender, you will have to learn a long list of keyboard shortcuts. Without knowing the hotkeys, working in the program is simply impossible, so pay attention to them throughout this article. Almost every program function has its own combination. In addition, hot keys in the program can change their purpose depending on the selected program tool. For example, if you are working in Object Mode, the G key allows you to quickly move an object in the viewport. But if you turn on 3D sculpting mode, the same key will call up a specific brush profile.
Three-dimensional editors often have a similar interface - projection windows, a panel with settings for selectable tools, etc. You will find all this in the Blender interface, but it cannot be called “intuitive”. It has many features, so even those who have good experience creating 3D graphics in other programs will not be able to get started right away. You need to spend more than one hour to study the main components of the editor, the location of the tools, as well as some commands to control the interface.

When starting a new project, 3D designers are used to starting everything from scratch - filling the scene with objects, selecting their parameters, etc. In Blender, an empty scene already contains a number of objects: a cube, a light source and a camera. The program interface is not overloaded with unnecessary information, so you will not find buttons for navigation in the projection window. The view is controlled by the middle mouse button (a simple press of the middle button will rotate the scene, while pressing and holding the Shift key will shift). To zoom in or out, use scrolling.

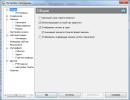
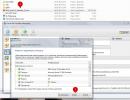
Owners of laptops that work with a touchpad may encounter problems when controlling the view in the projection window. On most mobile PCs, touchpads do not have a middle button, so some commands in Blender cannot be executed. Sometimes the touchpad driver provides the ability to emulate the middle mouse button in software, but this option does not always work properly on a laptop. Luckily, Blender has a solution to this problem. Open the program settings window by selecting File > Preferences from the menu, go to the Input tab and check the box next to the Emulate 3 Button Mouse option.

After this, Blender will turn on the middle mouse button emulation mode using optional keys. For example, to rotate a view in the projection window, you need to press the Alt key and the left mouse button at the same time, and to move the view in the projection window, you need to press Alt+Shift and the left mouse button. You can also enable the option to emulate the numeric keys of an additional keyboard in the settings.
If you already have some experience with three-dimensional editors 3ds max or Maya, you can activate the desired profile in the Blender settings, which will allow you to use familiar keyboard shortcuts for many commands.
When working with three-dimensional graphics, it is very important that the user can customize the program “for himself.” Blender's interface is very flexible and can be customized to suit your needs. Elements of the editor interface can be controlled in every possible way, for example, you can change the size of windows and panels.

The Blender workspace can be divided into conventional zones. Zones can be considered the 3D View Editor, which includes projection windows, the Properties Editor, and two panels - the settings panel and the toolbar. The settings panel is hidden by default. To see it, click on the plus sign in the window with the scene view or use the N key.
The toolbar can also be quickly hidden or shown using the T key.

The sizes of toolbars in Blender can be changed, you can even “retract” them completely, removing them from the screen. Any hidden panel can be opened using the plus icon, which appears in place of the hidden interface element.
The program interface can be very simply and conveniently “split”, dividing it into new windows and customizing their contents. You can, say, divide the projection window into two windows, in one of which you leave a view of the scene, and in the other you turn on the Graph Editor display mode. In the upper right corner of any program window you can see a tiny triangle. To split the current window into two, simply drag this triangle.


As a rule, novice users quickly find a way to “split” windows, create a large number of them, and then are at a loss as to how to remove unnecessary interface elements. This is another evidence that many operations in Blender are implemented implicitly, and finding the right commands often turns into a tedious quest. To hide any of the interface windows, you can slide it to the side, and to completely remove a window, it should be combined with the adjacent one. To join, you need to move the cursor to the border between the windows, and then right-click, select Join Area in the context menu and hover over the window that you want to remove.

There is another way to split the editor interface: you need to move the cursor to the border between windows, select Split Area in the context menu and use the dividing line to determine the position of the separation border of new windows.
By default, Blender displays only one type of projection - perspective. But to fully work with 3D, you will also need a classic view of objects - from above, from the side, from the front, etc. To switch to the four-window interface familiar to CAD applications, use the keyboard shortcut Alt+Ctrl+Q.

Another convenient feature of the Blender interface is that the scale of any program window can be changed. Not the window size, but the scale, that is, making the interface elements larger. To do this, use the plus and minus keys on the additional numeric pad of the keyboard. The effect of scaling editor windows is somewhat reminiscent of changing the scale in a browser - it becomes easier to read text and more convenient to enter values. This option will be especially relevant if you are working on a monitor with a very high resolution.

One of the distinctive features of Blender is the 3D cursor (it would be more correct to call it a 3D marker). This object is constantly present in the scene and is an auxiliary element for indicating exact coordinates. It is placed at the point in virtual space where you clicked the mouse. The 3D cursor uses the snapping principle, so it is very easy to place it, for example, on the surface of a 3D model. If you are “lost” in virtual space and do not see the three-dimensional cursor, press Shift+C. This will place the 3D cursor in the center of the scene and change the view so that you can see it.
Interestingly, when working with different 3D editors, users encounter the same interface problems. For example, in communities of novice 3D enthusiasts you can often see the question “where did the arrows go?” The fact is that in most three-dimensional editors, for transformation operations (rotation, movement and scaling), it is customary to use an auxiliary manipulator - a pointer with directions. At some stage of learning the program, an inexperienced user presses the “wrong button”, and this manipulator disappears from the screen. Rotating and moving objects blindly is quite inconvenient, and the user wastes his nerves and precious time searching for a solution to this problem.
Blender also has a similar handle that can suddenly disappear. If it disappears from the screen, most likely you accidentally pressed the Ctrl"+"Space key combination. Press this combination again and the manipulator will appear on the screen again. To turn the manipulator on and off, the corresponding button under the projection window is also used. You can also rotate, move and scale objects using quick commands: G - allows you to quickly move the selected object, R - rotate, S - scale. Knowing these commands is essential, and will especially come in handy when you are modeling.
The program has a very convenient search system. With its help, you can always find the command you need. Open the search menu using the Spacebar and start typing the name of the option you want. Blender will try to help with hints. Sometimes this speeds things up a lot. For example, if you are working on the dynamics of a computer game, you do not need to specify physical properties for each individual object. Just type game, and the Copy Game Physics Properies to Selection command will appear in the list, which will allow you to quickly transfer physical properties to selected objects in the scene.

⇡ Simulation
There are many modeling techniques in 3D graphics. You can create three-dimensional surfaces, for example, using polygonal modeling tools, when the surface of the model consists of polygons, you can do three-dimensional sculpting using virtual brushes (as in the ZBrush program), you can use modeling using splines (three-dimensional curves) and so on. Blender implements all the most common modeling methods.
The simplest and most popular method is polygonal modeling, in which a three-dimensional shape is created by editing the subobjects of the model frame - vertices, edges and surfaces (polygons). In order to start working with these subobjects, you need to enable the Edit mode. By default, the editor uses the Object mode for working with objects, in which you can control the position and orientation of objects in a three-dimensional scene. To switch to object editing mode, select the desired command from the list of operating modes.

When creating a complex topology of a 3D model, for example in the process of modeling a 3D character, it is often necessary to use the so-called soft selection. Its essence comes down to the fact that when you select one or more subobjects of the frame, for example a pair of vertices, moving them (or another transformation operation - rotation, scaling) in the projection window will affect the adjacent subobjects (vertices). Moreover, the degree of influence on adjacent vertices depends on the distance between the edited subobject and the adjacent vertices - the further the subobject is from the edited area, the weaker its transformation.
The concept of soft selection is universal. This command can be found in almost every 3D editor - Maya, 3ds max, Cinema 4D, etc. But this command is missing in Blender, and searching the documentation will not help you. The fact is that the developers called it differently - proportional editing. To activate the soft selection mode, you need to press the O key, and to change the diameter of the affected area, use the mouse scroll wheel during editing. You can also control the area of influence on adjacent vertices using the PgUp and PgDn keys (these keys should be held down when performing transformation operations). Soft Selection mode properties are also available in the toolbar to the left of the viewport.

You can create new surfaces manually. To create a new polygon, you need to select the vertices through which it will pass, and then press the F key. And the simplest way to create a vertex is to left-click while holding down the Ctrl key.
Combining subobjects is one of the most common operations in the program, especially important for editing the model wireframe. To combine two subobjects, say two vertices, you need to select them while holding down the Shift key and then press Alt+M. The program will display a context menu with settings for combining subobjects.

At the modeling stage, it may be necessary to transform an object into an editable shell (for example, if you make voluminous text and then decide to modify it using standard tools for editing the model frame). To quickly convert a spline shape into an editable wireframe, you can use the Alt+C keyboard shortcut. A menu will appear on the screen where you can select the conversion command.
⇡ Three-dimensional sculpting mode
Unlike other modeling techniques, digital sculpting is focused on an intuitive and creative approach to creating three-dimensional forms. Nowadays, not a single major CG project can do without such a tool. Organic forms are very difficult to program and make according to a ruler; for good artists it is much easier to create with their hands, albeit in the virtual world. The most popular sculpting program is ZBrush, with the help of which, for example, monsters from “Pirates of the Caribbean”, characters from the movie “Avatar”, etc. were created. This program is good for everyone, but its price is almost eight hundred dollars. Blender's digital sculpting tool can replace ZBrush in many cases, as it contains the basic options offered by Pixologic's product.

To start creating in Blender using virtual brushes, you need to enable Sculpt Mode. You can use brushes with different profiles, create your own deformation options, and assign masks. The program also has the possibility of symmetrical modeling. When creating a model, a dynamic topology algorithm is used, which allows you to compact the model frame, increasing the detail of the three-dimensional surface in places of deformation. Blender supports working with graphics tablets, and if you activate the corresponding option in the brush settings, the digital sculpting module will take into account the degree of pressure of the digital pen.
When switching to 3D sculpting mode, you can use a small library with brush profiles (two dozen different profiles are available). Blender allows you to quickly select the desired brush profile using hotkeys. They are easy to remember: the S key calls up the Smooth brush profile to smooth out uneven vertices, the P key activates the Pinch profile, which, acting on the vertices, pulls them towards the center of the editing area, the G key calls up the Grab brush profile, etc.

Of course, ZBrush is much more powerful in terms of functionality; Pixologic's 3D sculpting engine is more thoughtful and diverse. But on the other hand, integration with a professional 3D editor is very desirable for ZBrush, while Blender itself is a full-fledged editor.
Blender has a huge arsenal of tools for modeling, customizing character equipment, and many other tools for creating 3D that ZBrush simply doesn’t have. You should also not forget about the financial argument - you need to think carefully about whether it makes sense to pay money for functions that you won’t have to use.
⇡ Modifiers
3D editor tools often repeat each other. Indeed, it is very difficult to come up with something new, so the principles of constructing a 3D model are very similar in all programs. And Blender even has a whole class of tools that replicate similar tools for 3D modeling and animation in 3ds max. We mean modifiers. Yes, Blender, like the popular commercial package from Autodesk, also contains a group of modifiers for various purposes. At first glance, if you compare the list of Blender modifiers with the same one in 3ds max, you can see that the tools of the free editor look much more modest.

But here it is worth remembering one important detail - the free tool was not created for sale, but for work. There are some modifiers in 3ds max that are used extremely rarely in practice, and there are also those that practically duplicate each other’s purposes, such as Meshsmooth and Turbosmooth. Thus, if you put aside the “husk”, the gap between 3ds max and Blender becomes not so big. Just a few minutes after experimenting with Blender modifiers, you can establish a direct analogy between the names: the Solidify modifier is the same Shell modifier from 3ds max, the Blender Smooth modifier is in many ways similar to the Relax modifier, etc.
⇡ Lighting
Lighting sources always play a big role. Their settings are closely related to the parameters of the visualization engine. Depending on the selected type of rendering engine, the set of parameters for the created light source may be slightly different.

The simplest light sources in Blender are the Point source and the Spot directional light. In addition to them, there are also Sun, Area and Hemi. You can change the type of virtual light source on the fly by using the corresponding button in the parameters of this object.
If you enable the interactive rendering mode with the Cycles engine (select Cycles Render in the list and press Shift+Z), you can see that in the absence of light sources the scene is still visible - it is highlighted with the gray color of the environment, which is specified in the settings on the World tab.

Despite the fact that in the Sun object settings there is a parameter that determines the size of the light source, you will not see the area of the lighting surface as such in the projection window. This light source should be perceived as an endless wall of light, a simplified model of such a very large illuminator as the Sun. For this reason, moving the Sun light source in the projection window does not affect the overall lighting picture of the scene - no matter where it is in the scene, the intensity of the light flux and shadows remain unchanged. To change the illumination, you can rotate this light source to some angle. It should be taken into account that as the size of the Sun source increases, the light energy is distributed over a larger area, and the brightness of the light on individual objects in the scene becomes less.
The Hemi light source is not supported by the Cycles rendering engine and is interpreted as Sun by it. This object is a hemisphere whose surface emits light. This type of source can be used to simulate the sky.
⇡ Materials and texturing
At the stage of setting up materials in Blender, you understand how convenient the interface of this program is and how correctly the developers did it, taking as a basis the principle “program tools should not overlap each other.” By creating a small separate window with an interactive render (turned on by pressing Shift+Z or selecting the option to display objects in the Rendered projection window) and placing it, for example, under the Properties Editor, you can open the node editor instead of projection windows and “conjure” in it, selecting the necessary parameters of materials.

Blender does not have a material editor as such, but it does have a more flexible and visual tool - the node editor. It is selected in the same menu where there are commands for switching to editing mode, timeline mode, etc.

For the Cycles Render rendering engine, materials are a combination of three main settings: Surface (surface pattern), Volume (volume texture) and Displacement (material relief). You can bind shaders, textures, and all sorts of combinations of available nodes to these settings. Combinations of nodes ultimately determine the appearance of the model surface, and also determine the nature of filling the volume of the model frame and describe the visual effect of displacement of the mesh surface.
To create a new material and go to its settings, you should select the object in the projection window, go to the Material tab of the parameters editor, and then click on the Add new material button. The panel will display the main characteristics of the parameters mentioned above - the Volume settings, the Displace parameter and the Surface settings.

Basic parameters can be specified in the Blender parameters panel, and for more fine-tuning you need to call the Node Editor. Once you have selected the display mode on the node editor screen, select the Use nodes checkbox to see the contents of the diagram. After you create your first material, the first node diagram blocks will appear in the node editor.
To control material properties, new Blender users will need to take a deep dive into the properties of the nodes that can be used in a project. Working with materials in Blender is like playing with a construction set. The end result may look like a very intricate mind diagram.

The nodes themselves (or, simply put, sets of material properties) can be seen to the left of the node editor window - on the toolbar. To speed up your work, you can use the keyboard shortcut Shift+A - this command opens a context menu for quick access to nodes.

If there are connections in the diagram, some nodes influence others, and this is how the properties of the material are formed. For example, a connection between the Color socket in the Diffuse BSDF node and the Color socket in the Wave Texture procedural texture node will result in a wave-like pattern covering the object. And if you connect the Fac socket of the Wave Texture node to the Displacement slot of the Material Output node, the surface of the created material will be covered with wavy dents, the nature of which will be determined by the pattern of the same procedural Wave Texture. Thus, by mixing components in the node editor, you can get a material with any properties - matte or mirror, with glow, with a subsurface scattering effect, like in wax, with a relief covered with a pattern, etc.
Communication between nodes is easy to establish - just grab one of the so-called sockets (round colored dots on the right or left side of the node block) with the mouse cursor and drag it to a similar socket of another node. To destroy the connection between nodes, you need to grab one of the nodes and, pulling the connection line to the side, release the left mouse button.


Shader names in Blender often include a prefix of several letters, such as Glass BSDF or Subsurface Scattering BSSRDF. This prefix reports the mathematical component of the material visualization algorithm. The acronym BSDF stands for Bidirectional Light Scatter Distribution Function Model. Essentially, it is an algorithm that describes reflected light as well as a highly simplified subsurface scattering scheme. BSSRDF (Bidirectional Surface Scattering Distribution Function) is a bidirectional surface scattering distribution function that allows you to more accurately visualize the passage of light through a material.
When working with the node editor, it makes sense to enable one of the standard Blender add-ons called Wrangler node. This module will speed up your work in the Node Editor window. Let's say, to create a connection between some shader, for example Subsurface Scattering BSSRDF and a Subsurface Scattering BSSRDF node, just press Shift+Ctrl and click on the header of the Subsurface Scattering BSSRDF node block.

It is convenient to group text nodes. For example, if you create a Frame node and drag several nodes into it that form a property of some material, a solid group of components will appear that can be moved and used in your work.

For the activated Wrangler node add-on, which was mentioned above, this operation is performed even easier - using the keyboard shortcut Shift+P.
In some cases, it becomes necessary to temporarily disable certain nodes without interrupting the chain of connections in the diagram. In this case, you can simply “short” the node using the M key. As a result of this command, the input and output socket of the node will be automatically closed, and this component will no longer affect the material. Pressing the M key again will remove the short circuit.


The topic of our article today will be the Blender program, a review of which we have prepared especially for newcomers to the industry. This material will be useful to anyone who is just embarking on the path of 3D graphics and wants to learn more about the available software and its capabilities. We have already talked about such well-known applications as , and , and today we will look at a less professional, but no less popular 3D editor - Blender. So let's get started.
What is this program
Blender is a free software for creating and editing 3D graphics. Due to its cross-platform, open source, accessibility and functionality, the package has gained well-deserved fame not only among beginners, but also among advanced 3D modelers. As the program develops, it is chosen as a working tool for more and more serious projects, which is not surprising. In fact, this application is practically not inferior in terms of the number of features and functionality to more advanced 3D graphics packages. And at the same time everything is free.

The program will be an excellent help for getting acquainted with 3D graphics and the functioning of basic tools for creating and editing 3D objects, because Blender combines a set of options that are individually found in professional 3D editors. You can say without lying that it contains a little bit of every known program for creating . But at the same time, it is a completely independent, unique 3D graphics package, unlike any other application. Let's tell you more.
Blender is positioned as an application for creating and editing 3D graphics, rendering, animation, creating computer games and even sculpting. Quite a serious program that requires serious hardware resources, you say. But the package presents its first surprise at the stage of downloading the installation files - their weight is about 70 MB. Unthinkable for software of this level! However, the developers managed to provide the program with all the necessary functions that are fully functional and demonstrate excellent performance. An additional advantage is the stable and rapid development of the package thanks to a professional development team.
 Today it is a full-fledged 3D editor, in which the user is greeted with a fully programmable interface and a unique internal file system. At first glance, the program shell may seem inconvenient and incomprehensible, but after setting up the hotkeys, working in Blender becomes simple and convenient. The application uses Python as a programming language, with which you can create your own tools, edit the interface and the very principle of operation of the program. A pleasant bonus is the availability of the package on various operating systems of both bit levels: owners of computers running Windows, GNU/Linux and Mac OSX will be able to master the program.
Blender Features Review
Let's try to briefly cover all the capabilities of this unique editor, without going into details of the functioning of each tool. As with all programs, the user works in a kind of scene, or viewport. Here the 3D model is directly created and edited, as well as rotated, moved, scaled, etc. It also displays all changes associated with the animation, texturing and rendering processes. But more about everything. So what does Blender offer us?
Program functions
- 3 Dmodeling. It is represented by almost all existing methods of creating and working with three-dimensional models. You can design objects based on primitives, polygons, NURBS curves, Bezier curves, metaspheres, Boolean operations, Subdivision Surface and basic sculpting tools. Like 3Ds Max, the program offers a large number of different modifiers to apply to the model;

- Animation. Really well packaged. The user has tools at his disposal such as rigging (skeletal animation), inverse kinematics, mesh deformation, limiters, keyframe animation, editing vertex weights, etc. The dynamics of hard and soft bodies, as well as particle animation, are perfectly implemented;

- Texturing and shader sets. The program allows you to apply multiple textures to one object, and is equipped with a number of texturing tools, including UV mapping and partial texture adjustment. A number of customizable shaders add flexibility when working with materials;

- Possibility of drawing. Yes, this 3D modeling program provides the ability to create sketches with various types of brushes right in the application window. The current purpose of such a function is to help create 2D animation, for which this function is also equipped with flexible settings, in particular, working with layers;

- Visualization. The package is equipped with several built-in visualization tools and also supports integration with various external renderers;

- Basic video editor. A feature that even many advanced users of the program are not aware of. Blender has a built-in video editor, not as powerful as specialized software for this purpose, but quite good;

- Game engine. An extremely interesting feature of the program is the built-in game engine for creating interactive 3D applications. And the Python API application program interface allows you to independently make any adjustments to the created game.

Conclusion
This concludes the basic description of the program. Of course, I would like to say a few more words about the tools for creating and animating fur/hair, about working with fabric imitation, a liquid and particle simulator, and much more. We have not touched upon many useful options and capabilities of Blender, the review of which turned out to be as concise as possible. But if you wish, you can learn all this on your own. Fortunately, there is a lot of information on studying this program on the Internet.

In conclusion, it is worth noting that, despite the open source code and full availability of the application, Blender is a fairly powerful 3D editor that is actively being developed. Of course, it can't compete with professional 3D modeling programs yet. However, even now it represents an excellent alternative to expensive applications and copes well with the tasks. Blender is an excellent option for beginners in 3D modeling, as well as for those who do not intend to turn computer graphics into a source of income and intend to create for themselves.
It is no secret for any modeler that in order to successfully model objects, you need to be able to imagine the object in volume, to see it from the inside. Although this skill does not come immediately, with experience. I often model now in my head when I’m driving home from work, for example, and then at home I can only bring my plans to life. At first, many people find it difficult to even model a mug, but as a rule, all these problems come from wanting everything at once. It doesn’t happen like that, you have to learn everything. I want to tell you about a unique package, in my opinion, and its name is Blender.
It’s worth saying right away that the package is absolutely free and open source, which means that you don’t need to worry about the license, which means you can model, print, and sell products in it without fear of lawsuits and other troubles. Of course, you can always transfer some amount of money to the developers’ account, thereby helping the project develop further.
Another advantage of Blender for you will be that it is adapted for 3D printing. It has a Plugin to test the model for printability, as well as import into STL and OBJ format. In fact, Blender (I’ll write it like this) has a lot of plugins and extensions that allow you to customize it more flexibly, for yourself. In addition, the unit of measurement in it (despite different versions and opinions) is 1 mm, i.e. 1.00000 = 1 mm. This means that 0.0010 is 1 micron. In fact, the accuracy of the model's printing is limited by the capabilities of your printer.
Many people convinced me that there are a lot of CAD systems with which Blender will never be on par. Perhaps they are right in some ways, yes, Blender does not know how to work with drawings, but the CAD system cannot build a sculpture of, say, Venus, but Blender can. In general, in Blender, many objects, vases for example, are drawn by pressing several buttons, which takes less than a minute. High-level support for Boolean operations of addition, subtraction, and remainder. Work with text at a high level.
In general, Blender is a serious package that allows you to make animation, films, design and even games.
I mastered Blender in less than a week, this only applies to modeling, of course, I quickly got used to the hot keys and now I very rarely remember 3Ds max)) Below I provide you with links to Blender itself, as well as to the training course that I took . After completing this course and reading Blender Basics, you will be able to confidently work in Blender and, as a result, print your models.
http://www.blender.org/ - official website where you can download Blender for your OS.
http://b3d.mezon.ru/index.php/Blender_Basics_3-rd_edition - A book on learning all the basics of Blender (a must read)
http://www.youtube.com/watch?v=7GCtVM-8naY&list=PLC15BA37A75D1F0D1- a YouTube channel where the author tells the most important things and teaches you how to create a mug.
http://www.youtube.com/watch?v=WgW90_8zEK8- a master class from a person modeling for printing for jewelry.
http://www.youtube.com/user/fastaboutblender/playlists- Lessons on YouTube from a professional, explains everything from package settings to the smallest nuances.
You can always search the net for more Blender related stuff. After watching these videos, reading the book, and of course practicing, you will be doomed to success.
The archive contains simple practical work to be performed in the Blender 3D modeling environment. The material contains instruction cards and completed work. Compiled using online resources.
"PR 3 Airplane"Practical work “Airplane”
Exercise
Method of execution
Illustration
Make a rectangular parallelepiped from a cube
Use the S key to change the dimensions of the cube: along the X axis – 3.0; along the Y axis -1.5; Z -0.5
Show vertices hiding behind the front ones
Click on the button Visible Selection without leaving edit mode
Select edges
Press the edge selection key and select edges one by one while holding down the key shift
Turn on the Extrude tool and pull the front part forward
Special button on the Mesh Tools panel of the button window: Extrude or using the hotkey E (English letter).
Pull out while holding down the key ctrl .
Taper the vertex into a cone
Press key S and while holding down the key ctrl , move the mouse until the size of the top part is equal to 0.1.
Create the top of the plane and the tail.
Repeat steps 5,6,7.
Create wings.
0 on NumLock
View document contents
"PR 4 Castle Tower"Appendix 3
Extrusion (extrusion) in Blender.
Practical work “Castle Tower”
Exercise
Method of execution
Illustration
Launch Blender. Enable edit mode
Delete cube
Delete key
Switch to top view and Add mesh-ring
Numpad - 7
Add – Mesh - Circle
Switch to front view and start extruding
Narrow the top of the ring
Press the S key to turn on the zoom mode and hold down the key again. Move your mouse horizontally and left-click once the top size is zero (this can be seen in the bottom left corner of your 3D window).
Select the vertices of the base of the cone
Select the vertices of the bottom of the cone using the vertex selection key.
Narrow the base of the cone
Start extruding (key E) and then immediately press S. Make the inside of the tower a little smaller. When your tower body is wide enough (in your opinion), left click to lock the size.
Creating a tower body
Extrude the tops down. Press the E key and, holding down the CTRL key, drag down.
Adding other elements
Switch to camera view
0 on NumLock
View document contents
"PR 5 Castle Walls"Extrusion (extrusion) in Blender.
Practical work “Castle walls”
Exercise
Method of execution
Illustration
Switch to top view. Add 5-way mesh-ring. Give it the right size.
Numpad - 7
Add – Mesh – Circle
Align the tower with the wall
Exit editing mode And select tower using . "Capture" your tower and move it to one of the corners. You don’t need to place the center of the tower exactly at the corner of the pentagon, but move it slightly outward so that you can set the thickness of the walls
Add the remaining towers
Copy the tower ( Shift + D ) and move to the remaining corners.
Add volume to the walls
Select the ring and enter edit mode. Start extrusion. Resize the selected part to give the ring some width.
Give walls height
Leave edit mode and switch to front view using the key on the keypad. Your wall probably now starts somewhere in the middle of your tower, move it to floor level. Then extrude the walls upward.
Switch to camera view
0 on NumLock
View document contents
"building model"Practical work “How to make a building model in the programBlender »
Instructions for work: when you press any key, the mouse pointer should be on the working field (on the field where the object is located).
Exercise
Method of execution
Illustration
Start Blender and reduce the cube.
Press the S key and move the mouse.
From this cube we will create the outlines of the building.
To begin, move this cube up the Y axis and select the 4 side faces of the cube.
To do this, press the Z key and select Edit Mode.
Then select the 4 side faces of the cube and press the E key (extrusion or extrusion key) to extrude them.
Please note that when you change the direction of your contour along the Y and X axes, you will need to do a 2nd extrusion, and then select the four faces you created and only extend them downwards, as in the previous case.
Make a copy of the resulting model.
Now you need to select the entire created model and use Duplicate Object to make a copy of the model.
Select the console for further editing.
Select the second icon from the lower consoles and use it.
Rotate duplicate
Rotate the duplicate of your model by grabbing the green arc and moving the mouse.
We adjust the duplicate.
Choosing a type
Now we select Object Mode instead of Edit mode in the same console. Press the Z key.
Moving the selected model
We connect the sides of the building.
Select Edit Mode and select any of the sides (figure from point 7) and drag it out (figure from point 8). Just to do this, select this icon in this console. .In this way we connected the bottom side of the building with the top. The same principle applies to the other parties.
Consider the object.
You can use the scene overview control keys.
“1” – front view.
“2” – rotation of the view down.
“3” – right (side) view.
“4” – rotate the view to the left.
“5” – orthographic view.
“6” – rotation view to the right.
“7” – top view.
“8” – rotate view up
Note: after completing steps 1 to 11, you will only have the frame of the building without windows and doors. You can make windows and doors yourself.
View document contents
"pyramid"Instruction card
"Pyramid"
Launch Blender, delete the cube, set up projection windows.
X, then Enter (or Delete, then Enter); divide the working field into three windows - projections (RMB, Split Area); 1 window: View – Front (front view); 2nd window: View – Top (top view); 3 window: View – Camera (perspective).
Add an object to the scene
Spacebar; Add -Mesh -Torus
Scale an object
Key “S” - (proportional);
Key “S + Z” - (increasing the height of the ring);
Moving an object
Key “G +X” - along the X axis (length);
Key “G +Y” - along the Y axis (width);
Key “G + Z” - along the Z axis (height).
Repeat steps 2, 3, 4 – two more times
Add an object to the scene
Spacebar; Add -Mesh - UVsphere
Repeat steps 3, 4
P
perform smoothing of objects
Select an object - right-click (several objects - Shift + RMB; press F 9 (smoothing panel) - Set Smoth;
Add materials
Select an object - right-click; press the F 5 key (material panel) – add new – button - col (select color).
Repeat step 8 for all objects
For independent work:
View document contents
"PR 1 Drop"Annex 1
Objects in Blender. Practical work "Drop".
Instruction card
Exercise
Method of execution
Illustration
Delete, then Ok.Add a sphere to the scene.
Switch to front view.
Zoom in on the sphere.
Point the mouse over the sphere and roll the mouse wheel.
Switch to editing mode.
Reset selection.
Select the topmost vertex of the sphere.
Right-click on the highest point of the sphere.
Enable proportional transition editing.
Press O (English letter "ou").
Move the vertex up and perhaps a little to the side, after adjusting the number of vertices to be moved.
G - enable movement mode.
Mouse wheel - adjustment of covered vertices (circle visible).
Move the bottom vertex up slightly.
Similar to paragraph 7 and paragraph 9
Switch to object mode
Give the resulting object smoothness.
"Set Smooth" button on the Editing panel.
Switch to camera view
Launch Blender and delete the cube.
Delete keyAdd a cylinder to the scene.
Select: Add - Mesh - Cylinder.
Make sure you are in object mode.
Reduce the cylinder in all axes to 0.3 of its previous dimensions.
Press S, then, holding Ctrl, move the mouse until the values in the lower left corner of the 3D window are equal to 0.3.
Front view.
Enlarge the cylinder along the Z axis by 7.5 times.
Press S, then Z, and, holding Ctrl, move the mouse until the value in the lower left corner of the 3D window is equal to 7.5.
Pin by left-clicking.
Rotate the cylinder 90 degrees along the Y axis.
Press R, then Y, and, holding Ctrl, move the mouse until the values in the lower left corner of the 3D window equal 90.
Pin by left-clicking.
Duplicate the cylinder. Move the copy along the X axis so that the two cylinders touch each other
Duplicate: Shift + D.
X, then move with the mouse.Since the H-O-H bond angle in a water molecule is 104.5 degrees, the second cylinder should be rotated
along the Y axis by 75.5 degrees (180-104.5).Align the ends of the cylinders.
Move with the mouse using the red and blue axis arrows.
Place the 3D cursor at the point where two cylinders connect
Left click
Add a sphere (which will serve as a model of the oxygen atom
Select: Add - Mesh - UVSphere.
Duplicate the sphere twice, and transfer the duplicates to the ends of the cylinders.
Duplicate: Shift + D.
Move with the mouse.
Reduce the outer balls to a value of 0.8 from the original.
S. Move the mouse while holding Ctrl.
Combine all model elements.
Selecting a group of elements: alternately clicking the right mouse button while holding down the Shift key.
Merge: Ctrl + J.
Switch to camera view
Adjust the placement of the model on the stage
Using the Move and Rotate tools
Practical work "Snowman".
First stage. Creating the Foundation
Open Blender.
We clear the work area by deleting the original primitive. Click on Delete and confirm the deletion.
A snowman can be made from a few simple parts. Let's start with its base, three spheres of different sizes. There are two ways to add a new scene object. Either on the top panel select Add - Mesh - UV Sphere, or press SHIFT+A and select the sphere there. Perform the operation three times.
Once the three spheres are ready, you can start assembling the snowman. By right-clicking and selecting one of the spheres, use the S key to change the size of the sphere. Thus, we get three spheres of different sizes.
We get the base of the snowman.
Second phase. Snowman decoration
1. The snowman's face consists of three carrot elements - a nose and two eyes. Making the eyes is easier than one of the foundation clumps. We add two spheres, but much smaller in size, and place them on the upper lump.
2. Make a carrot from a cone. SHIFT+A and select the cone there, but in order to make a nose out of it, you will have to turn it over. At the bottom of the screen, select the pointer, which is located to the right of the arrow and on the cone itself, measurements appear on three axes, they can be changed and the cone will rotate. Having turned it ninety degrees, we install it on the snowman’s head.
Let's move on to the hands. We make them from cylinders. Press the key combination SHIFT+A and select the cylinder there. We flip it over in the same way as a cone, but the default length of the cone is too short for our model. Therefore, select Edit Mode and right-click on the top edge, drag it up. Turning it over, place the hand on the body. We repeat the steps for the second hand.
3. A snowman needs a hat. We will make a bucket from a cylinder. Edit from the Edit Mode menu. Select the top face and reduce its size.
4. Add some color. In the right panel there is a materials menu, you can select colors and paint the snowman. The result will be a color image.
5. After rendering, our snowman does not look bright. The problem is not enough light.
In the list of objects, you need to find a light source and make four copies of it and place it above the snowman to illuminate the object from four sides.
I, as the author of this blog, was very pleased to learn about a person who not only knows Blender well, but is also able to take on the difficult task of learning!
After contacting readers about learning Blender, almost no one has contacted me yet. But today, I am pleased to announce such a specialist. Let's meet!Blender3D from modeling to animation
Stepanov Anton Yurievich
Contacts:
Skype: tony_step
Email: [email protected]
instagram.com/tonystep1110
www.youtube.com/user/tonystep3d/videos
tonystep.blogspot.ru
My name is Anton. I am 25 years old. I started studying 3D graphics in 2007, studying the 3ds max 7 program. I accidentally came across a disk with many different programs, and a small quick start manual turned out to be specifically for 3ds max, so I installed it. At that time there was no stable Internet and very, very little educational material. Therefore, I had to delve into F1 (help for the program). With the advent of a stable Internet, learning has also accelerated.
In 2009 I switched to Maya because I realized that I wanted to learn how to create rigs and character animation.
In 2012, I received a task to implement a commercial project, the software must be licensed, so I decided to try Blender 3D, since I could not afford to purchase a license for the software I was using. I was surprised that Blender is a very easy program, it took me a week to get used to it and start working, it launches instantly and has the same functionality as Max or Maya. Frequent releases and high-quality plugins also contribute to the professional use of Blender. In addition, there are many high-quality lessons that greatly speed up learning.
Since then, Blender has become one of my main tools for creating 3D models, animation, rendering, etc.
Course program
1. Interface, navigation are the main tools in Blender.
Here we will learn how to scale and move the viewport, rotate around an object, and also get acquainted with the necessary tools for working with 3D models. Let's study the program interface, hot keys, and basic settings for comfortable work.
2. The concept of topology, rules for constructing a grid by A. Kyshtymov.
3. Sculpting, dynamic topology, subdivisions.
Let's talk about sculpting in Blender, what tools exist for effective sculpting, and brush settings. What a wonderful thing dynamic topology is, and how it is implemented in specialized sculpting programs (Sculptris, Zbrush). I'll tell you about some of the subtleties and tricks that I use in sculpting.
4. Retopology, visual mapping, texturing.
What is retopology and what is it used for? Retopology of low-poly models and retopology of characters for animation in films and cartoons. Creating character texture mapping (UV-mapping) and basic texturing techniques in Blender and Photoshop.
5. Render Cycles, nodes, “baking” in Cycles
Let's talk about how to visualize a “beautifully” created model. What is Cycles render and why does it need nodes? Like “oven in a gopher.”
6. Setup, restraints and basic tools.
A very long, tedious and scary topic - a character setup, but extremely interesting. There's nothing cooler than teaching your character to move.
7. Animation, basic rules of animation, animation keys, animation curves.
Animation, animation and more animation. In these lessons we will learn how to animate a character, create basic animations (walking, running, jumping), and also learn how to create animatics, dialogues and action scenes.
Question answer
What time do classes take place?
The time of the lesson is discussed with the teacher. The duration of the lesson is no more than one hour.
How will the classes be held?
Classes are held online (Skype) individually. The teacher displays his screen and explains the topic of the lesson. The student receives homework, which he must complete within the time period agreed with the teacher. During the deadline for completing homework, the student can consult with the teacher for 10 minutes (free of charge).
What will be discussed in class?
You will also receive full video recordings of the lessons so you can watch them again.
Depending on the terms of the contract, you get the opportunity to prepare your own demoreal (video presentation of your work) for your portfolio.
The price of lessons depends on the complexity of the topic and is paid per hour. Payment is made (preferably) by bank transfer.
1. Interface, navigation, basic tools in Blender (150 rubles/hour).
2. The concept of topology, rules for constructing a grid by A. Kyshtymov (150 rubles/hour).