Download and install custom fonts for Office. How to increase or decrease font size using keyboard shortcut in Excel? How to save a font in Excel
To change the font of one or more cells in Excel, you must first select them. Next, you can use several methods.
1 way
On the toolbar (Home tab) there is a section called “Font”.
Here are the tools that allow you to change:
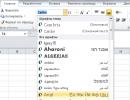
1) Name of the font (typeface). The font is selected from the drop-down list.

By hovering the cursor over a particular font, you can see how the design of the text in the selected cell changes.
2) The font size can be increased or decreased. To do this, you need to open the list with font sizes (minimum - 8, maximum - 72) and select the desired value.

If you need to specify a font size less than 8 or greater than 72, you can enter the desired value in a special field.

To increase and decrease the font size, there are also “Increase Font” and “Decrease Font” buttons.
3) Font color. To access the list of colors, click on the small arrow next to the underlined letter A.

If you need a full palette, then select “Other colors”.

4) Font style - bold, italic or underlined.
For bold font, click on "F" or use the key combination "Ctrl" + "B".

To apply italics, click on “K” or use the key combination “Ctrl” + “I”.

To highlight the contents of a cell, click on the “H” or use the keyboard shortcut “Ctrl” + “U”.

You can also do a double underline. To do this, click on the arrow next to the “H” button and select “Double underline” from the drop-down list.

You can assign several types of styles at once. For example, bold and italics.

Method 2
Right-click on the desired cell (if it is a range, then on any cell in the range) and select “Format Cells” from the context menu.

A dialog box will open in which you need to select the “Font” tab.

Here you can select all the necessary formatting parameters - font name, style, color, size, modification.
When creating new workbooks, Excel 2013 (and many other versions) installs the Microsoft proprietary font, Calibri, by default. Not everyone likes it, and sometimes it is simply necessary to use other fonts in documents, especially if this is prescribed by corporate standards. Let's look at how to make Excel use a different font when creating new workbooks and sheets.
For example, we will change the font from Calibri to Tahoma.
In Excel, you need to go to the File - Options menu and there, in the “When creating new workbooks” section, select the desired font and its size:

This is officially recommended by Microsoft and will work if you launch Excel from a shortcut or create new workbooks there. But this will not work, if you are used to creating documents from the context menu with the right mouse button. The new sheet created will still be in the Calibri font.
To change the font in documents created using the right mouse button, you need to change the template from which the new document is created. It is located in the file path "C:\Windows\ShellNew\EXCEL12.XLSX".

You just need to open it, change the font to the desired one and save. Since the location is system, you will need administrator rights. Just in case, first copy the original file for backup and replace it with the edited one. Try creating a new document with the right mouse button and make sure everything works.
Each newly created workbook opens with default settings. But what if you are not satisfied with any of the standard settings of the book? For example, you need a book to contain only one sheet. Or perhaps you need to change the default font or its size.
Or maybe you want to hide the grid lines that the sheets contain. Or do you want the standard header to always appear when printing. You can change these types of settings in the dialog box Excel Options. However, other changes require the use of a template.
Change default values in the Excel Options dialog box
In chapter Are common dialog box Excel Options There are four parameters that control settings for new books (Figure 15.1).
You can specify the text font, font size, mode and number of sheets. These changes apply only to new books; they will not affect existing books.
Creating a book.xltx template
To set options for new workbooks that cannot be specified in the Excel Options dialog box, you must create a special template file called book.xltx and then save it in the correct location on your hard drive.
To create a new default workbook template, you need to change the default settings for a blank workbook. The following is a partial list of settings that you can change.
- Number of sheets. Add or remove worksheets, or even change their names.
- Styles. Use the style gallery (located in the group Styles tabs home) to customize styles. By default, all cells are styled Ordinary, so to change the default font (including fill color, number format, frame size and style), you need to change this style. To do this, right-click on its name in the style gallery and select the command from the context menu Change. Then make the necessary changes in the dialog box Style.
- Printing options. Change these settings on the tab Page layout. For example, you can enable headers and footers, set the margin size.
- Column width. If you don't like the default column width, change it.
- Graphic arts. Insert one or more graphics, such as your company logo or a photo of your cat.
File Save As. In the dialog box Saving a document
When the new default workbook looks the way you want, select File Save As. In the dialog box Saving a document follow these steps:
- From the dropdown list File type select format Excel template(*.xltx). If the template contains VBA macros, select Excel template with macro support(*.xltm).
- In field File name enter book.xltx(or book.xltm, if it contains macros).
- Save the file in a folder XLStart.
Folder XLStart can be located anywhere. To determine its location, click Alt+Fll to activate VBEditor. Then click Ctrl+G to open the window Immediate, enter the following expression and press the key Enter:
? Application.StartupPath.
Close the saved file. Now, every time you start the program, a new empty workbook will use the template you created. In addition, when you press Ctrl+N a new book will be created based on your template.
If you ever need to use a workbook with Excel's default settings, choose the command File Create, and then specify the item A new book.
Of course, in Excel, you can change the font size in the Font Size dropdown, but if you want to increase or decrease the font size just by using some keyboard shortcuts, how can you solve it in Excel?
Increase or decrease font size using keyboard shortcuts
Here are some keyboard shortcuts to increase and decrease the text font size for the selected cell(s), please do the following:
Increase font size, click Alt+H and then click FG keyboard keys;
Reduce font size, click Alt+H and then click FK keys on the keyboard.
Increase or decrease font size using special keyboard shortcuts
If the above shortcut keys are difficult to remember, you can create your own shortcut keys here. Please follow these steps:
1 ,Hold ALT+F11 and opens Microsoft Visual Basic for Applications window.
2 . Click Insert > module, and paste the following code into Module window.
VBA code: Increase or decrease font size using special keyboard shortcuts:
Sub MakeBigger() Selection.Font.Size = Selection.Font.Size + 1 End Sub Sub MakeSmaller() Selection.Font.Size = Selection.Font.Size - 1 End Sub
3 . After pasting the code, save and close the window and click developer >Macro, see screenshot:
4. In the appeared Macro in the dialog box select MakeBigger macro in the list, and then click Options button to go to Macro Options dialog box, specify the key combination to increase the font size in Hotkeys section, see screenshot:

5 , Then click OK, select MakeSmaller macro from the list, and then click Options button to go to Macro Options dialog box, specify a key combination to reduce the font size in Hotkeys section, see screenshot:

6 , Then click OK and close the macro dialog, now when you click Ctrl+O, the selected cell font size will be increased, and when you click Ctrl+P, the font size will be reduced as needed.
Recommended tools to improve productivity in Excel
Kutools for Excel helps you always finish your work ahead of time and stand out from the crowd
- More than 300 powerful advanced features designed for 1500 work scenarios, increasing productivity by 70%, giving you more time to take care of your family and enjoy life.
- No more memorizing formulas and VBA codes, give your brain a rest.
- Become an Excel expert in 3 minutes. Complex and repetitive operations can be completed in seconds,
- Reduce thousands of keyboard and mouse operations every day, say goodbye to occupational diseases now.
- 110,000 high-performing people and a selection of 300+ world-renowned companies.
- 60-Day fully functional free trial. 60-day money back guarantee. 2 years of free updates and support.
Provides tabbed viewing and editing in Microsoft Office, much more powerful than browser tabs
- The Office tab is for Word, Excel, PowerPoint, and other Office applications: Publisher, Access, Visio, and Project.
- Open and create multiple documents in new tabs in the same window, rather than in new windows.
- Increases your productivity by 50% and reduces hundreds of mouse clicks for you every day!
Most applications (such as Microsoft Word, Excel, and PowerPoint) include fonts that are automatically installed when you install the software. For example, applications designed for document design, such as Microsoft Publisher, often come with a large number of additional fonts that can be used in any other program on your computer.
However, sometimes you may need to install custom fonts that you have created, purchased, or downloaded. In this article, we will talk about how to install these fonts for use in Microsoft Office.
Note: For information about embedding fonts in Microsoft Office Word documents and PowerPoint presentations, see Embedding Fonts on the PPTools website.
Finding fonts on the Internet
In addition to fonts installed with other applications, you can use fonts downloaded from the Internet. Some are sold, some are distributed as shareware, and some are available for free. This Microsoft site provides links to companies and designers who develop and distribute fonts.
Once you find the font you want to use in your Office application, you can download and install it using your computer's operating system. Because fonts operate at the operating system level, they are not downloaded directly into Office. You need to install the font in the folder Fonts in the Windows Control Panel, after which it will be supported automatically in Office. On a Mac, you need to add the font through the Fonts, and then copy it to the Windows Office Compatible folder.
Many third-party companies package fonts in ZIP files to reduce their size and speed up downloading. If you downloaded a font saved as a ZIP file, you can open it by double-clicking its icon.
Installing a downloaded font
The downloaded font must be installed on the operating system. Microsoft Office will then be able to recognize and use it. For detailed instructions, select your operating system from the drop-down list below.
Locate the font file you downloaded (most likely it has a TTF or OTF extension and is located in your Downloads folder). Double click it.
Note: If the file has a ZIP extension, you must open it and extract the font file.
The font will open in the font viewer. Click the button Install font. A window will open Fonts.
Close book font. The font should now be available for Microsoft Office.
Note: If you're using Office 2011 for Mac, you may need to drag and drop fonts into Windows Office compatible collection Book font to make it available to Microsoft Office.
Sharing files containing custom fonts
When you install custom fonts, they will only work on the computer on which they are installed. Fonts installed on your computer may appear differently on another computer. Text formatted in a font that is not installed on your computer will be displayed using Times New Roman or a standard font.
So if you plan to share Microsoft Office Word, Excel, or PowerPoint files with other people, you should know what fonts are included in the version of Office the recipient is using. If the fonts are not included in this version, you may need to embed them or provide the fonts with your Word file, PowerPoint presentation, or Excel spreadsheet. For more information, see the article