Creating and setting up a Minecraft server: step-by-step instructions. Creating a server in Minecraft What is needed to create a minecraft server
Now many fans are very interested in setting up a Minecraft server, because not everyone manages to do it the first time. This is where detailed instructions and the most important problems that arise in most cases among inept programmers are provided.
Before that, you should know the types of “packages”. There are several of them: original (clean) and with a set of certain mods. Having dealt with the standard version of the server of a popular game, it will be much easier to understand the essence of other varieties.
Brief introduction
For every creator of such a server, the most important thing will be attendance. Therefore, first of all, you need to know how to create a live and fairly visited server without extra costs. In fact, setting up a Minecraft server is carried out in three simple steps:
The first item on this list can be completed in just half an hour, the second may require a whole day to fully develop, but the third requires an indefinite amount of time.
Each gamer can simply create a server to play there with his friends. But it will be much more interesting to develop it in order to glorify it among the majority of players. Promotion will require a lot of time and effort, although this will have nothing to do with the game. To do this, you will need to create a separate website, promote your own advertising on third-party resources, and so on.
Download all necessary programs
The first step is to ensure the correct operation of the server, for which the Java package on the computer will definitely come in handy. It must be installed first by downloading it from the official website. If the package is already available on your personal computer, then the game client will launch instantly. In this case, additional installation of various programs will no longer be required.

Next, you need to visit the game developer’s download page and download the server part itself. Many versions are located in the MultiplayerServer section, where each player has an excellent opportunity to choose the most suitable one for himself. The file must be saved in a specific folder, which in the future will become the basis for a new “package”.
Like Minecraft without much effort, we now understand, but the next steps will not be so simple.
Creation and configuration
In this section, setting up the Minecraft server will be a little more complicated, but overall there will not be any particular difficulties. After downloading the server part to a personal computer, it must be launched. First, you need to wait for the generation to complete, and at this time there will already be several new files and folders in the database. All the main settings can be found in a file called server.properties. It is best to load it in a text document, then all the symbols will open without problems.
Creating a Minecraft server without registration is quite easy, since the developers took care of the convenience of users and removed all additional items that take a certain time (messages to a mobile phone for confirmation, letters to the mail, and so on).
It would seem that all the basic settings have been completed, and you can already start enjoying your favorite game. But still, for complete safety and reliability, it is worth performing a few more settings:
- You don’t have to touch the server-ip field, since immediately after the game starts, all the necessary parameters will be entered automatically.
- The gamemode field will need to be filled in with the name of the game mode. All players who join the server will be automatically directed to it.
- When you enable the white-list, you must add yourself to the white list or make yourself an operator.

If you change any of the parameters, the server must be restarted in any case so that the program begins to function normally and does not cause glitches, lags, and so on. Better yet, configure additional settings while the server is completely offline.
Connecting to the server
It should be noted that not only users of the same local network can play on the same server, but also other gamers from the Internet. Most often, a server is created on the computer where the game itself will be played. In this case, you must enter the connection address: 127.0.0.1 or simply localhost. This Minecraft server IP will, of course, be used by the network interface. Its advantage is its availability even when there is no network card on the computer device.
Now Minecraft servers with a launcher are becoming more and more popular. Note that in them all these settings items will be exactly the same. All difficulties that arise lead to the need to check the antivirus and, just in case, the firewall. You may have to add the server with the port to the exceptions, but such problems are very rare, and professionals can find many solutions for them.
Setting up via local network
Now playing on the Minecraft server will be very interesting and even educational for all players. It will be much easier to set it up here. Any beginner in this business will love this option. Among other things, the local network guarantees a normal connection to the service and a significantly lower number of errors.
Players have the opportunity to open the world from the game in single player mode for the local network. This is done quite simply and quickly: you need to load the world itself, press pause and select an item in the menu called “Open the world for the local network”. But you should definitely take into account that the server owner in this situation is significantly limited in management capabilities.

Of course, Minecraft servers with a launcher also belong to the local network, and problems with them are extremely rare.
Connection
As you know, in order for other players to connect to a specific server, their personal computers must be located in the same local network together with the base server, that is, with the owner’s computer.
There is a special line for the address where you need to enter the data of the computer with the main server.
Setting up a game using the Internet
When using the Internet, setting up a Minecraft server is much easier and faster. The static address does not contain any problems, so you can safely work with it. You can find out through special services, of which there are now a large number on the Internet.
To connect other players to the desired server, you must enter this address and then click the "Connect" button. Some problems can sometimes arise with this point, but here a program called Hamachi will come to the rescue. It allows a computer to assign an external static address. Knowing it, all players who want to connect will be able to carry out this action in a matter of seconds. In addition to this program, you can find some more similar ones that will function on exactly the same principle.

Thus, you can create a good server on which quite a lot of active players will be collected in the future. Modern gamers visit free Minecraft servers quite often, so their number is rapidly increasing.
Administration
The administration process is easy. At this time, the player will have to manage and ensure correct operation without unnecessary crashes. The command line will be a good helper in this matter.
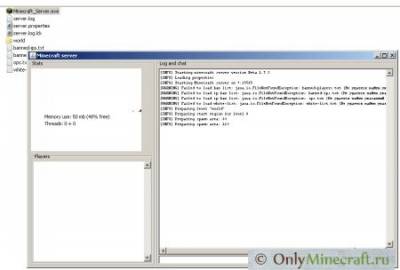
The server GUI windows contain interesting elements:
- The information window shows the necessary information on the use of RAM. There is a dynamic graph on which everything is clearly expressed.
- The list of players shows all the nicknames of people who connected and started playing on this server.
And the most important part of these windows is the command line. She always helps in any matter related to computers, so this couldn’t be done without her. With its help, the administrator is given the opportunity to ban players, whitelist them, grant powers, and so on.
And Minecraft servers without registration are available to absolutely every gamer in different countries.
Reasons for defining a server as offline
Playing on the Minecraft server offline is impossible, so when such a problem appears, you must immediately look for ways to solve it and eliminate it.
You need to immediately check the IP, it must be external. If you do not understand this definition, you should definitely call or write a letter to the support service, where they will sort out this issue.
An external address using a router must be forwarded via Virtual Server or Port Forwarding. If not, then you should perform this action, it will not take too much time.

If this is not the problem, then the last option is to disable the antivirus. While connecting to the server, the antivirus itself must be completely disabled, and then added to the exceptions.
Unfortunately, Russian Minecraft servers quite often produce similar problems.
Defining the server as Unnamed Server
Unfortunately, free Minecraft servers more often present this problem, but there are still methods to combat it.
The standard file through which all settings were made should contain the following option - motd=Minecraft Server Name. If it is missing, you need to add it to the very end, changing it to the server name.
If the result of such actions is unsuccessful, you will have to configure everything manually. To do this, you need to go to the server and click "Edit".
Reasons for removing a server from monitoring
Now the IPs of Minecraft servers play an important role in promotion, so problems can also occur because of them.
First, you need to try to independently search for the server by address, typing it into the address bar present on the main page. There may also be a situation where the server will not be deleted, but simply hidden for other players. And this happens because it is offline for two hours or more. In this case, the server will return to its place after half an hour has passed online.

Now you know how to promote your own Minecraft server. Android is a platform that also allows you to play such a wonderful game, but the settings here will be completely different. Despite the graphics and image clarity, this program has many fans on phones and tablets.
So, today I will tell you how to create a minecraft server. To begin with, I will tell you about a regular server, and in the next article we will look at running a server on bukkit. That is, today's server will not support mods, but it is quite enough for playing with friends, and its installation is simpler.
In fact, there is nothing difficult here, but many beginners have a lot of questions related to the process of starting a server, which I will try to answer today in a form that will be accessible even to those who are not particularly computer friendly.
We will install a server for Windows, since I have not met a single person with Linux who could not set up a server :)
In order to create a server on your home computer (or not on it), we will need software available at the link. This version is best for beginners, as it is the most visual, if you just want to play with friends online, then this is a great solution.
And so, we place this file in a separate folder to make it more convenient, and run it. We are waiting for a line like “ Done (10,146s)! For help, type “help” or “?”". It took me about 10 seconds. Let's stop the server; to do this, enter “stop” in the input window at the bottom right and press the Enter key. Let's now look at setting up the server, because this is the only way we can create a minecraft server exactly the way we need it. Let's look at what appears in our server folder:
- banned-ips.txt - list of players banned by ip
- banned-players.txt - list of banned players
- ops.txt - list of ops or, more simply put, list of admins
- server.log — server log. Any information that you are unlikely to need is recorded here.
- server.properties - server settings
- white-list.txt - list of players who have access to the server
Let's take a closer look. The banned-ips, banned-players, ops and whitelist files are a list of players. There should be one nickname on each line. If you want, you can enter your nickname in ops.txt, but I recommend using the command that I will talk about towards the end of the article. Let's take a closer look at the server.properties file and consider all its points. Most items can only accept the values “true” (“allow”) or “false” (“deny”). Here is a list of all commands:
- allow-nether=true — whether to allow the nether world on the server
- level-name=world — world name. Defines the name of the folder in which your world will be stored
- enable-query=false — whether to allow server statistics queries. Leave it as is.
- allow-flight=false - should cheaters be allowed to fly? This does not apply to creative flight
- server-port=25565 — server port, in most cases there is no need to change it
- level-type=DEFAULT - server type, if you put “FLAT”, you will get a flat map
- enable-rcon=false - allows you to gain remote access to the console. Don't ask, I don't know how.
- level-seed= - level seed, for it to take effect, you will have to wipe (delete the “World” folder)
- server-ip= - in most cases should be left empty
- max-build-height=256 — maximum construction height (one of: 64, 80, 96, 112, 128, 144, 160, 176, 192, 208, 224, 240, 256)
- spawn-npcs=true - whether to spawn villagers
- white-list=false — whether to enable the white list
- spawn-animals=true — whether to spawn animals
- online-mode=true - if false, then pirates will be able to enter
- pvp=true — whether to allow pvp
- difficulty=1 difficulty level (0 - Peaceful, 1 - Easy, 2 - Normal, 3 - Hard)
- gamemode=0 - if you set “1”, then all players will be creative
- max-players=20 — number of slots on the server
- spawn-monsters=true - whether to spawn hostile monsters
- generate-structures=true - whether to generate villages, treasuries, fortresses...
- view-distance=10 — visibility range in chunks, I recommend not changing it
- motd=A Minecraft Server - a message that is displayed in the list of servers. Must be no more than 60 characters
Actually, after changing the settings and saving them, you can start the server and enjoy the game. Oh yes, here is a list of commands that is available from the server application itself (where we wrote “stop”). These commands are also available from the game if you are Op. In this case, you should add a “/” character before the command. Here is the list itself:
- help - displays a list of available commands
- kick<ник>— kicks the player (disconnects from the server)
- ban<ник>- bans the player
- pardon<ник>- unbans a player
- ban-ip
— adds an IP address to the list of banned ones - pardon-ip
— removes the IP address from the list of banned ones - op<ник>- makes the player Op
- deop<ник>- demotes Opa to a regular player
- tp<ник1> <ник2>- transfers the first player to the second
- give<ник>
[quantity] - gives the player an item with the specified id. The quantity is not required. - tell<игрок> <сообщение>— sends a private message to the player
- stop - stops the server
- save-all - saves the map
- save-off - disables landscape saving, usually not used
- save-on - enables saving the landscape
- list - displays a list of players
- say<сообщение>— displays a message in the chat on behalf of the server
- time set<количество>— sets the time. A game day lasts 24,000. If we set the time to 0 (time set 0), we get morning. And if you put 12,000, then evening
- time add<количество>— adds a certain amount to the current time
- gamemode<ник> <значение>- changes the player's game type. The value can be 0 (survival) or 1 (creative)
- toggledownfall - enables or disables precipitation
- xp<ник> <количестве>— gives the player a specified amount of experience (0-5000)
That's all, now you know how to create a server in Minecraft, have a good game on your server!
As fun as Minecraft's single-player mode is, multiplayer, where you can play with friends, is much more fun. There are several ways to play Minecraft in multiplayer. One of them is to create a Minecraft server that you and your friends can connect to. Of course, existing servers can also be used for this purpose.
In this guide, we'll show you how to create a Minecraft server for you and your friends on your home PC.
First you need to download the .jar version of the server
Place the downloaded jar file in a folder. It doesn't matter where she is. Next, you need to prepare the file that will launch your server.

Creating a Batch File
Create a new text document and add the following lines to it:
@echo off
title run-minecraft
java -Xms1024M -Xmx2048M -jar minecraft_server.jar nogui
pause
This means we want java to run our server "minecraft_server.jar" with 1024 megabytes (1 gigabyte) of RAM. If an error appears, reduce the RAM values to 512 MB, it helped me and the server started!
To run the server with more memory, simply change the -xms and -xmx values. Moreover, they must be equal to the numbers 64, 128, 256, 512, and so on.
To save a file in .bat format, click the File button in the upper left corner of the screen, select Save As, then under the “File name” field, select All files. It is very important. Name your file start or start server and click Save. Then change the file extension from .txt to .bat
Or you can download my bat file here: (to change it, right-click on the file and select “Edit”).
User agreement and server launch
After completing the previous step, start your server. First, it will close instantly as you need to accept the user agreement. To do this, open the text document with the agreement that appears in the folder, change the line eula=false to eula=true, save it and start the server again.

Your server should start normally and start generating the world and creating other important files like server.properties, whitelist, banned-players and so on.

Connecting to the server
To connect to the server we just created, you, as the owner, just need to go to multiplayer and add a server, specifying “localhost” as the IP address.
As for your friends, you can give them your external IP address, to find it out, go to the website 2ip.ru. In addition, your router should have ports 25565 through 25566 forwarded. An excellent video on port forwarding can be found below.
I hope this quick guide will help you create a Minecraft 1.8 server for you and your friends, and then have a good time together! If you still have any questions, ask them in the comments below!
This is a guide on how to create a Minecraft server on various platforms. By the end of the guide, you will know how to install a Minecraft server on Linux, Windows, and Mac operating systems.
Overall, Minecraft is a sandbox video game developed by Mojang. It consists of ranking the most popular games on streaming sites such as Twitch. The game can be played independently, but there is also a multiplayer mode with a large community of players.
To enjoy multiplayer mode, players will need to either set up their own Minecraft server or use a hosting provider. In this guide, we will focus on the solution to installing your own Minecraft server on Linux, Windows and Mac. If you have it on Hostinger, you can use these instructions and play with your friends and family!
How to create a Minecraft server on Linux
Let's see how to create a Minecraft server on the two best Linux distributions - Ubuntu and CentOS. Although the process is very similar on both systems, there are some differences in the process of installing the required packages.
Setting up a Minecraft server on Ubuntu
First of all, we will create a Minecraft server using a VPS running Ubuntu 16.04 OS. The whole process consists of three simple steps.
Before you begin, you need to connect to your server via SSH. To log into the server, open a terminal (or use if you're on Windows) and enter these commands:
Ssh username@ipaddress
As soon as you log in, you can begin installing your Minecraft server. Please note that installing a Minecraft server requires Java installed on your system. Java may already be installed on your system. To check this, run the following command:
Java -version
If you receive a message that says Java was not found on your system, you can continue to follow these instructions. Otherwise, you can end the current section and move on to step 2.
Run these commands in your terminal to download the latest software packages to install on your system, including Java:
Sudo apt-get update
Now you need to install Java. We are installing Java 7 for this tutorial:
Sudo apt-get install openjdk-7-jdk
If you need the latest version of Java, you can run this command instead of the previous one:
Sudo apt-get install default-jdk
Here we should also install screen, which will ensure that your server runs in the background even if the connection is lost. To do this, enter the following command:
Sudo apt-get install screen
You now have Java and Screen installed on your system.
Step 2 – Install Minecraft Server on Ubuntu
Let's now see how to create a Minecraft server on Ubuntu VPS. It's always best to keep your files and programs clean and organized. To avoid chaos, let's create a new directory in which all Minecraft files will be stored. This step is optional, although for clarity we highly recommend it. To make a new directory, run:
Mkdir minecraft
Once created, go inside the directory:
Sudo apt-get install wget
Now download and install your own Minecraft server:
Wget -O minecraft_server.jar https://s3.amazonaws.com/Minecraft.Download/versions/1.11.2/minecraft_server.1.11.2.jar
At the time of writing, the latest available version is 1.11.2. You need to replace this number with the version that is most recent at the moment. You can check the version using the link.
Accept the Minecraft User License Agreement:
Echo "eula=true" > eula.txt
First, let's run screen so that we can start the server in the background:
Screen -S "Minecraft server 1"
We named the current session 'Minecraft server 1', but you can use any other name.
That's all - you have successfully installed your custom Minecraft server on Ubuntu.
Now you only need to start the installed server. To do this, run the following command in the terminal:
As you can see, Minecraft requires 1024MB or 1GB of RAM available to run the server. Since these are the minimum requirements, we recommend that you have more random access memory (RAM) available for better performance. To allocate more memory for the server, simply replace 1024 in -Xmx And -Xms parameters for 2048 (2GB) and so on. This is what you will see after running the command:
And now there you have it: your own Minecraft server in just a few minutes. The server is running in the background since we are using screen. To turn off screen, click CTRL+A, Then D. You can roll back the operation and open the screen window again by typing screen -r in the terminal. You can experiment with the server settings in the properties file:
Nano ~/minecraft/server.properties
Installing a Minecraft server on CentOS 7
Let's see how to create a Minecraft server on a VPS running CentOS 7. The process is not too different from Ubuntu.
Step 1 – Install Java and Screen
First, you need to install Java, since Minecraft is completely built on it. Next screen , since it is required for the Minecraft server after logging off the SSH session. Connect to your VPS server via SSH (Windows users can use the client for this) and run the installation of these two packages:
Yum install java screen -y
Step 2 – Install Minecraft Server on CentOS 7
To streamline the installation, let's create a new directory:
CD minecraft
Download Minecraft server packages:
Wget -O minecraft_server.jar https://s3.amazonaws.com/Minecraft.Download/versions/1.10.2/minecraft_server.1.10.2.jar
Run screen with the correct name:
Screen -S "Minecraft server"
Accept the EULA by changing the value from false to true in the eula.txt file:
Nano eula.txt
Step 3 – Starting the Minecraft Server
Now you can start the server using this command:
Java -Xmx1024M -Xms1024M -jar minecraft_server.jar nogui
The result should be something like this:

Server Minecraft has been successfully launched, you can exit screen using the keyboard shortcut CTRL – A + D.
Server settings can be changed by editing this file:
Nano server.properties
How to create a Minecraft server on Windows
You can also install the Minecraft server on your Windows PC. We will try to cover everything you need for this in three steps.
Step 1 – Install the latest version of Java
Since Minecraft is based on Java, you need to install the latest version and make sure everything is running correctly. You can use the command line to check compliance. Run the following command:
Java -version
Then make sure that your version matches the latest Java version on the official website. Download and install if your current version is older or if you don't have Java at all.

Step 2 – Install Minecraft Server on Windows
Now you need to select the location where you want to install your Minecraft server. To properly organize the storage of all the necessary files, we recommend that you create a special directory. Once you create it, download the latest Minecraft server software installation from the official website.

Move the file .jar to the directory you created earlier and double-click on it.

Before you continue installing the Minecraft server, you must agree to the terms of the license agreement EULA. This can be done by editing the file eula.txt and changing the parameter eula=false on eula=true.

Step 3 – Starting the Minecraft Server
You can start the Minecraft server using the Windows command line. Use this to navigate to your Minecraft directory. For example:
Cd Desktop/MinecraftServer
Start the Minecraft server by running the command:
Java -Xmx1024M -Xms1024M -jar minecraft_server.jar nogui
Or you can double-click the left mouse button again on the file with the extension .jar and this will lead to the same result. You will need to allow access to the Minecraft server through the Windows firewall.

If you see a screen like this, it means your Minecraft server has started successfully:

How to create a Minecraft server on Mac
Last but not least, let's look at installing a Minecraft server on MacOS. Solving the problem in three steps.
Step 1 – Install Java and Screen
Java enabled default, if you are using the latest version of MacOS. You can double-check this by entering this command in your terminal:
Java -version
If you find that it is not available, you can download traditional versions of Java from Apple's website.
Step 2 – Install Minecraft Server on Mac
To keep everything neat and organized, your best bet is to create a directory for your Minecraft server. Once you have created it, download the Minecraft server setup from the official website.

Download it to the created directory. Then open a text editor and set the format to plain text: Format › Make Plain Text. Paste the following into the file:
#!/bin/bash cd "$(dirname "$0")" exec java -Xms1024M -Xmx1024M -jar minecraft_server.jar nogui
Save the file as startmc.command V in the same directory,where the Minecraft server installation files are located. To make it work, you need to change the access rights. You can assign them from the Terminal, which can be found in Applications › Utilities. Once the terminal opens, go to your Minecraft directory. For example:
cd Desktop/MinecraftServer
You can assign access rights with the following command:
Chmod a+x startmc.command
Step 3 – Starting the Minecraft Server
If all steps were completed correctly, you can start the Minecraft server by double clicking on the file startmc.command. After this, a new terminal window will appear.

You may notice warnings about several missing files or directories when you first run it. Don't worry about this, it's completely normal!
Finally
Congratulations! By completing this tutorial, you have learned how to create a Minecraft server on various platforms and operating systems.
If you want to open your own server, but don’t know how to do it, then this article will be of interest to you. Creating a server in Minecraft will allow you to play with friends or with other players in your own world. There is also a collection of mods that will decorate your world for the better. The assembly is carried out without any difficulties. Use various commands, they will allow you to control the game in your world: ban players, change the weather in Minecraft and much more.
You can find many videos on YouTube on how to have fun. And also, if you are interested, you can create your own channel and make a video of all your adventures. By creating your own server, you will have complete control over it. Minecraft is a game where imagination is given free rein, so you can appreciate not only your imagination, but also your friends. Assembling various modifications for the game will fill it with more opportunities. Also, the assembly for the game can be made by the players themselves and distributed on sites. An assembly can be created by combining several mods in Minecraft.
You can also put various maps on the server, which you can play with friends. You can install them on our website in the Maps section. You can install them and have fun, or you can make them yourself, creating your own world. And if you are planning to create something really cool, you can put them up for public download if you wish. If players wish, they can create a map of incredible beauty that will justify your efforts when looking at a beautiful map in minecraft.
Commands on the server also play an important role, as was already written above, they allow you to “hold the control panel in your hands.” Commands are written to ensure that the server is under your control.
The commands are shown in the screenshot below (CLICK ON THEM):

Creating a server in Minecraft
First, you need to open the page http://www.minecraft.net/download.jsp and you will need to download a file called Minecraft_Server.exe. This is the official website, hence it has all the latest versions.The file that you downloaded Minecraft_Server.exe (or otherwise called minecraft_server.jar) needs to be opened and transferred to the folder in which you will have the server.
Now let's move on to the ports, you need to open it, but if you have it open 25565, then you will see the following message:

Now, keep calm and wait until the process for the minecraft game reaches the end. After completion, you will need to close the window.
Another case will be if your port for minecraft is closed, or the operation of Minecraft_Server.exe or Java is blocked by some program, for example a firewall, as shown in the picture below. If this happens, try uninstalling java and installing it again, a message will appear from the firewall and you will need to allow the application access.
How to open port 25565. In any case, first you must allow java access, unless of course such a window appears. Of course you grant java these rights. The screenshot shows an example of blocking.


If everything goes well, new files will appear in the folder, and the world.
We definitely need a file called server.properties. You need to open this file with notepad. Now you should take note of the information below. In order to find out your IP address, you need to go to sites that will show it to you. For example, I can cite the site 2ip.ru, where you can freely view your IP address, as shown in the screenshot.

If your IP changes, and most people do, then you need to enter an update to the server-ip= line before each server startup.
Sites that show IP should be bookmarked to make searching easier.
Launch and log into your server (with video)
The information is relevant for Minecraft versions 1.2.5, 1.5.2, 1.6.1, 1.6.2, 1.6.4. Next, you need to run Minecraft_Server.exe and wait for the download to finish. Go to minecraft (it is not necessary to enter your username and password).Click on Multiplayer, then Add Server, as shown in the picture below.

Next you need to enter the server name (this name will be shown in the list) and server ip
Next, click Done, and your server will appear in the list. Green stripes on the right indicate that it is working and is also shown online. Next you need to click Join Server.


Done, now you play on your own server.


