How to connect separated hard disk volumes. How to combine hard drives
The question of how to combine two disks into one is one of the most frequently asked among computer users. This can be useful in many situations, including even issues related to installing a single file system for all partitions, converting GPT or RAW formats that may not be accepted by the operating system, installing software that requires a lot of disk space, etc. The user can be offered two main methods of combining, which will be discussed further in as much detail as possible. The proposed solutions work equally well when performing such actions with logical partitions and when working with RAID arrays, when two or more independent hard drives are installed on the computer.
Benefits of combining hard drives or partitions
It goes without saying that the first and main factor influencing a positive decision in favor of merging partitions is increasing the available disk space on one disk, which is extremely necessary when installing some programs.
On the other hand, as already mentioned, if different types of file systems are installed on disks or partitions, it is quite common to observe problems with the installation of certain types of software. Bringing them, so to speak, to a common denominator eliminates the problem entirely. Finally, if the system has unreadable RAW partitions or GPT format for hard drives larger than 2 TB, which the operating system may not perceive, such a tool is simply irreplaceable.
Merging options
Now a few words about how to combine two disks into one in Windows 7 and higher. First, you need to decide exactly how the partitions will be merged. First of all, we can highlight methods of combining with the loss of information or its preservation. The second is the use of standard system tools or third-party software.
It’s worth saying right away that the solution to the question of how to combine two disks into one, using the built-in Windows tools, does not imply the preservation of data that was originally located in one of the partitions (this is not provided at all). Therefore, before doing such things, all information from the partition being deleted (and it will actually be deleted and only then attached to the main disk or partition) must first be transferred to another partition or to removable media. As is already clear, there is no need to talk about the performance of installed programs. When solving the problem of how to combine two disks into one, but so that both the information is preserved and the applications work, it is necessary to use additional third-party tools. They will be discussed separately.
How to merge two disks into one in Windows 7 and higher versions using standard means?
First, let's look at the system's own tools. This is the disk management section. You can access it through the administration menu, but it’s easier to use the “Run” console, in which you need to enter the line diskmgmt.msc.

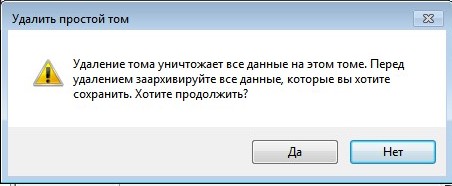
Here you select the partition through which you want to merge, and use the RMB menu to call up the volume deletion option. The system will immediately issue a warning that all information on the selected disk will be deleted. We agree.

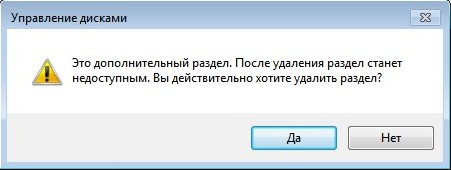
We repeat a similar operation, but for the section. After this, the so-called unallocated area will appear.

Now you need to use RMB on the partition to which you will attach and select the volume extension line.

At the disk selection stage, most likely, free attachable space will be immediately added to the list. If this does not happen, you should use the add button yourself. After this, click the continue button, and in the next window - finish. If you look at the state of the disks and partitions after the operation is completed, you will see an increase in the space of one of the partitions at the expense of the other.
How to merge two disks into one using third-party programs
To manage disks and partitions, when you need to merge and save data, you can use third-party utilities that look much more powerful than the system’s own tools. These include software packages like Partition Assistant from AOMEI, Disk Director from Acronis, Partition Master from EaseUS and many others.

Let's look at the merging process based on the last mentioned utility. For example, we need to merge drive E and drive F, but so that after that only one partition E remains. In the main window of the Partition Manager section, use the merge button (Merge), check the boxes for the specified disks (partitions) and click the “OK” button. After checking the merge, the process will be in pending status. Click the Apply button and confirm the action. After this, the unification process will begin.

When it finishes, only one partition (E) can be seen in disk management. Explorer will show two hard drives in one hard drive or partition. Only drive F in partition E will be shown as a local directory (Local Disk F) with all the information that was previously present on it.
Brief conclusions
As a summary, it can be noted that if the user requires a quick merge, but there is no critical information on the attached disk or partition, you can use the system's tools. If data storage is mandatory, third-party programs will be needed. And further. Please note that if there is a second operating system on the combined disks in the attached partition, it will not be possible to run it.
When purchasing a new one or reinstalling the system, quite often there is a need to partition the hard drive or repartition it. This is quite simple to do, and there are a large number of methods for this procedure. So, let's look at how to partition, create a new partition, and also how to merge hard drive partitions.
What's the best way to partition a hard drive?
Why do you need to partition your hard drive?If you are a beginner, then for convenient and safe work with data, the hard drive must be divided into partitions. For what? Firstly, it is very convenient when the operating system is installed on one partition of the hard drive, and all documents and media files are on another partition. Secondly, if files are infected with viruses on one partition of the hard drive, they will not be able to get to another partition, unless you copy the infected file to that other partition.
How to properly allocate hard drive space
Before partitioning your hard drive, you need to think very carefully about how to allocate the space on it.
As for the Windows operating system, it is best to allocate at least 25-30 GB for the system drive “C”. If the capacity of your hard drive does not allow you to save space on your hard drive, then we recommend allocating 100 GB for drive “C”. For what?
This way, you can install a large number of large programs without fear that there will not be enough space for them on the system disk. In addition, you will be able to install a large number of games, and at the same time, without fear that their saves will also not fit on the “C” drive. One more nuance: the freer the system partition, the better the operating speed of the OS.
Experts on the site recommend downloading files downloaded from the Internet to the system drive so as not to infect all your media files on drive “D” if there is a virus in the downloaded file. And to download files you also need to allocate space. As you can see, there are a lot of arguments for allocating a large volume to the system partition. But at the same time, there is no need to allocate too much space for the partition with the system; this is of no use.
As mentioned above, you need to split the hard drive into at least 2 sections. If you have data that you want to separate into a separate partition, you can create a third partition with the required volume for these files.
All partitions must be created in the NTFS file system.

How to partition a hard drive and merge partitions in Windows 7 and Windows 8
How to partition a hard driveTo use the standard disk partitioning utility, you need to call “Manage” from the “Computer” context menu. In the left panel, select “Disk Management”. After selecting the line, all drives connected to the computer will be displayed in the right pane. After we activate it by selecting it with the mouse, it will be highlighted with a stroke on the bottom panel. Right-click on it and select “Shrink Volume” from the context menu.
While the system performs the appropriate actions on the disk, the user has no choice but to wait patiently. Finally, a message will appear on the screen warning you that the disk will be divided into two approximately equal parts. Confirm your choice by clicking on the “Compress” button. An unallocated area shaded in black now appears on the panel along with the disk. Click on the shaded area and select Create Simple Volume. When setting up a new disk in the Create Simple Volume Wizard, the user can assign a volume label, name the partition, and select a formatting type. As soon as the “Create Simple Volume Wizard” completes its work, formatting the disk will begin. After it, the user will have a newly created logical disk.
If you are not satisfied with splitting the disk into two equal parts, and this happens quite often, since with a 500 GB hard drive (and even more so 1 TB), allocating half for the system is an unaffordable luxury. For system and program files, 60-100 GB is enough. The rest of the space is best used to store personal files. This cannot be done using standard operating system tools. For this purpose, third-party programs are used that can work with disks, or they can partition the disk through the operating system installer.
How to Merge a Broken Hard Drive
In order to unite broken hard drive partitions in Windows, you need to resave the data on these partitions; they can be written to disks or temporarily sent to cloud storage. Then open the Disk Management menu as described above and delete the partitions you want to merge. To delete a partition, right-click on it and select the item: “Delete volume...”, do the same with the second partition. After that, right-click on the unallocated empty area and select “Create a simple volume.” That's it, two sections turned into one.

How can you partition a hard drive when installing a system?
In order to partition the hard drive when installing the system, you need to go to the selection of the partition for installation. Then click on “Disk Setup”. In the menu that appears, you will see all the necessary buttons for dividing and merging sections.To partition a new hard drive, select the existing partition and click the “Delete” button. Then select the free area and click on the “Create” button, where you will need to enter the desired partition size and click on the “Apply” button. To create other partitions, select the free space again and click the “Create” button.
In order to distribute the remaining free space, if any, select one of the hard drive partitions and click on the “Expand” button, then you will need to specify the final size of the partition to be expanded.
To combine partitions, we delete one partition and, using an extension, add the freed up space to it.
How to connect two drives into one without loss of information? I have a C: drive and the operating system is installed on it. There are two more drives E: and F:, these are the ones I want to combine into one drive, but both drives have information. This means that I cannot do this using the built-in tools of Windows 7. Or I can, but I need to transfer information from the F: drive and delete it, then attach the resulting unallocated space to the E: drive, as a result I will get one large E: drive.
In short, there is a lot of information on both disks and it is quite difficult to transfer it anywhere; I don’t have a portable hard drive. I found articles on your website about the free section manager "", these articles have almost everything: how to create a section, increase, decrease and most importantly, all this happens without losing information, that is, before working with the program, information does not need to be transferred anywhere. You just don’t have an article on the topic of how to connect two disks into one, I think the large audience of your resource will be grateful to you for such an article. Gleb.
How to connect two drives into one
Hello, friends! As our reader correctly noted, for these purposes you can use the free program "EaseUS Partition Master Free Edition". Using this program, you can combine two disks into one without losing information on these disks.Our article is suitable for operating systems: Windows XP, Vista, Windows 7 and Windows 8.1.
Let's return to today's article. The content of the article:
1) Connect two disks into one using the "EaseUS Partition Master Free Edition" program quickly and easily, naturally without loss of information.
2) We connect two disks into one without resorting to any programs, that is, using the tools built into Windows 7. I think this part of the article will also be useful to someone. But we will have to transfer data from the disk that we want to delete, otherwise there is no other way.
3) Friends, we also have an article on how to connect two disks into one using the program. This program is the leader among hard drive managers, but unfortunately it is paid.
How to connect two disks into one using EaseUS Partition Master Free EditionLet's go to the official website http://www.easeus.com/download.htm. Select " EaseUS Partition Master Free Edition" and click Download

Freeware Download

Download Now

The program installer is downloaded. Let's launch it. Installing the program is simple, but there are a few points you need to pay attention to.
If you don’t need the TuneUp Utilities 2013 optimizer, uncheck the box and click Next.

It is not necessary to indicate your email

Before starting the program, go to Disk Management. We will not touch drive C:, but we will connect drive E: (59 GB) and drive F: (59 GB), so we will end up with one drive E: (119 GB).

Let's launch the program.

In the main program window, left-click once on the E: drive and click on the Merge tool,

In the window that appears, indicate the drive with which we want to merge the E: drive, this is the F: drive, check the F: box and OK.


Our program works in deferred operation mode, click the Apply button and OK,


The disk merging process has begun.

Go to Disk Management and look at the result. Instead of two drives E: and F:, we now have one drive E: (119 GB).

All the data that was on the F: drive moved to the E: drive, into the folder Local Disk F. 
How to connect two disks into one using the Windows 7, Windows 8 operating system itself without resorting to any programs
Let's say that some users do not want to install additional software on their computer and will try to make do with the tools built into the operating system.

Let's go to Disk Management. To connect drives E: and F:, you must first transfer all the data from drive F: to a portable hard drive or flash drive, or to drive E:, then delete drive F:, right-click on it and select Delete volume, agree Yes.

Once again, right-click on the “Free” space and select Delete Partition.

Are you sure you want to delete the partition? We agree Yes.
Unallocated space of 59 GB appears. We attach this unallocated space to the E: drive. Right-click on drive E: and select Expand Volume.


Ready.

All. I would be very glad if I helped someone.
How to partition and merge an external hard drive? Hello, friends! In this short article I want to show you how you can divide an external hard drive into separate partitions and, accordingly, combine an external hard drive that has already been partitioned. In fact, this process does not take much time, and is no different from the process when you need to partition the main system hard drive.
How to partition an external hard drive.
And so, go to “Computer Management”. Right-click on “My Computer” and in the drop-down menu click the “Management” tab.
In this window, click the “Disk Management” tab. In the bottom line, in a red frame, my external hard drive is displayed, and it will be the same for you.

Right-click on the external hard drive and select “Shrink Volume” from the drop-down menu.

In this window, opposite the line “Size of compressed space”, set the size of the future partition, I set the size to 300GB. Click the “Compress” button.

After compression, we see an unallocated area, that is, the external hard drive is broken. But the partition will not be displayed in My Computer until we create a new volume.

Right-click on the partition and in the drop-down menu, click on the “Create simple volume” item.


The last step is to format the external hard drive partition. Set everything the same as shown in the screenshot and click “Next”.

Click the “Finish” button.

That's all, now you know how.
How to reverse merge an external hard drive.
Everything is quite simple, everything is analogous. Go to the “Disk Management” settings, right-click on the external disk partition and select “Delete volume”.

Confirm deletion of the volume.

Now you need to click on the first partition of the external hard drive and click on the “Extend volume” item.
 (chapter).

That's all the guys I wanted to show you. Write reviews in the comments, ask questions, I will answer everyone. Good luck to you!!!
I already told you... At the request of subscribers, today I will tell you how to do the reverse procedure. Merge several disks into one using standard Windows tools. No need to use third party programs.
How to merge hard drive partitions
So, let's go to the control panel. Open the Administration applet.
(To enlarge the image, click on it)

Computer management
Disk management 
A panel with computer disks will open in front of us 
Select the disk we want to expand. Right-click and select expand volume. 
The volume expansion wizard will launch, click next. A window will open to select disks that can be used to expand the volume. 
You need to select the disk and indicate the size that you want to attach, or if you need to add the entire space, then just click next and you're done. 
After completing the wizard, the selected disk will be enlarged to the desired size.
How to combine logical drives
Now let's consider the option when you need to increase the size using an existing logical disk.
ATTENTION! Before this procedure, save the data from this disk! This action is irreversible! All information will be lost!
So, the data has been saved, now let's proceed directly to the merger. Everything is simple here, first we delete the section that needs to be attached. To do this, right-click on the partition to be deleted and click “Delete Volume”. 
The disk will be deleted. Now we do the same as with the unmarked area. For clarity, I recorded a video - merging logical drives in windows: