How to make endnotes. How to make a footnote in Word - Best options
The main feature of links in Word is their interactivity, that is, when you click on it, you will be taken to an Internet resource or another place (it all depends on what is written in the link.
There is also such a tool as footnotes - they can also be located at the bottom of the page, but their function is completely different.
There are two types of them - regular (they can be located anywhere on the page) and end (they can be seen at the bottom of the page in Word).
Now you will learn how to make them.
First, select the place in the text where you want to enter the link.
In the top menu of the program, click on the “Links” item, and inside click on “Insert footnotes”. You will see that a number with the inscription one has appeared near the word at the top, and a line has been drawn at the bottom of the page in which there will be a blinking cursor and the number one. In this field, write a text explanation for your button.

If you want to install another one, again place the cursor in the place you need and click on the inscription “Insert footnote”. Everything is similar - the number two will appear just above the word and below.
Now let's take a closer look at what an endnote is. To do this, without changing the menu item, click on “Insert endnote” at the top.
So, you managed to make two types of footnotes on one page at once. You can distinguish them by their number indexes.
If you need to change the appearance of these numbers, right-click on the bottom footnote field and select “Properties” or “Options” in the menu that opens. In another window that opens, you will see editing tools.

Right-click on the field.

An endnote can be seen in other ways than at the end of a document. To do this, click on the inscription “show footnote” and you will see it.
How to make a link in Word 2007
Launch the program, open any text document in it and find a word, fragment or entire sentence. Using the left mouse button, select what you need. You will see that the text has been highlighted - a background will appear around the letters. Right-click on the background. A window will open with a menu in which you need to select and click on “Hyperlink”.
After this, the hyperlink creation window will open. As you can see, here you can associate text with addresses of Internet resources, with places in the current document, and even with other files on your computer’s hard drive.
For example, the website address can be pasted into the “Address” field, and you can take it by copying it from the top line of your browser and pasting it into a Word document.
In the same menu you can implement a very convenient and necessary function. It's called "Hint" and it appears in the program when the mouse cursor hovers over the link. Click on the Hint item and enter the text there.
The selection you made into a hyperlink will immediately change its color in the document. Don't forget to save the changes you made to the text file before closing.
How to do it in a Word 2003 document?
Word 2003 is older than 2007, so everything is done there a little differently.
Go to the “Insert” menu item (top left in the program) and select “Bookmark”.

.
In the window that opens, click “Add”. Now in the very top line you can name the bookmark as you like, but remember that the name must begin with a letter and have no spaces in the name. However, the correct name has already been created there, so you don’t have to change it.

Open a text document and select the text for the link. Now right-click on the selected area and select “Hyperlink” from the menu that opens.
A window will open for adding it, in which you can link the selected text in any way. In our example, we associate with "Place in Document". Click on this inscription in the window, then select a place in the text where the user will go after clicking and click on “Ok”.
I hope that you are once again amazed by the variety of functions that Word has.
Video lessons
Footnotes can be useful in almost any document. It doesn’t matter what you are writing, an essay, a thesis or a fiction novel in general, the need to explain something or refer to something can appear at any moment. In Microsoft Office products, the process of placing footnotes is automated and quite convenient. The required actions vary slightly from version to version, so it is better to consider all versions of this program.
Microsoft Word 2003
How do you make footnotes in Word 2003? It's simple! In the menu, look for the item “Insert” -> “Link” -> “Footnote  "
"
In the window that opens, you can choose where the explanations for the footnotes will be located: 
You can also determine how the footnotes will be numbered; there are many options: letters, numbers, and footnotes can also be marked with any symbol you like by entering it in the appropriate box.

In the end it will look something like this: 
By the way, when you hover over the footnote icon, you can read the explanation for it: 
Microsoft Word 2007/2010
In these two versions of Microsoft Word, the process of adding footnotes is exactly the same, so they can be combined into one section. First you need to go to the “Links” tab, there will be a small section where all the buttons for working with footnotes are collected. 
Place the cursor where you need a footnote in the text and click on the “Insert footnote” button. 
By default, footnote legends appear at the bottom of the page and are numbered. To somehow change the settings, you need to click on the small square with an arrow in the lower right corner of the block. 
A window will open, almost the same as in Word 2003 with all the footnote settings. 
In it, just like in a similar window in 2003 Microsoft Word, you can configure the symbol for displaying footnotes, their position and the beginning of numbering.
Microsoft Office 2013
Just like before, clicking on the button in the lower right corner will bring up the footnotes menu. 
Unlike previous versions, Microsoft Word 2013 has a function to arrange footnote explanations in the form of columns; this is done in the footnotes menu. 
MS Word provides a function for adding footnotes, which allows you, without cluttering up the main text, to give the necessary explanations to scientific terms, reveal the meanings of unfamiliar words, or indicate the source of information.
Footnotes are short notes found at the bottom of a page or at the end of a document. They make the material more meaningful and easier to understand. Each footnote in the document is numbered and separated from the main text by a horizontal line. As an example, let's try to make footnotes in Word 2007.
Quick navigation through the article
Adding footnotes at the bottom of the page
It is more convenient for the reader to analyze graphical data when all the accompanying information and notes are in front of their eyes. The same principle applies to scientific text, which is replete with complex terms.
To create annotations at the bottom of a specific page, you will need to do the following:
- On the Word 2007 toolbar, open the “Links” tab;
- Then place the cursor after the desired word in the text;
- In the “Footnotes” section, click the “Insert Footnote” button.
A horizontal line will appear at the bottom of the page, under which there will be a footnote serial number and a blinking cursor - here you need to write an explanation.
If the text to which a note is given moves to another page, then the footnote automatically moves to the same page.
Endnotes
In order to move the explanations to the presented material to the very end of the document, you must perform the following steps:
- Open the “Links” tab on the toolbar;
- Place the cursor at the desired place in the text;
- In the "Footnotes" section, select the "Insert Endnote" function.
The cursor will automatically move to the end of the document, where you will be able to add a note.
By default, Word 2007 numbers footnotes using the lowercase letter i. This option is acceptable when there are not many notes in the document (ranging from 1 to 5).
If there are more footnotes, it will be difficult for the reader to navigate them. In this case, you will need to change the format of the numbers to simplify the task of finding the desired explanation:
- You must open the "Footnotes" dialog box by clicking on the arrow located in the lower right corner of the section;
- Select "Endnotes";
- In the “Number format” field, set the desired numbering type;
- Click the “Insert” button;
- Write an explanation at the end of the document.
Remove a footnote from a document
Word 2007 numbers all explanations to the text automatically, that is, you can freely add and delete footnotes without fear that their sequence will be disrupted.
To remove a note, you need to place the cursor in the text before the symbol indicating a footnote and press the “Delete” key twice - at the same time as the symbol, the note with which it is associated will be deleted.
Word has a lot of necessary functions for the user. In this article we will look at one of these functions - placing footnotes in a document.
Quite often you can find them in fiction, scientific literature or magazines. They are also used in explanatory notes, reports, coursework and diplomas.
With their help, the author can give an explanation for the word or phrase used in the document, if it is an abbreviation, then its decoding. A footnote can also be used to insert the literature from which a piece of text was taken.
They are also very convenient for the reader, because when reading they are not distracted by various explanatory phrases that are in no way related to the main text. And if necessary, you can simply look down and look at the explanations given by the author.
So, in order to make footnotes in Word, open the document and go to the “Links” tab. Here is the section that interests us.
At the bottom of the page
To make a regular footnote at the end of the page, place the cursor after the desired word or phrase and click on the button "Insert Footnote". Then write the explanation you need below.
In this case, they will be numbered in order in the document. Add another one on the same sheet - there will be number 2, then on the next one - there will be number 3, and so on.

At the end of the document
To insert it at the end of the document, click on the button "Insert Endnote". Thus, all those made in the text will be displayed at the end of the document; they are also numbered in order throughout the document.

Now let's look at all the functions that can be applied to them. Click on the small arrow in the "Footnotes" section. As a result, a window will open in which you can specify the necessary parameters for them.

On each page from 1
If you need the numbering of footnotes to start anew on each sheet, then in the functions window, configure the parameters as shown in the figure below. You can select the desired number format.
If you click “Insert”, it will be added to this page with the configured parameters once. If you click “Apply”, then later when you click the button "Insert Footnote", for each new page the numbering will start from the beginning.

After the text
In the options window, you can choose to add a footnote at the bottom of the text rather than at the bottom of the page.

For each section with 1
If your text is divided into sections or chapters, and you want the numbering to start over in each chapter, then in the functions window select numbering "In every section".

Please note that at the end of each chapter there should be "Section break (from next page)". To do this, on the tab "Page layout" open the drop-down list “Breaks” and select from it "Next page".

If you want to change the number format to A, B, C... in one section, instead of 1, 2, 3... - then in the functions window select the number format and click apply "To current section", then click the “Apply” button at the bottom.
In the same way, you can add them immediately after the text for one section, and put them at the bottom of the sheet in another.

At the end of the section
To ensure that footnotes appear at the end of each section rather than at the end of the page, configure the options in the Functions window as shown in the figure below.
If you choose to apply "To current section", then all of them will be at the end only for the selected section. For all others, they will remain in order at the bottom of each sheet. If you choose to apply "To the entire document", then footnotes will appear at the end for each section.

When you hover the cursor over any of them, its text will be displayed. If you double-click on it in the text, the page in Word on which it is explained will open. To see where it is located in the text, double-click on the desired explanation with the mouse.
How to remove footnotes
To delete a footnote, place the cursor behind it and press Backspace twice.

It seems like she told me about all the points that you need to know in order to make a footnote in Word. If you have any questions, ask them in the comments and I will try to help.
Rate this article: (1
ratings, average: 5,00
out of 5)
Webmaster. Higher education with a degree in Information Security. Author of most articles and computer literacy lessons
When we create another document in Microsoft word, we sometimes need to show where we got the written material from or make a small explanation of the written material. In order to do this, Word has an excellent tool - snoke. Making a footnote in Word is very simple, but for some reason not everyone uses it. In this article I will tell you how to quickly create a footnote in Word.
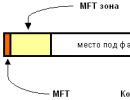
But first, a little theory. Before you start making a footnote in Word, be sure to decide what kind of footnote you need. If you want to make a note at the bottom of the page you are currently writing on, it is a footnote or a page footnote, which is inserted at the end of the page. But, if you need to add a footnote to the end of the document (for example, when writing term papers, it is often necessary to add an explanation of the material being described to the very end of the document), then here you will need an endnote.
So, we have decided on the types of footnotes. Now let's look at how to make notes in word 2013, 2010 and 2007
How to make a regular page footnote in word
In order to make a regular footnote, you need to go to the toolbar of your Microsoft Word editor (top menu) and click on the “Links” tab. Did you click? Great, now you will see a little footnote submenu and it will say insert footnote and insert endnote in your word. You need a regular footnote, so move the mouse cursor after the word you want to insert a footnote to and click “Insert Footnote”.
If this is the first footnote on your page, then the number 1 will appear above the word to which you added a footnote, and at the bottom of the page you will need to write the text of the footnote.
![]() How to make a footnote in Word
How to make a footnote in Word
In order to make an endnote in Word, you need to again go to the footnote menu, which we have already been to, and click insert endnote. After clicking on the insert endnote button, you will be moved to the very end of the document and you will need to write the text of the footnote.
![]()
Please note that the Microsoft Word program numbers regular footnotes with numbers 1,2, 3, and endnotes with small letters i (if you have one endnote, then i will be written at the end of the document, and if there are five endnotes, then iiiii).
As you can see, making a footnote in Word is very simple. And, if you make a footnote at least once, you will never forget the algorithm of actions and will be able to make footnotes in any Word documents without any help.