An email that will change your life. Problem: Feedback Avoidance
Good day, friends! Today is another article dedicated to the CMS Joomla, or rather not to the engine itself, but to the creation of contacts with a feedback form. A special feature of Joomla feedback form is that all the tools necessary to create it are at hand for the webmaster, and there is no need to download and install additional extensions. The CMS is equipped with a built-in Contacts component, as well as a reCAPTCHA anti-spam plugin.
Conventionally, the implementation of the stated idea can be divided into several stages, namely:
Creating and setting up a contact.
Organizing the output of a page that will contain all the necessary feedback information.
Enabling, configuring and adding captcha.
Why do you need a feedback form?The feedback form is the connecting element of the site, thanks to which users and the owner of the web project can maintain communication with each other. It is in the feedback form that particularly important information is indicated (mobile number, e-mail), allowing the user to send their suggestions and wishes to the owner or order a product.
The Joomla feedback form consists of empty fields required for the visitor to enter specific data (his name, email address, subject of the letter); after filling, you must activate sending by clicking the special “Submit” button.
For greater convenience of visitors, it is recommended to place the feedback form in a visible place (most often this is the site header). And since we organize its display using the created menu item, it will be displayed on all pages at the location of the horizontal menu.
What information is desirable to leave to the site owner?Mobile number (commercial web projects, online stores).
Address (commercial web projects, online stores).
Work schedule, delivery method and possible payment methods (commercial web projects, online stores).
E-mail, Skype, etc. (blogs, business card sites, one-pagers, commercial web projects, online stores).
Joomla contacts
After these steps, you will see a page similar to the one below, only with blank fields. “Edit contact" - one of three tabs in which you need to make some settings.
Name – you can specify any name you like, it will still be hidden from the eyes of users.
Alias is a field that is filled in automatically, i.e. left empty.
The associated user is the name that will be displayed when commenting. You can specify your nickname or leave the default name assigned by the system “Super Users”.
Image – it is possible to select an image that will be associated with this contact.
Position – allows you to specify the position of the employee to whom contacts will be linked.
E-mail – is responsible for displaying the email address of the contact person.
You can figure out the rest of the fields anyway; in them you can specify the address, zip code, mobile and landline phone numbers, fax, etc.
In the right area of the screen (sidebar), you must select Status/Published, Category/Uncategorised, Favorites/None.

“Additional information" - a tab with a text editor in which it is recommended to write a short greeting.
You can use my greeting as a template by following the link.
“Content display settings” - is responsible for displaying the feedback form.
Show feedback form – “Show”.
Send a copy to the sender of the letter – depending on your choice, allows you to hide or show the sender a copy of his own letter.
Creating a Joomla menu item to display contacts and a feedback formThe next step is to go to the Menu/Main Menu/Create menu item tab.
On the menu page that opens, assign a title. So we write “Contacts”.
Menu item type – press the blue “Select” button, then select Contacts/Contact on the page that opens.

Selecting a contact - this is where we need to link the previously created contact to the menu item. Click “Select” and click on the corresponding contact.

After making the necessary adjustments, click the “Save” button. As a result, a new “Contacts” menu button will appear on your website, by clicking on which the user can find a feedback form and easily contact you.
We could have ended here if not for one thing, but! A bunch of useless letters that will flood your email address with spam bots.
Protect Joomla from spam by configuring the built-in reCAPTCHA pluginWhat is CAPTCHA? This is a security tool that allows you to effectively combat automatic registration and sending of letters. This is a special form in which an Internet user undertakes to perform a certain action (enter characters, answer a well-known question, or put together an image from parts).
CMS Joomla acquired a built-in captcha starting from version 2.5; before that, you had to be content with third-party extensions. Despite the fact that Joomla uses reCAPTCHA, we will try to set up a more modern and, in my opinion, convenient version. This is what it will look like after all the settings have been completed.

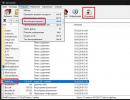
First, let's enable the plugin by going to Extensions/Plugin Manager. For a more convenient and faster search, I recommend entering captcha in the search bar and clicking the icon responsible for the search. As a result, a similar window will open. Click on the cross next to the “Status” item, thereby launching the plugin and click on the phrase - CAPTCHA – reCAPTCHA.

It's time to get the "Public Key" as well as the "Private Key".
To obtain the keys you must follow the link. This is one of many services owned by Google. You must have your own account. You can easily log in by entering your data, which you previously used to add an RSS feed on the Feedburner service or by installing the Google Adsense code on Joomla.

Using the form that opens, you need to register the site.
Title – assign a name (let’s say the name of the main page).
Select the type of reCAPTCHA – allows you to select the type of captcha - reCAPTCHA V2 – a standard form, to complete which you need to check the box next to the phrase “I am not a robot”; Invisible reCAPTCHA – user verification in the background.
We check the box next to the proposal “Accept the terms of use of reCAPTCHA” and “Send notifications to owners”, and then click the “Register” button.

Well, our keys are ready. There's nothing left. We copy the value of the “Secret Key” field into the “Private Key” field in the standard reCAPTCHA plugin, and the “Key” field into the “Public Key” field.

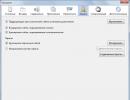
After receiving and entering the keys, you can select the “Style” that is most suitable for your site, as well as “Size”. Now you need to click “Save and close”, then go along the path System/General settings/CAPTCHA (default) and select the only value provided by the system “CAPTCHA - reCAPTCHA”. Click “Save” again and check the functionality of the captcha by going to the Joomla feedback form.

As you can see, everything works. If you have any difficulties, let's solve them together in the comments.
Thank you for your attention and see you soon on the pages of Stimylrosta.
Found a grammatical error in the text? Please report this to the administrator: select the text and press the hotkey combination Ctrl+Enter
Communication via email, as in other areas, has its own rules of etiquette and social protocol. If you need to write a letter asking for feedback at work or school, or to get feedback on your written work, you should think about the wording, structure of the letter, and timing. This will allow you to make your letter as effective as possible. Be polite, punctual and to the point to get the information you need.
Steps How to Ask Customers for FeedbackDon't ask too many questions. Customers receive a huge number of requests to complete surveys from all kinds of companies. If you want the client to delete your letter upon receipt, include a huge number of questions in it. If you want to interest a person, limit yourself to a couple of questions.
Ask questions that require a detailed answer. Don't ask questions that can be answered with "yes" or "no." Instead of “Would you recommend us to your friends?”, ask the following question: “How would you describe us to another person?” Questions like these will help you gain more information.
Promise the client to respond to him as soon as possible. Thanks to this, the client will feel that his opinion can influence something. If a person knows that he will be answered, he will write a more sincere review.
- When responding to a review, be honest and act like a professional. In the modern world, due to the capabilities of the Internet, you can instantly lose your reputation if you behave unprofessionally with people.
Do not use flash graphics or other objects that will take a long time to load. If a person has a slow connection, they will probably delete the message if they realize it is taking too long to load. Remember: you need feedback, not the client.
Choose the appropriate font and format. The letter should look neat and professional. An email written in Comic Sans and containing low-quality graphics is unlikely to impress your customers. It is better to use standard fonts (Times New Roman, Arial) if you are not font-savvy, and avoid a lot of graphics.
Make sure your email will be readable on all devices. Single-column text will be more convenient than multi-column text. The font should not be too small. The letter should be easy to read on a laptop, phone and tablet. Since in the modern world many people read email from their phones, the letter must follow this format.
The letter will be modest. Follow the rules of correspondence adopted at your place of work. Being humble will help you get feedback, but don't go overboard or your manager may think you don't know anything about your job. Frame questions so that everyone can see your progress on a project or task. This will let your manager know that you are not slacking off. Below we provide some more important recommendations.
- You can say this: “I was working on a presentation that is due tomorrow, and I had a question about the format. I am not sure that I correctly understand the standards adopted in our company. I am attaching the presentation to this letter and would be very grateful if you take a look her and comment if everything is okay. Thank you for your help."
- Don't forget to thank the person.
Talk about specific things. This will avoid general phrases that will be unhelpful. Don't ask yes or no questions unless you absolutely have to. Try not to ask your manager or colleague too many questions at once.
Thank the person when they respond. If you are advised to work more or told that your performance is not yet up to par, explain what you plan to do to improve this. Don't answer right away - give yourself the opportunity to calm down and think about the information.
- Reply no later than 1–2 days later.
Introduce yourself. A teacher may have hundreds of students, especially if it is a university. You should indicate your first and last name, group number and department. If you are a high school student taking preparatory courses, please indicate your class. This way, the teacher won’t have to guess who you are, and it will be easier for him to write a review.
Don't go beyond business communication. Sometimes students find it difficult to write to teachers because they cannot decide on a style. If your teacher has already written for you himself, stick to the same style as him. It’s better to formulate your thoughts like this: “I’m not sure that I understood the task correctly. I have several questions regarding the work.”
Keep it short. Do not attempt to explain the entire context of your questions unless the context is necessary to understand the questions. For example, if you want to ask for an extension on a paper due date, your teacher may need a detailed explanation, but if you just want to ask a question about a paper, don't explain why you missed writing sooner because of your dog or why you're writing now (if only the deadline doesn’t come very soon). Don't talk about things that don't really matter right now.
Don't wait until the last minute to ask for feedback. Your teacher is unlikely to want to help you on the eve of the test and will probably be unhappy that you didn’t bother to ask earlier. If you are forced to ask questions at the last minute, keep it short, to the point, and apologize for the inconvenience. Thanks to this, the likelihood that the teacher will answer you will be higher (provided that he reads the letter on time).
Use the format specified by the teacher. Often, teachers stipulate a specific format in which the assignment must be completed. For example, if the teacher asked you to send your work in .doc format, do not send the document in .pdf or .pages. If you don't know which format to use, use .rtf or .pdf or ask your teacher a question.
Ask for feedback on a paper you've already taken or your performance in an exam. Write a polite letter to your teacher. If the teacher has office hours, go see him in person. Say something like this: “I didn’t do as well as I hoped on the exam. Could you please point out my mistakes so that I can prepare better for the next exam?” As a rule, teachers are willing to give recommendations in such cases.
How to Ask for Feedback on Written WorkFirst, write to someone you know personally. If you want detailed feedback, you should ask someone you know well (such as a friend or colleague). Write as you usually do. If you usually call a person, do so. Don't submit your work in the first email unless you're sure the person will agree to help you (for example, if you haven't already asked the person to read the work or if the person hasn't offered to do so).
- You can include a short excerpt or description in your letter. It depends on whether you are writing to a friend or a colleague.
Write to a specialist in this field. If you need a professional opinion, write a letter to a professional you know and explain what your project is and why you need feedback. Don't put pressure on the person - just politely ask him to think. Say this: “I understand if you don’t have time for this.” It might be worth asking the person if they would recommend another expert to you.
Don't submit your work in the first email. Most likely, such a letter will remain unanswered unless you indicate that this work will be paid. If you contact a famous person, he is unlikely to answer you because he receives a ton of similar letters. It’s better to first ask friends, colleagues, teachers. Surely they will be ready to help you and will meet you halfway.
Greetings to my readers, I have gained experience and will tell you about the principles of operation of the PHP feedback form. I will show you with clear examples so that you understand how everything works and how the interaction occurs between the input form itself (its input fields) and the handler file written in PHP. In addition, you can download the sources for free along with .
Of course, it will be great if you have at least a little understanding of HTML / CSS because... You will have to drag the code onto your page by analogy. We will not touch on the PHP language; I will show you all the necessary changes that you need to make for yourself.
UPDATE: Based on the responses from readers, I realized that I need something more beautiful and functional, meet me, check it out and take a look. Choose which one you like best)
UPDATE2: Version 3.0 Adaptive Landing + ajax form with transmission of UTM tags, read and see. You'll like it
I remembered myself when I first tried to create a feedback form in PHP on my own, and to be honest, it was labor-intensive, because... I didn’t understand what and how was happening. Patience and perseverance, friends, and you will succeed.
PHP feedback form - structure
We will study the analysis of the feedback form itself using the example of a Landing Page; by the way, there is a separate article on. You can see how this works in action using the buttons below, I am attaching the sources of this one-page page and the main php handler file (this file will process and send the email)


After downloading the sources and unpacking the archive, you will see the following file structure:

- image - all images that are used for the Landing Page itself, buttons, etc.
- js - javascript scripts that provide, for example, a pop-up modal window on a page and other visual effects
- index.html - index file of our one-page page
- index1.php is a handler file into which values from the form are transferred, then a letter is generated from the received variables and sent to the specified email address. Index1.php will also act as an intermediate notification page about the successful sending of data with automatic redirection back to index.html (i.e. our one-page page)
It is important that your hosting, where the site files are located, supports PHP processing, otherwise the index1.php file will not be executed and will not work. To clarify this nuance, contact the campaign where your hosting is registered or just test it - it works, it means there is support. If not, then enable the php language support option
Take a look at the diagram of how all elements interact (page, form, handler)

Let's take a look at how one of the buttons works, which brings up a modal pop-up window containing a feedback form. This given source code is not something you can insert into a page once or twice and it will work. You will have to customize it yourself to suit your design and needs.
| 1 2 3 4 5 6 7 8 9 10 11 12 13 14 15 16 17 18 | Request a call back Request a call back |
Request a call back Request a call back
Below is the complete source code of the index1.php handler, in order to set up sending to your mailbox, change “ [email protected]"to your own, the rest, in principle, can be left unchanged
| 1 2 3 4 5 6 7 8 9 10 11 12 13 14 15 16 17 18 19 20 21 22 23 24 25 26 27 28 29 30 31 32 33 34 35 36 37 38 39 40 41 42 | You will be contacted |
You will be contacted body ( background: #22BFF7 url(img/zakaz.jpg) top -70% center no-repeat; ) setTimeout("location.replace("/index.html")", 3000); /*Change the current page address after 3 seconds (3000 milliseconds)*/
Checking the functionality of the formCall the window and enter data for a test check of our form 
Let me remind you once again that your hosting must support the processing of PHP files, otherwise our handler will simply not be executed and no letter will be sent to the specified email address. The result of a successfully completed feedback form 
That's all for me, I tried to convey the meaning and operation of the script in the best possible way. If you have any questions, feel free to contact me in the comments or on VK (see contact details). I wish you easy and productive work.
Not long ago I came across a working method that allows an attacker to send spam on behalf of your site using the Joomla feedback form (contact form). This feature is not a vulnerability and is unlikely to be fixed. In this article I will talk about how this became possible and what you need to do to protect your website.
Standard Joomla feedback formJoomla has a fairly powerful and flexible component called “Contacts”. This is a standard Joomla component. It is on every site, because... installed with the CMS. This component allows you to create and display contact categories, contacts, and feedback forms on the website that allow you to contact a particular contact. A contact is, conditionally, a user - a person from the site.
I once wrote an article about how you can create a feedback form on your website using standard Joomla tools. This instruction is still relevant today. It allows you to create a completely usable feedback form without installing third-party extensions. Sending spam is possible when this particular form is used, as well as under the simultaneous combination of certain circumstances, which will be discussed below.
Sending spam on behalf of the site using the Joomla feedback formYou will be surprised how simple the discovered method of sending spam on behalf of a site is. For this to be possible, the feedback form should look something like this:

Those. two conditions must be met:
If at least one of these conditions is not met, there will be no problems. If both conditions are met, then, as they say, watch your hands:
What happens as a result? Joomla thinks that the form was filled out by a person who provided their real address and wants to contact a contact from the site. Since the box to send a copy of the letter is checked, two people receive letters from the site: the person whose address is associated with the contact, and the person whose address is entered in the Email field.
Thus, by substituting different addresses in the Email field, you can send thousands of messages on behalf of your site. Yes, perhaps the contact will see this, quickly understand what is going on, and close the loophole, but there is a very high probability that this will not happen.
The consequences of such an attack for the site and business can be extremely unpleasant, especially when a lot of money has already been invested in promoting the site. If spam is sent from your domain address, I think there is no need to explain what the reaction of its recipients will be.
How to protect against this vulnerability?How to protect against this vulnerability? Elementary. Make sure that one of the conditions described above is not satisfied, namely.
24.4KThe quality of a website and its usability largely depend on whether its future visitors can easily contact the administration or managers.
Of course, you can use the opportunity to send a letter to the email specified in your contacts. But this method is too long and inconvenient, especially if we are talking about a small question, recommendation or comment.
In this regard, it seems logical to use a feedback form.
The essence and meaning of the feedback form for JoomlaThe feedback form is a convenient tool for sending messages to the site administration.
This small but extremely significant detail of modern sites does not lead to the creation of excessive page weight and is not associated with writing a significant number of cumbersome scripts.
The Joomla 3 content management system (CMS) allows you to create a feedback form that has the following advantages:
- Easy setup;
- Beautiful and convenient interface;
- Possibility of promptly sending messages;
- Availability of a contact form on all pages of the site;
- Possibility to do without reloading the page;
- Spam protection.
When a user sends a letter to the administration through this component, it automatically arrives at the site owners’ email address.
In fact, the entire process of the feedback form can be represented in two stages:
It is important to note that such a form can consist of an arbitrary number of fields for various purposes. In this case, fields such as “E-mail”, “Name”, “Subject” and “Message” are required.
The process of creating a feedback form in Joomla 3: step-by-step instructionsThe standard functionality of CMS Joomla 3 allows you to create a feedback form without installing additional extensions. This greatly simplifies the task of creating this important module on any website.
In this regard, the instructions below may be useful even for amateurs who are not fully familiar with the intricacies of programming.
It is advisable to consider in detail each of the stages of creating a feedback form on Joomla 3.
Step 1.In the Joomla 3 admin panel, open the “Components" menu and go to the "Contacts" tab:
Step 2.In the window that opens, click the “Create” button, after which a form with empty fields will appear. Here you need to provide all the necessary information.
In particular, the fields “Name”, “Category” and “Linked user” are required. In addition, you can specify the following contact information: “Position”, “Mailbox”, “City”, “Website”, “Phone”, etc.
Upon completion of filling, the status is set to “Published”. If the feedback form is being configured for a multi-lingual site, then it is also important to select the language for which it will be displayed:
Step 3.On the “Additional information” tab, you can place additional contact information, such as directions or work schedule, which may be important for users of the feedback form:
Step 4.On the “Publication Options” tab, it is possible to specify the start and end date of the publication, as well as specify meta descriptions and the meta tag “allow/deny” page indexing:
Step 5.On the next tab - “Display settings" You can select what contact information should be published on the page, since by default all specified data will be published.
Here you should set the display format of the Joomla 3 feedback form.
It should be emphasized that there are three display options available:
- “Collapsing lists" - the page will have two or three items: contact, feedback form and additional information, located vertically;
- “Tabs” - the same tabs will be displayed, only horizontally;
- “Normal” - all specified contact information will be visible on the page.
On the last tab "" you can configure blocked topics and mailboxes, and also activate the item "Send a copy of the letter to the sender's email":
Step 7Once all the necessary data has been specified, you need to save the contact:
Step 8After saving, you need to create a menu item for the created contact. To do this, go to the “Menu” section and select “Main menu”, then the “Create menu item” tab:
Step 9In the window that appears, you need to bind a separate menu item to the main or vertical menu, which is usually located in the left or right block of the Joomla 3 admin panel:
Step 10As the type of menu item, you must select the “Contacts" section:
Step 11After setting the type of menu item, the “Select contact” field will appear. In it you need to select the contact created in the previous steps (in this case, Administrator).
It is important to emphasize that the “Contact display options” and “Mail options” tabs copy the settings of the “Display settings” and “Contact display settings” tabs, respectively:
Step 12On the “Link display options” tab, enter the “Title as a link” field, which is a custom description of this menu item. Subsequently, this description will be displayed when you hover over the menu item.
You can also give the menu item your own CSS class if you want a unique look. This item is optional:
Step 13After completing the operations described above, you can configure the page display parameters, namely the title and h1 tags of this page.