How to block your computer from remote access? How to disable remote access to your computer.
Users, wondering how to remove remote access to a computer in order to protect themselves from external attacks, install third-party programs, without even suspecting that the bulk of all hacks occur due to standard Windows settings. By default, the operating system allows remote connections to the computer. Trying to make things easier for users, Windows developers have included in the system the ability to remotely configure and provide assistance. Such help is only suitable for large corporations that have a system administrator who can fix computer problems in seconds while being in another location. For home users, remote access can only make the job easier for attackers eager to hack someone else's system.
How to get to the remote access setup menu?
In just a few minutes, any user can independently remove remote access to a computer.
- For users working under an administrator account, you must perform the following steps sequentially - “Start”, select “Control Panel”. In the window that appears, select “System”.
- For users working under a different account or who do not have account information, you need to open the System window with administrator rights. Click the “Start” button, “All Programs”, “Accessories”. Having found “Explorer” in the list, run it “with administrator rights”. To do this, hold down the Shift button on the keyboard with one finger and right-click on the “Explorer” icon. If the user operates the mouse with his left hand, then he needs to press the left mouse button. In the list that appears, select the “Run as administrator” field. In the window that opens, in the panel on the left, find and click on “+” to expand “Control Panel”, then “All controls” and select “System”.
Disabling remote access in the system menu
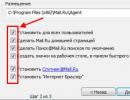
Once in system management, before removing remote access to the computer, you need to find the corresponding section. On the left side of the panel, click “System Protection”. On the bookmarks bar at the top, select “Remote access”. In the “Remote Assistance” section, uncheck the box next to “Allow connection”. In the “Remote Desktop” menu, check the box next to “Do not allow connections.” Click “OK” and close all system windows. Restart your computer through the Start menu. After rebooting, you need to check whether the changes in the system are saved. To do this, you need to re-enter the system properties and make sure that remote connections are not active. If nothing has changed, you need to carefully study the instructions on how to disable remote access, paying attention to obtaining system administrator rights.

Pitfalls of VPNs
All Windows users should make sure that the computer is not part of a virtual private network, with the exception of situations where the provider provides Internet services only through a virtual network, which is indicated when connecting. You must open the “Control Panel” with administrator rights and select “Network Center”. Select "Change adapter settings." Before you remove remote access and virtual private networks in Windows 7, you need to find out which connection is used to operate the Internet, otherwise you can cut off your access. If there is more than one connection in the list, before deleting it is better to first disconnect it and select the “Disconnect” menu. If the shutdown does not affect the operation of the Internet, you can delete the icon.

Another loophole - remote windows registry
Questions related to how to remove remote access to a computer are answered by simply disabling Remote Assistance, but few people remember about the remote registry. But, if you think about it, by connecting remotely to the registry, you can write any commands in it that, when the system is rebooted, will not only re-enable the assistant, but will also cause additional damage to the computer. With administrator rights in the control panel, you must select the menu “Administration” - “Computer Management”. In the left panel of the snap-in that opens, select “Services and Applications” and launch “Services”. In the list of services, find “Remote Registry” and right-click on the inscription. Select properties. In the “Startup type” field, select “Disabled”. Save and restart the computer through the “Start” button.

Disable remote access using the command line
Users who have become familiar with the powerful Windows Command Line tool will definitely be interested in how to remove remote access to a computer without unnecessary transitions between operating system windows. There are two ways: entering commands yourself or using an executable file with the .bat extension.
In the executable file, it is recommended to write pause after each command, since without completing work with one service, the command is transferred to another service, which can cause an error in the system with a refusal to execute. If, after disabling the necessary services, you do not want to restart the computer, you can immediately stop the services from the command line.
fb.ru
Windows 7 Remote Desktop
Remote Desktop in Windows 7, as its name suggests, is a service that allows you to connect to your computer's desktop remotely over a network. If you think that this function is needed only by administrators, then you are mistaken. For regular users, remote desktop may also be useful:
- If you need to use a program that cannot be installed at work. You can connect to a home computer on which programs are installed
- You forgot a document at home that you need to find on your computer. Of course, you can search for a document directly on a shared folder on your home computer, but there is one difficulty here - searching on a remote folder, with a slow connection, is very ineffective.
- If you have your own servers, you can set them up from anywhere on the planet where there is Internet access.
In order to enable remote desktop in Windows 7, you need to follow these steps:
Go to the Start menu - Right-click My Computer - select Properties from the context menu.
In the system information window that opens, on the right side, click Remote access settings.
The System Properties dialog box has opened, Remote Access tab. Here, in the Remote Desktop section, you need to set the radio switch to the Allow connections to your computer position. There are two options for enabling Remote Desktop:
- Allow remote connection to your computer from any computer on which the Remote Desktop client is installed. This option is less secure, but you can connect from computers that do not have Windows installed, such as Linux or iOS.
- Another option for enabling Remote Desktop is to allow connections only from computers that use RDP with Network Level Authentication support, that is, Windows 7 and later.
I will include a less secure method, since I use Ubuntu Linux on my laptop, and if you plan to only use Windows 7 and newer, use the second option.
If it is not possible to be physically near the computer, a remote desktop connection can be enabled remotely, namely, by connecting to the remote machine using the registry editor and changing the appropriate settings. This procedure is relevant for computers that are members of the domain.
Once you have enabled Remote Desktop, it is very easy to connect to it. Windows Remote Desktop allows you to connect not only to Windows users, but also to other operating systems:
- Windows comes with the Remote Desktop Connection program (mstsc.exe)
- In Linux, an RDP client needs to be installed, for example Remmina, RDesktop and many others.
To connect to a remote desktop from Windows 7, you need to open the Start menu - All Programs - Accessories - Remote Desktop Connection, or type mstsc.exe in the search bar.
In the Remote Desktop Connection dialog box, in the Computer field, enter the Name or IP address of the computer on which you enabled the remote desktop. Click the Connect button.
In the dialog box that appears, enter your username and password.
Please note: You must enter the username and password of the user of the remote machine, not the one from which you are connecting.
That's all. You see the remote desktop and can work on the remote computer as if you were sitting at it.
Another small note - you may notice that the remote desktop does not display all desktop visuals. This is due to the default settings for the remote desktop client. If you work on the same local network and the connection speed is 100 megabits or more, you can change the settings. To do this, before connecting to the remote desktop, click the Show options button.
Then go to the Interaction tab and specify the speed of your network connection, according to which the optimal parameters will be determined.
profhelp.com.ua
How to allow remote connection to a computer in windows 7/8.1/10
Enabling a remote connection to a computer is very simple. Start-Right click on the My Computer icon in Windows 7 or This PC in 8.1, properties. Setting up remote access.

How to allow remote connection to a computer in Windows 7-8.1-10-01
Check the Allow remote connection switch.

How to allow remote connection to a computer in Windows 7-8.1-10-02
If you wish, you can immediately add users or a group to whom this can be done using the Select users button.

How to allow remote connection to a computer in Windows 7-8.1-10-03
In addition to the “classic” way to enable Remote Desktop support on a desktop computer with Windows 7 or a server, you can also do this:
In the registry key HKEY_LOCAL_MACHINE\SYSTEM\CurrentControlSet\Control\Terminal Server you need to add the fDenyTSConnections dword key with the value 0.
"fDenyTSConnections"=dword:00000000
Nov 22, 2014 00:13 Ivan Semin
pyatilistnik.org
Standard Windows tool for remote access via RDP within a local network

The Windows system has been providing the ability to implement remote access via the RDP protocol for a long time. This standard tool appeared in the version of Windows NT 4.0, released in 1996. It was more or less functionally modified in the Windows XP version, and found its completeness already in Windows 7. Versions Windows 8/8.1 and 10 inherited remote access via the RDP protocol from Windows 7 without functional changes.
Below we will take a closer look at the operation of remote access via the RDP protocol in versions of Windows 7, 8.1 and 10.
7. Connection settings
1. Remote access via RDP protocol
Connection using the RDP protocol is carried out between computers located on the same local network. This type of connection is intended primarily for IT specialists who maintain company computers integrated into their production network. Without leaving their workplace, connecting remotely to the computers of enterprise employees, system specialists can solve problems that do not require intervention in the hardware of the machines and carry out preventive measures.
Connecting to a remote computer using the RDP protocol is also possible outside the local network, over the Internet. But this will require additional steps - either forwarding port 3389 on the router, or combining it with a remote computer into a single VPN network. In view of this, connecting to a remote computer over the Internet is much easier using other software tools that do not require unnecessary actions. This is, for example, the standard Windows utility “Remote Assistance” for providing computer assistance over the Internet. It works on the principle of sending an invitation file to the user who will provide computer assistance. Its more functional analogues on the Windows software market are programs like TeamViewer.
RDP is also used to connect to Hyper-V virtual machines. A remote connection via RDP can offer more opportunities than the standard connection window of a standard hypervisor. The Hyper-V connection window does not provide sound playback in the guest OS, does not see connected USB storage media, and cannot offer more connection with a physical computer than pasting text copied into it. Whereas an RDP connection can provide the virtual machine with visibility of various devices connected to the physical computer, a better image of the guest OS desktop, work with sound, etc.
To connect via RDP, the remote computer must meet the following requirements:
- It must have a password-protected account;
- The system must allow remote connections;
- If you do not want to change your access data every time you connect with a constantly changing dynamic IP address, you must assign a static IP address in the network settings.
Remote access is only possible on computers with Windows Pro, Enterprise or Ultimate editions installed. Home versions of Windows (Home) do not provide remote access via RDP.
2. Password on the remote computer
If you are working on a remote computer using a Microsoft account, and using a short PIN code instead of a long password, when connecting via RDP, you must enter that same long password, and not a four-digit PIN code.
If an unpassword-free local account is used on the remote computer, and there is no special need for a password, such as when connecting to Hyper-V virtual machines, you will have to create at least a simple password like “777” or “qwerty”.
3. IP address of the remote computer
When connecting via RDP, you will need to enter the IP address of the remote computer. The internal IP address is visible in the system network settings. But in versions of windows 7, 8.1 and 10 these are three different paths. In Windows 7, this is a section of the Control Panel, and in Windows 8.1 and 10 this is the Settings application, with its own organization inherent in each version. Therefore, we will find out the internal IP address in a universal way suitable for each of these systems - through the command line. The shortcut to launch the command line in Windows 7 is available in the Start menu. In Windows 8.1 and 10, the command line is launched from the context menu on the Start button.

In the command line window, enter:
After pressing Enter, we will get a summary of the data, where the internal IP address will be visible.

4. Allowing remote connections
Permission to connect remotely in Windows systems is usually initially disabled. In any case, this definitely applies to licensed assemblies. The ability to connect via RDP on a remote computer is activated in the system settings. We need the "System" section. In the Windows 7 version, it can be accessed by searching the Start menu. And in Windows 8.1 and 10, you can get to the “System” section from the context menu on the “Start” button.
You may be interested in: Looking for vulnerabilities in Windows 10 - getting money

Click “Remote Access Settings”.

In the system properties window, you must set the option to allow remote connections to active. There is no need to remove the authentication option. To apply the changes, click “Apply” below.

Such settings will open the path to a remote connection, but only for the administrator account. Regular account users are not allowed to provide their own computer for remote control. The administrator can give them this right.
Below the option to allow remote connections there is a “Select users” button. Let's press it.


In the field below, enter the name of the user who is allowed to connect to him via the RDP protocol. For local accounts, this is their name, and for Microsoft accounts, this is the email address used for authorization. Click "Ok".

That’s it – now this user’s account will be accessible from any computer within the local network.
5. Connect to a remote computer
All necessary actions on the remote computer have been completed, let’s move on to the main computer from which connection and control will be carried out. You can launch the standard RDP connection utility by finding its shortcut using a search within the system. In Windows 7, this is a search in the Start menu.

In versions Windows 8.1 and 10, press the Win+Q keys.

A small connection window will appear. In the future, it will be possible to connect to remote computers using exactly this abbreviated form. But for now, click “Show Options”.

In the “Computer” field, enter the IP address of the remote computer. In the field below - “User” - accordingly, enter the user name. If a Microsoft account is connected to the remote computer, enter the email address.

If you work on your computer using a regular local account, the username must be entered in the format:
Computer\User
For example, DESKTOP-R71R8AM\Vasya, where DESKTOP-R71R8AM is the computer name, and Vasya is the user name of the local account.

Below the username there is an option to save authorization data on a remote computer. Connection parameters - IP address, username and password - can be saved as a separate RDP file and used to open it on another computer. Click “Connect”, and then “Connect” again in a new window.

Enter the password for the remote computer account.

Click “Yes” in the certificate error window.


We will get more settings for connecting via the RDP protocol in the utility window initially, before establishing the connection.
6. Connect to another account on a remote computer
Below the column for filling in the user name of the remote computer, if the “Always request credentials” checkbox is not checked, options for deleting and changing access data are displayed. By clicking the “Change” option, in addition to the authorization form in an existing account on a remote computer, we will see the ability to connect to another account that is present on the same computer.

After entering a new username and password, the authorization data for a specific IP address will be overwritten.
7. Connection settings
In the opened window for connecting to a remote computer, we will find tabs with customizable parameters. The first two concern the convenience and functionality of remote access.
“Screen” – in this tab you can set the screen resolution of the remote computer; the utility window will open with this resolution after connection. If accessing from a weak computer, you can set the resolution to low and sacrifice color depth.

“Local resources” – here, in order to save system resources, you can disable sound playback on the remote computer. Or, on the contrary, you can also set up audio recording from a remote computer. In the column of local devices and resources, after clicking the “Details” button, we can, in addition to the active printer, select other devices of the main computer that will work on the remote computer. These are smart cards, separate hard drive partitions, flash drives, memory cards, external hard drives.

An obstacle to using the RDP protocol may be its blocking by antiviruses. In this case, the RDP protocol must be enabled in the settings of antivirus programs.
Windows 7 and previous versions of the operating system have a built-in Remote Assistance program. It allows you to control the computer of a user who needs help from another computer using a local network or an Internet connection.
Activating and deactivating the assistant
The technician can control the computer that needs to be repaired directly from his computer. When connecting via “Remote Assistance,” an image from another user’s computer appears on the wizard’s screen, and all actions performed by the wizard are transferred to this user’s computer and change its settings.
There are three ways to ensure a secure connection:
- for computers connected by a local network, you can send an invitation file, which is received by the user who needs help and passed on to the wizard;
- the same security file can be sent by email if the connection is made via the Internet;
- If the IPv6 protocol is configured, you can use a direct connection via the easy connect button.
When connecting, a mode is first activated that allows the master to observe the actions performed on the other user’s computer, but he cannot influence what is happening. To proceed to control, additional permission will be required.
To start using Remote Assistance, you must complete the following steps:
Also in Windows 7 there is the ability to enable voice connection, which will allow the master and the user to communicate during a session without third-party programs.
Video: setting up remote assistant
Connecting computers
After the computer has been configured, perform the following steps on it:
- Launch Remote Assistance from the Maintenance folder in the Start menu.
 Open “Remote Assistance” through the “Start” menu
 - Indicate that this computer needs help.
 Select the “Invite someone you trust to help” mode
 - Choose one of the ways to invite a master. For example, through a file.
 Choosing how to invite a master
 - Save the provided file.
 Save the file in a folder from which it will be most convenient to retrieve it
 - Send the resulting file in any convenient way to the computer of the master, and on the computer you are setting up a window will appear with the password that will be needed for the connection, remember it.
 It would be best to write down the connection password
 - Now go to the wizard's computer. There should already be an invitation file on it, open it.
 Open the invitation on the master’s computer
 - Enter the password received earlier on the user's computer.
 Enter the previously received password on the master’s computer
 - Return to the user's computer again and confirm that you allow the master to connect.
 We confirm by clicking the “Yes” button that the connection should be established
 - The connection is established, but the master can only observe. To start controlling the user’s computer, he must click on the “Take control” button.
 Click on the “Take control” button to start controlling another user’s computer
 - After this, the user must once again confirm that he trusts the wizard.
 We indicate that the master can control the computer
 - Terminate the connection using the “Stop remote control” button on one of the computers. To establish a voice connection, click on the “Conversation” button.
 Use the “Stop remote control” button to end the session
Video: Connecting to a Windows Remote Desktop
Establishing a connection without an invitation
There are times when sending a request from a user's computer to a master's computer is inconvenient or impossible. Therefore, there is a method that changes the parameters so that the master himself can send the request, that is, he does not need an invitation file for this.
A prerequisite for such a connection is that the master must be authorized in an account with a name and password identical to the account in which the user who needs help is authorized.
- The master's account should be in the administrators group, and the user's account should be in the remote assistants group, which is created automatically by the system after entering the help offer mode.
 On the master's computer, run a command prompt with administrator rights. To do this, go to the Start menu and search for Command Prompt.
 - Open Command Prompt as Administrator from the Start menu
 Use the mmc command in it to open the console.
 - Enter mmc on the command line and press Enter
 Expand the “File” menu and select “Add or remove snap-in”. In the window that opens, click the “Add” button and add a Group Policy Object Editor. Save any changed settings and return to the console.
 - You can add the Group Policy Editor to the management console using the “Add” button
 Open the local computer policy, and in it “System Configuration” - “Administrative Templates” - “System” - “Remote Assistance”. In the destination folder, expand the “Remote Help Request” file.
 - Open the file “Remote Help Request”
 Activate the function by checking “Enable” in the window that opens.
 - We enable the “Request Remote Assistance” function by checking “Enable”
 Return to the folder and open the “Offer remote assistance” function. Also activate it, and in the settings indicate that assistants can control this computer. Click on the “Show” button.
 - We enable the “Offer remote assistance” function and indicate that assistants can control this computer
 Enter the name and password for the master account. Save all changes you have made.
 - We specify the master who will have access to the user’s computer
 Go to the master computer and start connection mode on it using the command C:\Windows\System32\msra.exe /offerra, executed as an administrator.
 - Enter the IP of the computer you want to connect to. You can either find it on the Internet by typing the appropriate request, or through “Start” - “Control Panel” - “Network and Internet” - “Network and Sharing Center” - “View network status and tasks” - under the inscription “network with access type: Internet" click on the link with the connection type - "Details" - in the "IPv4 Address" line and the IP you are looking for will be displayed.
 Specify the IP to which you need to connect
 - All subsequent actions are the same as those described above for a normal connection: the user must grant permission for the connection, and then for control. Disconnection is carried out using the standard method, through the “Stop remote control” button.
 Getting started with “Remote Assistance”
Video: “Remote Assistance” without an invitation outside the domain on Windows 7
Connect without permissions
Sometimes the wizard must connect to the user’s computer while he is away. But by default, you need user permission to start monitoring and controlling another computer. You can bypass these security steps by changing the helper code:

Done, the master can now connect to the user without confirmation from the user. The files that were modified above should end up looking like this:
- function LoadVariables()
{
;
try
{
if(parent.gIsURA)
{
idNormal.className = "sys-font-body sys-color-body DisplayNone";
idUnSolicited.className = "sys-font-body sys-color-body Display";
if (parent.gHelperName)
{
idUnSolicHelper.innerText = parent.gHelperName;
idUnSolicHelper1.innerText = parent.gHelperName;
}
}
else
{
if (parent.gHelperName)
{
idHelperName.innerText = parent.gHelperName;
}
}
}
catch(error)
{
parent.FatalError(parent.L_RCCTL_Text, error);
}
btnAccept.disabled = false;
btnDecline.disabled = false;
btnDecline.focus();
DoAccept();
;
}
function DoAccept() - function InitiateMsg()
{
var vArgs = window.dialogArguments;
try
{
idExpert1.innerText = vArgs;
idExpert2.innerText = vArgs;
idExpert3.innerText = vArgs;
}
catch(error)
{
idBody.style.visibility = "hidden";
alert(L_ERRACCESSDENIED_Text);
return;
}
onClickHandler(0);
return;
}
function onClickHandler(id)
What to do if the assistant does not work
There are instructions in case of connection or connection problems.
Access check
If the assistant is not found in the system or is inactive, this means that it may be blocked. To verify this, follow these steps:

Setting up a firewall
In Windows 7, the built-in firewall is configured automatically, but it can still cause problems. To avoid this, you should, firstly, disable third-party antiviruses, and secondly, follow these steps:
- You must disable the Firewall (or allow access to DCOM in exceptions) on the computer.
- On systems XP SP2 and higher, you need to change the security settings (this can be done using Group Policy). In the Computer Configuration/Windows Settings/Security Settings/Local Policies/Security Options/ node, change the permissions as follows:
- for DCOM: Machine Access Restrictions in Security Descriptor Definition Language (SDDL) syntax we give the Anonymous Logon and Everyone permissions Allow Local and Allow Remote Access;
- for DCOM: Machine Launch Restrictions in SDDL syntax, we give the Administrators group permissions Allow Local Launch, Allow Remote Launch, Allow Local Activation, Allow Remote Activation, and the Everyone group - Allow Local Launch, Allow Local Activation.
You can control another user's computer from your own computer by connecting through the built-in remote assistant. A standard connection will require an invitation file and agreements from the user seeking assistance. But these restrictions can be circumvented by changing the assistant code and Group Policy settings.
Computer security is based on three principles - secure storage of personal data and important documents, discipline when surfing the Internet and the most limited access to a PC from the outside. Some system settings violate the third principle by allowing other network users to control the PC. In this article we will figure out how to prohibit remote access to your computer.
As mentioned above, we will only change system settings that allow third-party users to view the contents of disks, change parameters and perform other actions on our PC. Be aware that if you use remote desktops or the machine is part of a local network that shares devices and software, the following steps may disrupt the entire system. The same applies to situations where you need to connect to remote computers or servers.
Disabling remote access is carried out in several stages or steps.
- General prohibition of remote control.
- Turn off the assistant.
- Disable relevant system services.
Step 1: General ban
With this action, we disable the ability to connect to your desktop using the built-in Windows feature.

Access is disabled, now third-party users will not be able to perform actions on your computer, but they will be able to view events using the assistant.
Step 2: Disable Assistant
Remote Assistance allows you to passively view your desktop, or rather, all the actions you perform - opening files and folders, launching programs and adjusting settings. In the same window where we disabled sharing, uncheck the box next to the item allowing the connection of remote assistant and click "Apply".

Step 3: Disable Services
At the previous stages, we prohibited performing operations and generally viewing our desktop, but do not rush to relax. Attackers, having gained access to a PC, may well change these settings. You can further increase your security level by disabling some system services.

All the steps above can only be performed under an administrator account or by entering the appropriate password. That is why, in order to prevent changes to system parameters from outside, it is necessary to work only under an “account” that has normal rights (not “administrator”).
More details:
Creating a new user on ,
Conclusion
Now you know how to disable remote control of your computer over the network. The steps described in this article will help improve system security and avoid many problems associated with network attacks and intrusions. True, there is no point in resting on your laurels, since no one has canceled virus-infected files that end up on a PC via the Internet. Be vigilant, and troubles will pass you by.
Today we’ll look at how to disable Remote Assistance and remote access to your computer.
First of all, let's go to access settings. Open the "Start" menu, then right-click on "My Computer" and select "Properties" from the drop-down list.
You can also access system properties through the “Computer” window. Just go into it and go to "System Properties" in the top panel.


A window with system properties will open in front of you. In order to disable access to the computer, in the “Remote Desktop” block, select the “Do not allow connections to this computer” option. Remote Desktop is a feature that allows you to access your computer from another computer. By disabling this option we block access.

Now let's look at how to disable the assistant. At the top of the window, click on the "Advanced..." button. In the window that opens, uncheck the “Allow remote control of this computer” setting and click “Ok.”

Now all that remains is to uncheck the “Allow remote assistance connections to this computer” option, click “Apply” and “Ok”.

The Remote Assistance option allows you to invite someone to connect to your computer. By disabling it, we also make it impossible to connect to your computer.
This video tutorial is dedicated to Windows 7 and talks about the features of using windows.
Surely you have already heard something about bit depth and the fact that to install many programs or drivers you need to know it. At the moment there are 2 of its values: 32 bit or x86 and x64 - or 64 bit. Today I’ll tell you how to recognize it.
If you need to add another language to the language bar in Windows, but don’t know how to do it, then you’ve come to the right place.
From time to time, users who try to install Terminal Services or remote desktop connection On Windows 7, Windows Vista, Windows Server 2008 (R2), Windows Server 2003, Windows Server 2000, Windows Home Server, or other RDP servers, you may receive the error message “The terminal server has exceeded the maximum number of connections allowed.”
The error occurs because there is a previous session or existing RDP connection to the server or host that was not disconnected or terminated properly. To prevent things from getting worse, unless the terminal server on the network was fully connected to remote clients and no additional slots were connected, the administrator can shut down the remote server using Terminal Services Manager to kill any RDP connections.
Instead of restarting or rebooting the host or server that the user wants to apply to the remote desktop in the remote control, here are alternative methods to bypass remote shutdown or termination Terminal Services or remote desktop sessions and connections.
Method 1
- Terminal Services Manager or Remote Desktop Services Manager can be used to disable and reset any Terminal Services or remote Desktop connection. Depending on your operating system, there are different ways to get up and running Terminal Services Manager.
Windows XP and Windows Server 2003:
Press Start - Execute and enter %SystemRoot%\System32\tsadmin.exe
Windows Vista and Windows Server 2008:
Press Start and enter the type tsadmin.msc in the Start Search field.
Windows 7 and Windows Server 2008 R2 or higher:
Press Start and enter the type Remote Desktop Services Manager in the Start Search field.
Tip: On the client operating system or workstation, Remote Server Admin Tools (RSAT) must be set for the manager to define.
- After launching Remote Desktop Services Manager or Terminal Services Manager, right-click on "Remote Desktop Services Manager" or "All to Server List" and select Connecting to a computer .
- Then enter the name or IP address of the Remote Desktop Services server you want to manage.
Log in to the remote server if prompted.
- Verified servers will be listed in the left panel. Select the desired server that is not responding to the remote desktop session.
- On the right panel, go to panel sessions.
- Right-click on the session you want to disconnect and select Disable .
Method 2
- Launch window command line.
- Authenticate to the remote computer using the following command:
Replace the server name or IP address of the computer with the actual NetBIOS name or IP address of the remote host. For example, net use /user:Administrator \\188.8.8.8\C$.
Enter password.
- Terminate any existing Remote Desktop connection or Terminal Services connections using the following command:
reset session Replace the server name or IP address of the computer with the actual NetBIOS name or IP address of the remote host. For Tip: A notification will not be displayed when the session ends successfully. Method 3 net use /user:Administrator \\ Replace the server name or IP address of the computer with the actual NetBIOS name or IP address of the remote host. For example, net use /user:Administrator \\188.8.8.8\C$. Enter password. Also, from Windows Explorer, map to the network drive to share folders on the target server, and log in accordingly. qwinsta/server: Where the server name or IP address is the actual computer name or IP address of the remote host. For example, qwinsta /server:188.8.8.8. rwinsta Replace Note: qwinsta is a window station request and rwinsta resets Window stations. After the Remote Desktop or Terminal Services connection ends the session and disconnects, the slot is released and the Remote user can remotely log in again.