Formatting a hard drive via BIOS. How to format a disk via BIOS - awesome ways to destroy the system! Formatting a disk via BIOS
Standard tools do not provide a direct option to format a hard drive through the BIOS. Once upon a time, when using DOS, which itself was already an operating system but booted just like the BIOS, you could type in Command line DEL plus the drive name and perform this action. Today's PCs do not provide this option. Therefore, to perform this operation you must use either the operating system or special programs. The first option is not suitable if the OS does not start. Additionally, Windows protects itself. If you try to format a volume, usually drive “C” on which the OS is recorded, this action will be prohibited. Therefore, a different approach is needed. But exiting to the BIOS is mainly necessary as an intermediate stage of performing an action. Therefore, we will figure out how to format a hard drive through BIOS, taking these features into account.
What is formatting
The hard drive is structurally a plate on which a coating with special magnetic properties is applied. Initially there are no reference points for the hard drive heads on it. In order for each bit of information to be stored in a specific place and to provide quick access to it, the disk needs to be partitioned. This process is called formatting. Tracks, sectors are applied to it, and information is also recorded to identify the hard drive and control it. During this operation, the physical condition of the surface is also checked; those areas that have defects that preclude reliable recording and storage are marked as inaccessible.

Formatting is carried out not only on new hard drives, for which this is almost always done at the manufacturer, but also when reinstalling the system. Disk sectors on which Windows or another OS was recorded are marked in a new way in order to eliminate conflicts between programs. In addition, deleting files from storage does not mean that they are completely erased. Quick formatting deletes only information about the location where they were located. Therefore, over time, the disk becomes filled with their fragments, which does not improve the stability of the machine. Approximately the same applies to solid-state hard drives (on chips) that are gaining popularity; the OS works with them according to the same principle.
Formatting Types
When reading files, the machine does not search for them across the entire surface of the disk. The disk has a service area in which a list of files and exact addresses, that is, track and sector numbers, are stored. The reader immediately goes there, and then precisely positions the heads in the right place. This feature is associated with the existence of two types of formatting. When considering how to format a hard drive, you need to take this feature into account.
Quick formatting takes minimal time. When executed, the list of saved files is simply erased.
Standard normal formatting- a longer operation, during which all information is erased and the disk is checked. In this case, all service information is completely rewritten, taking into account detected inoperative tracks and sectors.

When performing quick formatting, it is necessary to take into account that information previously recorded on the disk becomes inaccessible using standard methods. True, most of it can be restored using special utilities. With full formatting, everything is lost forever.
FAT32 or NTFS
If you need to format the disk, you can select one of the file systems. By the way, the need to change it is also the reason for formatting the disk. It doesn't matter which system was installed before, all programs and versions of Windows work with both options. Let's figure out what to choose.

NTFS supports working with large amounts of data, but, as experience shows, it works slower on older machines with low performance. This is her only drawback. If you choose FAT32, then you need to take into account that you will not be able to copy or move a file larger than 4 GB, because when the system was developed, all computer memory was smaller. Also, this system does not support data encryption and restriction of access to it. Therefore, if speed is important with limited hardware capabilities, then for formatting you should choose FAT32, otherwise NTFS, which is more suitable for hard drives of modern machines.
Using an operating system boot disk
This solution is actually formatting a disk in Windows; we simply use the system that is not installed in the machine, but load it from removable media. Let's consider the sequence of actions:

Using the Command Line
Another way is possible, through the Command Line. Then you should do the following:

Another method using a boot disk, but without booting
In this case, you do not need a boot disk, but a Windows recovery disk version 7, 8 or even XP. It's just as easy to do:

The process takes several minutes. Now you can use this disk to format your hard drive, even if the OS does not start. To do this you need to follow these steps:
- Insert the recovery disc into the drive and reboot the machine. The system will start booting not from the hard drive, but from the optical drive.
- After selecting the language, press Shift + F10. This will open Command line.
- To determine the usual volume name, enter the command wmic logicaldisk get deviceid, volumename, size, description
- Then format the disk using the already known command format /FS:NTFS X: /q
Formatting using special programs
There are many formatting programs, but the vast majority of them are installed and run from Windows. We are interested in those that do not require a working OS; relatively speaking, they allow formatting the hard drive via BIOS. True, this is a double job, since after performing an operation on the disk on which the OS was, you will still need to reinstall it, and for this you need a boot disk with Windows.
One of the utilities that works without an OS is ERD Commander, intended for emergency system recovery and is actually a trimmed version of Windows.

The program has many useful functions, but let's look at disk formatting. The sequence of actions, which is very similar to formatting work using the OS, will be as follows:

Conclusion
We will be glad if this short article helps you solve the problem of formatting disks using BIOS if other options are not possible. The solution to this problem is presented using the capabilities of the operating system and the use of special programs.
Video on the topic
Often, before installing an operating system, users wonder how to format a hard drive via BIOS. This procedure must be resorted to in order to clear partitions that are inaccessible after Windows starts. However, it is worth remembering that it will not be possible to completely delete information from the hard drive itself in this way.
Description of the procedure
To perform this, you will need a boot device with a recorded OS (it is advisable to create it in advance). The sequence of steps to format a disk via BIOS is as follows:
- Restart the computer with the connected media and immediately after startup enter the I/O system using the appropriate key. Usually this is F12, F8 or Escape, but if the version is very outdated, other combinations may be used.
- In the window that appears, you need to open the Boot tab, then Boot Option Priorities. This section allows you to select where the OS will be loaded from (from a flash drive or other device), which is what you need to do. Depending on the removable media, mark the USB port or CD-ROM.
- Exit, saving your changes, after which the computer will restart. Before you start formatting the disk, you will need to launch the OS from the selected device by pressing any key on the laptop.
- Call the command line. If the procedure is carried out using Windows 7 media, press the combination Shift+F10. For version 8, this method does not work; it is replaced by the user interface.
- Make sure the drive letter is correct before formatting the drive. After starting from the boot device, it may change, so in order not to delete important files, you need to enter “wmic logicaldisk get deviceid, volumename, size, description”.
- Go directly to the cleaning procedure. To do this, you need to enter “format /FS:NTFS X: /q” in the window, instead of X entering the desired designation, for example, C (the drive that most often needs to delete data from the system partition).
Then all that remains is to wait for the end of the process, confirming the command by pressing Enter.
Other methods
The Windows installer allows you to do without CMD, which some people are afraid to use for some reason. Only the familiar interface will be used here, but before you start formatting the hard drive via BIOS, you will have to carry out the first 3 points of the previous section.
After selecting a language, click on “Full installation”, call up a list of available disks and configure the installation. In the parameters that open, you need to mark the “Format” item with the cursor and follow further instructions. However, this method will not work if installing the Windows operating system is not required.
In addition, you can use the ERD Commander program by creating a boot CD based on it. In the BIOS you will also need to select a priority device to start (in this case, the drive). When the program opens, go to the MicroSoft Diagnostic and Recovery Toolset section and click “Next” until the working window opens. In it you need to click on the “Cleaning” item, after which the hard drive will begin formatting (this is impossible through the BIOS without external means).
There is another program that allows you to do the same and burn an emergency flash drive - AOMEI Partition Assistant Standard Edition. It is a free analogue of utilities for working with various drives and has a friendly interface, so the user can understand how to format a hard drive without outside help.
In general, the algorithm of actions is almost the same for most operating systems, but the names of the items may differ significantly from each other. The same applies to the input/output system: the names of the sections may not be the same as those given above due to differences in versions. However, although it is easier to clean a Windows hard drive, it is important to remember that using third-party tools is mandatory. It is not possible to format via BIOS due to the lack of proper functionality, so you will have to stock up on a boot device.
The BIOS itself is not equipped with a function called “formatting” as such. It acts more like a tool in the disk cleanup procedure, bypassing system startup. The hard drive contains the operating system that is currently in use, so the media can be formatted “from the inside.” In this article you will learn how to format a hard drive through Bios in various ways.
To completely format a hard drive means to destroy all data stored in the internal memory. After completing the formatting procedure, you can safely install a new system. You don’t even have to worry about all sorts of errors or other problems. Remember that before starting the procedure, you should definitely check whether copies of your important files are saved somewhere. Once the drive is formatted, you will not be able to recover the files you need unless you have copied them prematurely to some other media.
So, using “BIOS” you can format your hard drive in the following ways:
- Using an external storage device.
- Using a special program.
- During the system installation procedure.
- Formatting from external media
So, how can you format your hard drive? Let's start by using a third-party boot device. The essence of this method is that for formatting you need to load some kind of external drive. Among the most common types of storage devices, it is worth noting a flash drive and a CD/DVD drive. Using their example, everything will be described step by step below. Such drives must have a special cleaning program written on them. For example, the “Live CD” program is widespread. It is intended specifically for formatting procedures.
So, prepare your boot device and follow these steps:
- Connect the device to the appropriate connector: if it is a flash drive, you should connect it to the USB connector; if it’s a disk, then into the drive. In this case, the computer must be turned off.
- Turn on your computer. Be careful here: you should have time to see which key should be pressed when selecting “Enter Setup”. Different systems have different keys: “F8”, “F2”, “F12” or “Del”. The last key is usually used on laptops. Press the corresponding key several times to have time to enter the settings before the system boots.
- Were you able to enter the BIOS? Now you need to select the “BOOT” menu. There you should change the device priority settings. Set the priority from “Flooppy” to a value depending on the device you connected: “USB-FDD” or “CD-ROM”.
- Save the changed settings. To do this, press “F10”, and then confirm saving by pressing “Y” and “Enter”.
- Now restart your PC. If all actions were performed correctly, you will see the program image after downloading. There, clear the required partition on your hard drive.
"ERD Commander"
The next way to format a hard drive through BIOS is based on the use of a special program called ERD Commander. This software allows you to boot even if the system startup fails. Download the ISO image of the program, burn it to external media and complete the following steps:
- We learned how to enter the BIOS above. Perform the same actions and set the device priority in the same way. Here the download will already be carried out thanks to the program.
- Now restart your PC. A special menu should open. There, select “MicroSoft Diagnostic and Recovery Toolset”, and then click “Next” until a window with the “Cleaning” item appears.
- Here you should select the disk partition you need to clean.
How to format a hard drive via “BIOS” when installing/reinstalling the system
Now let's look at another way to format a hard drive. Carry out the cleaning procedure directly during the system reinstallation process. Here we use the Windows distribution package, which was previously recorded on the media. This method allows you to clean any partition of your hard drive. All programs previously installed on the partition selected for formatting will be deleted, and a new operating system will be installed there. Therefore, the method is quite convenient, especially for those who just want to install the system on a clean hard drive partition, that is, to completely reinstall the system.
You can find the system distribution kit on disk or download it from the Internet. Well, maybe one of your friends has it lying around on some storage device. If you download the distribution, install it on external media as an ISO image.
So, for formatting you need to follow these steps:
- As we described above, you should choose an external drive as a priority.
- Now restart your PC and the Recovery Console should appear on the screen. You must select the system you want to log into.
- To log in, you must enter the administrator password. Just press "Enter" if you haven't installed it.
- A command line will appear in front of you. There you should type “format c:”. Now confirm by pressing “Enter”.
- Specify the file system: “FAT” and “NTFS” are available. Select a cleaning method: fast and complete are presented there. As an example, let's show what it looks like in the end: format with: /Q /FS:NTFS. In this case, we selected "NTFS" and "Q" stands for quick wipe.
- Now just wait for the cleaning to complete. Then everything will be clear: the system will tell you.
Conclusion
So, this article discussed the question “How to format a hard drive through Bios.” We have discussed three accessible and understandable ways to format a hard drive. Choose the one that suits you best. They are all effective, efficient and quite convenient. We hope that the data parsing method is clear to everyone, and the article will be useful for all PC users who need help regarding the topic of formatting.
Formatting a hard drive via BIOS is one of the most popular questions on the Internet. This article will focus on this issue, talking about two ways to format an HDD.
It should be immediately clarified that it will not be possible to format a hard drive using the BIOS alone, since you will additionally need a Windows distribution package recorded on a disk or flash drive.
Method 1: Through the command line
The bottom line is this: you will need to enter the BIOS, set your bootable USB flash drive or Windows disk as the main boot device in the settings, and then, after loading the distribution, launch a terminal window, through which the HDD will be formatted.
1. Connect a bootable USB flash drive or insert a disk, and then send the computer to reboot, at the earliest stage of turning on the computer, starting to press the key responsible for entering the BIOS (In most cases, this is either the F2, or Del).
2. Once in the BIOS, you will need to set the flash drive or disk as the main boot device. For example, in the Phoenix Award BIOS you will need to go to the section "Advanced BIOS Features" , select an option "First Boot Device" and set the flash drive or disk as the main boot device (in your case, the menu items may vary depending on the BIOS version).
3. After loading the distribution kit from Windows, the language installation window should appear on the screen. To launch the terminal, press the keyboard shortcut Shift+F10. If you are using a distribution with Windows 8 or older, set the menu language, and then go to “Diagnostics” – “Additional features” – “Command line” .
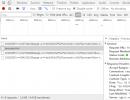
4. A terminal window will be displayed on the screen, with the help of which the HDD formatting procedure will be performed. Run the following command in a terminal window:
wmic logicaldisk get deviceid, volumename, size, description
The final command will depend on which file system you want to clean the hard drive on.
Formatting in FAT32:
format /FS:FAT32 M: /q
Formatting to NTFS:
format /FS:NTFS M: /q
Where “M” is the letter of your HDD.
Method 2: Through Windows Installer
In this method, formatting the hard drive will not be launched through a terminal window, but directly through the Windows Installer interface.
1. Follow the first and second steps described in the first method.
2. When the language installation menu appears on the screen, install Russian and proceed further.
3. Select an item "Full installation (advanced options)" .
4. Select the drive that will be formatted, and then click the button "Disk Setup" .
5. Select the drive and then click the button "Format" .
Wait for the formatting procedure to complete.
The BIOS itself does not have a format function. This system utility is only a cleaning tool that bypasses the loading of the operating system. This question arises because the media is not formatted from the inside, because the version of the OS being used is recorded on it. Below you will find the main ways to format a hard drive via BIOS and instructions for them.
How to format a hard drive from a boot disk or flash drive
Full formatting of a hard drive is equivalent to an operation to destroy all data on its internal memory. After this procedure, you can reinstall the operating system without fear of errors or other unpleasant moments. Just before you completely clean your hard drive, you should check whether you have copied all the necessary files. It will be difficult to recover information, and in some cases it will not be possible to do so at all. Formatting a hard drive via BIOS is carried out in several ways:
- using external media;
- using a special utility;
- during Windows installation.
The first method of formatting a hard drive via BIOS involves booting from some drive. It uses a flash drive, CD or DVD. One of them must contain a special wrapper program for cleaning. The most commonly used is a Live CD, designed specifically for this purpose. You can copy it using the popular UltraISO utility. After preparing such a boot device, follow the instructions on how to completely format your hard drive:
- With the computer turned off, insert the prepared media into the drive or USB connector.
- When starting, pay attention to which key will be indicated next to the phrase “Enter Setup”. This could be F8, F12, F2 or Del. The latter is more often used on laptops. Press this button several times.
- When going into the BIOS, go to the BOOT menu and change the priority from Flooppy to CD-ROM or USB-FDD, taking into account the type of boot media you have.
- To save the settings, click F10, then Y and Enter.
- Restart your computer. If the steps were performed correctly, the program image will load, where you can clean up the desired partition.
Formatting a disk using the ERD Commander program
The second option, how to format drive C via BIOS, is based on the use of a special program called ERD Commander. It helps even if the system fails to boot. You need to download its ISO image, which you then burn to a DVD or flash drive. If you were able to complete these steps, follow these instructions:
- Using the method described above, enter the BIOS menu and change the boot order, which depends on the external media with the recorded program.
- Restart your computer. In the menu that opens, go to the MicroSoft Diagnostic and Recovery Toolset item, and then click “Next” 2-3 times and in the “Cleaning” window that opens.
- Select the desired section.
Formatting your hard drive when installing Windows

The next method is how to format a hard drive via BIOS. It is carried out during the process of reinstalling the operating system using the Windows distribution. During this procedure, it is possible to clear any of the partitions. The peculiarity of this method is that all programs that were used previously will be deleted, and the operating system itself will be updated.
The concept of distribution is a form of software distribution. It contains a set of utilities necessary for the initial initialization of the OS. You can download the distribution yourself or use the disk drive included with your computer for recovery. In the first option, you will have to burn the ISO image to a CD or flash drive again. Further actions are as follows:
- Similar to the instructions described above, set the CD-ROM or USB-FDD to boot first.
- After the reboot, the recovery console will launch - as a user, select the OS there to log in to.
- Enter the administrator account password. If it's not there, press Enter.
- In the command line that appears, type format c:, then confirm by pressing Enter.
- If desired, set the file system - NTFS or FAT. Choose between quick and complete cleaning methods. As a result, the command could be format c: /Q /FS:NTFS. Here Q refers to quick cleaning.
- Wait for the cleaning operation to complete, and then follow the system prompts.
Video: how to format a hard drive in Windows 7